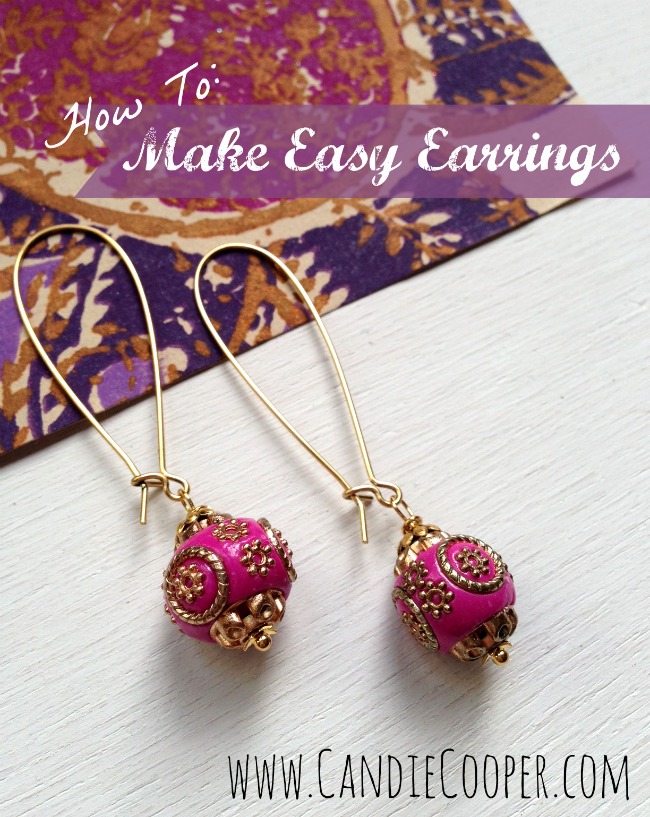
How to Make Easy Earrings with Wrapped Loops

How To Make Easy EarringsWant to instantly make yourself feel better?  Whip up a sassy pair of earrings just for you.  You deserve it.  I promise.  I don’t know about you, but sometimes when I make myself something, I feel guilty—I should give these as a gift, I should be adding these to my stash of things to sell, and so on.  This is also not a new song on this blog.  So….  I’m telling that little voice in my head I’ll do it next time.  You can too!  For now, it’s our turn!  Let’s do this!
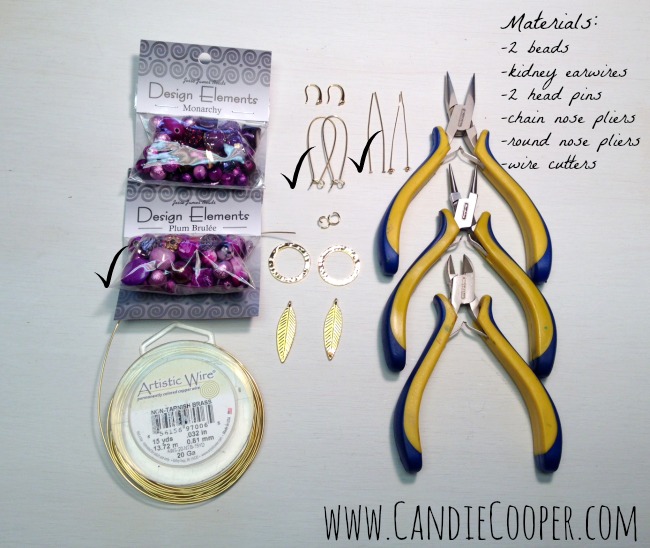
Earring Making MaterialsI actually made a trio of earrings with these supplies of which tutorials on will trickle out.  For now, you only need what’s checked and listed.  You might also want a couple bead caps (half domed beads that sit next to a focal bead).

P.S. Ergo plier sets are my fave.
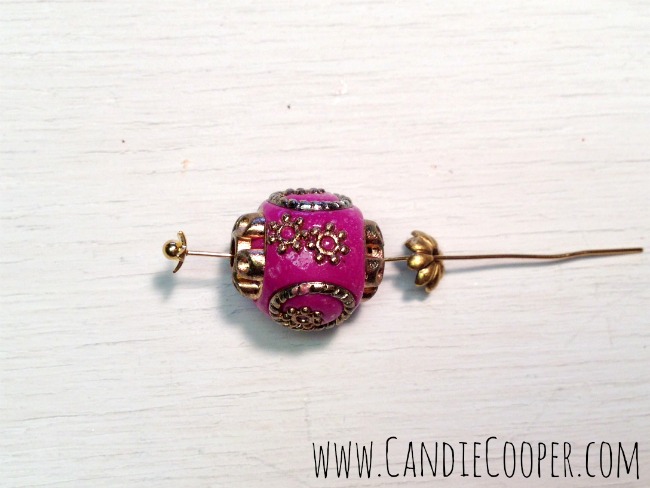
How to Make Easy Earrings 7String all the pieces onto a head pin.  I’m using Beadalon decorative balled/star head pins, Jesse James Boho style beads (see JoAnn Fabrics) and brass bead caps.  The bead is so decorative, I didn’t think I needed much else (note that for once in my life, I’m keeping it simple).
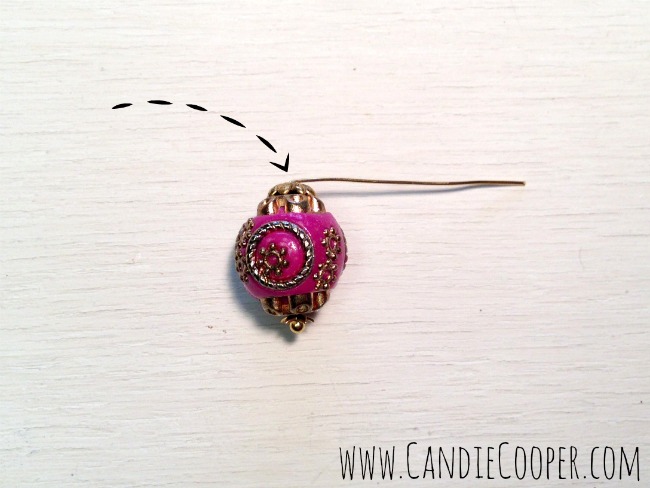
How to Make Easy Earrings 9.jpgMake a 90 degree bend in the head pin just above the last bead cap.
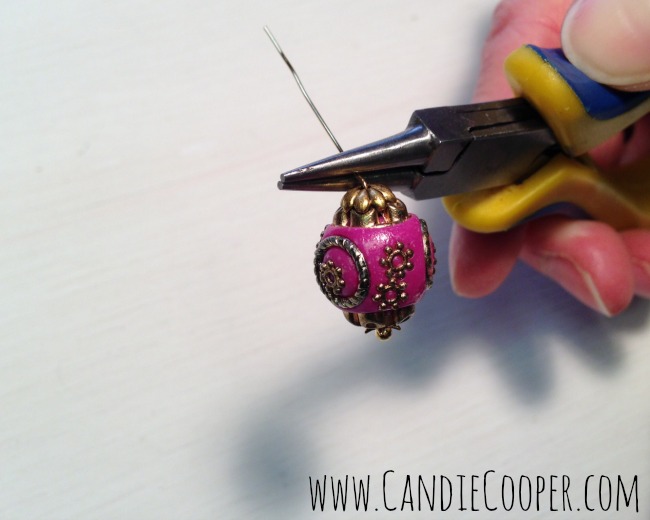
How to Make Easy Earrings 1Put the round nose pliers into the bend of the head pin and bring the end of the wire up and around the pliers and back under.
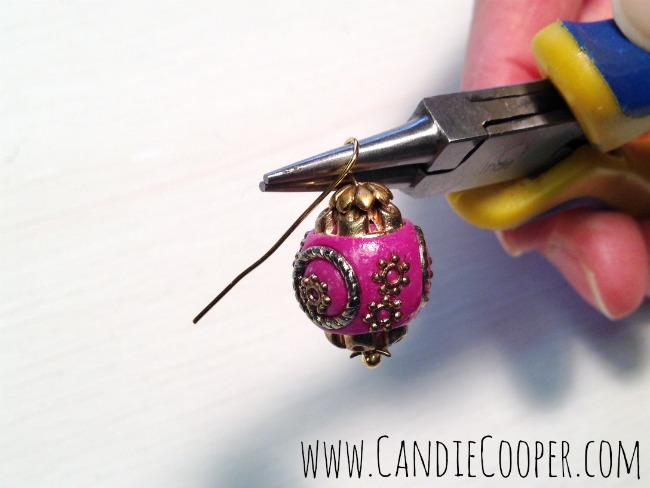
How to Make Easy Earrings 2If you’re new to making jewelry, pliers are simply for forming wire or small amounts of sheet metal.  We need a solid round loop at the top of the bead dangle so we have to use round tipped pliers to achieve that.
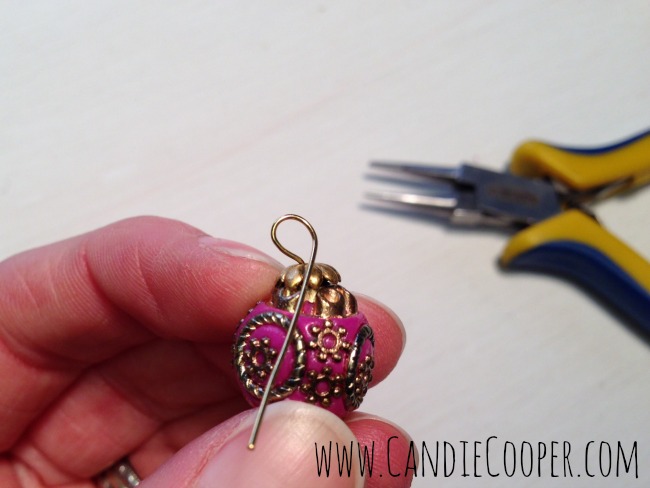
How to Make Easy Earrings 3At this point, your loop can look like this or close to it.  If this is your first time making jewelry, know that this wrapped loop technique is one of the hardest tricks in the book.  Making the loop consistently sized takes a bit of practice.

Now, we’re going to grab the chain nose pliers (angled tips).
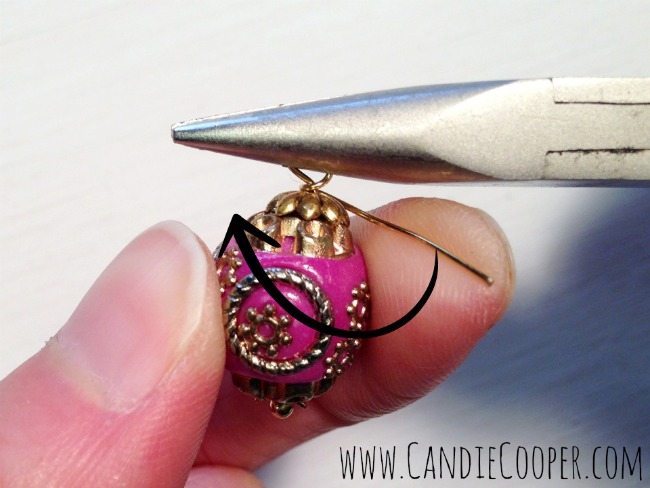
How to Make Easy Earrings 8.jpgPut the loop in the jaws of the pliers and now twist the end of the wire round and round just above the bead.  My wraps are always messy.  If you want perfect, you came to the wrong blog.  Trim any excess wire with wire cutters.
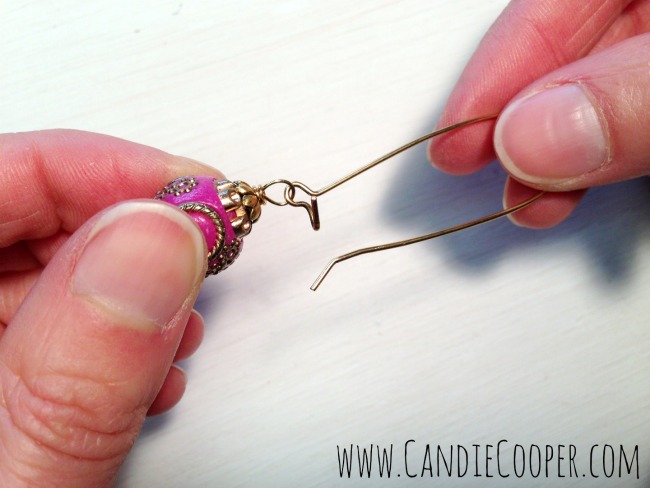
How to Make Easy Earrings 4.jpgOpen up the kidney ear wire and hang the beaded dangle in the front opening.
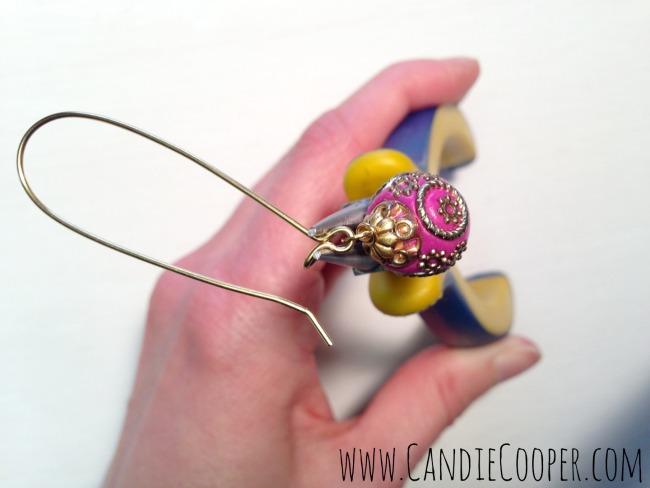
How to Make Easy Earrings 6Use the round nose pliers to pinch the opening shut.  You don’t have to do this if you want to make lots of beaded dangles and change them out.  If I’m selling earrings, I close the loop because inevitably those bead balls will make a run for it.  Probably start a new bead colony or something.  Plus your customers will be really happy if they aren’t messing with runaway bead dangles.  But, why am I talking about customers?  We’re keeping these for ourselves, right?  With that….
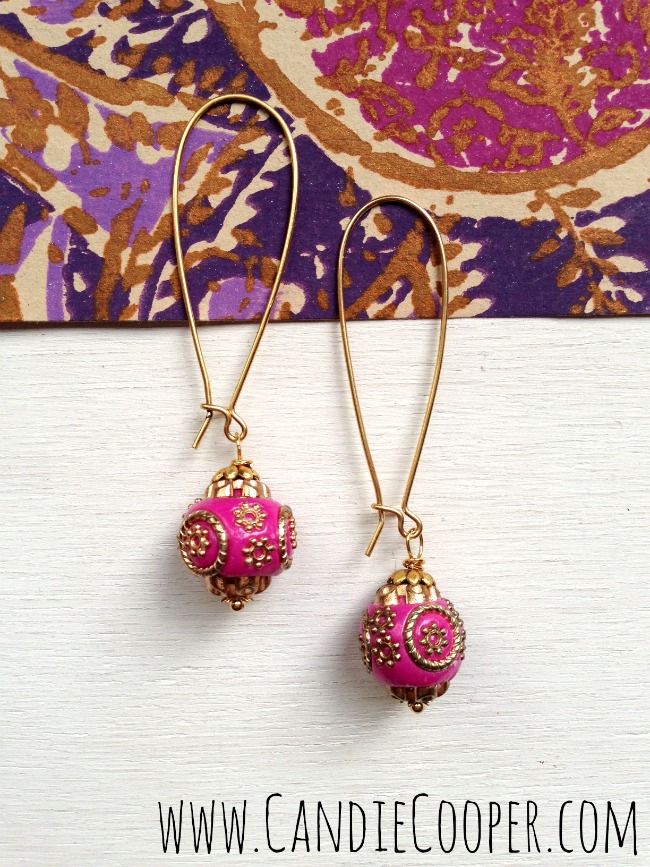
Boho Chic EarringsThey lived happily ever after….(“they” being us and the sassy new earrings).

THE.  END.
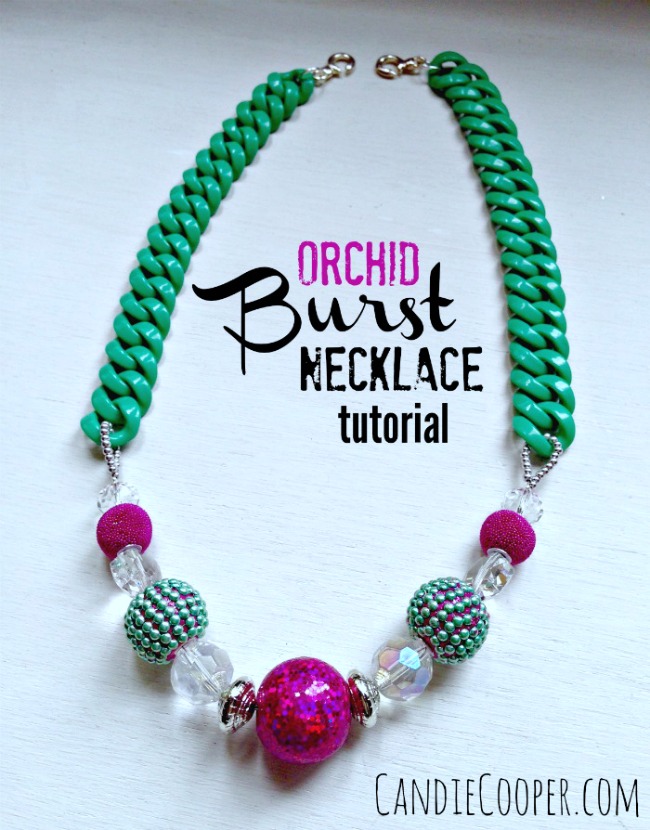
How to Make A Statement Necklace with Resin Chain and Beads

Jewelry Making Orchid Burst Necklace Tutorial2Have you seen the resin chains at Hobby Lobby?  I like them so much because they are reminiscent of Bakelite.  They are bold and bright, fun for spring fashion, but how do you transform them into jewelry pieces?  Here is one easy idea from me to you with love.
P.S.  Sorry in advance for my color tint issues.  I’m just not that savvy with my photo edits (YET!), but I’ll get there.  Thanks for hanging in with me.

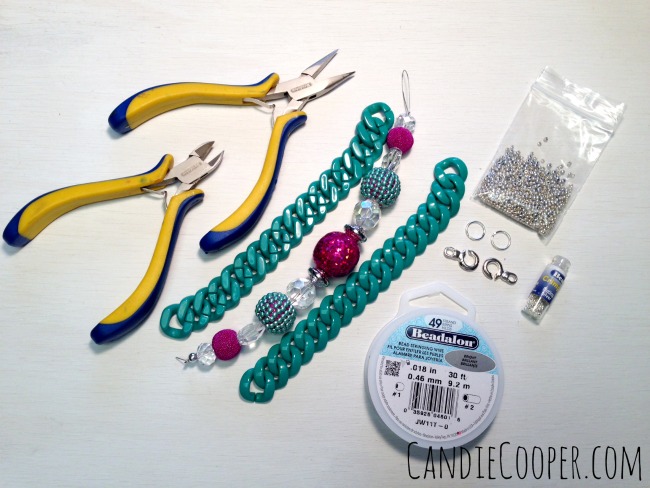
Jewelry Making Materials 1Basic supplies for this necklace are:  chain nose pliers, wire cutters, 2, 7″ chain pieces, 7″ strand of Jesse James Beads,  silver seed beads, 2 12mm jump rings, Beadalon duet clasp, 49 strand .018 nylon coated beading wire and #2 crimp tubes.

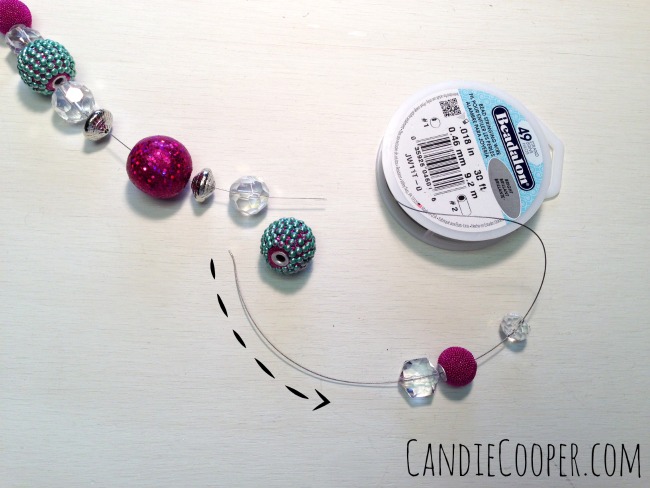
String the Jesse James Beads onto wireString the beads onto the beading wire.

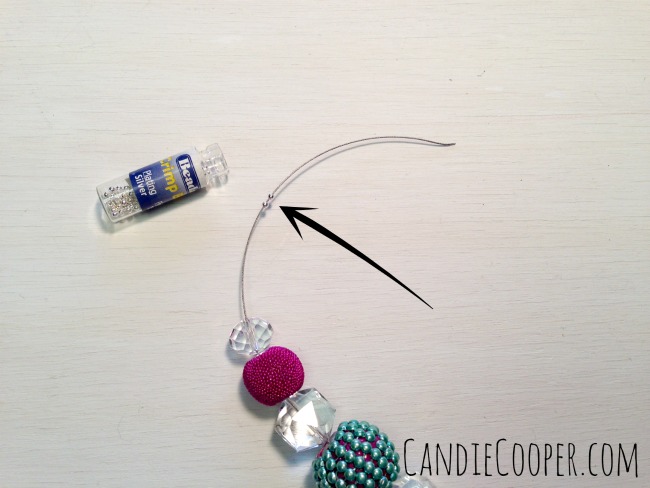
String the crimp beadsFollowed by 2, #2 crimp beads.

It’s so important that the crimp beads match the beading wire.  Too big of crimp beads equals potentially-embarrassing-beads-crashing-to-the-floor scene.  Never good.

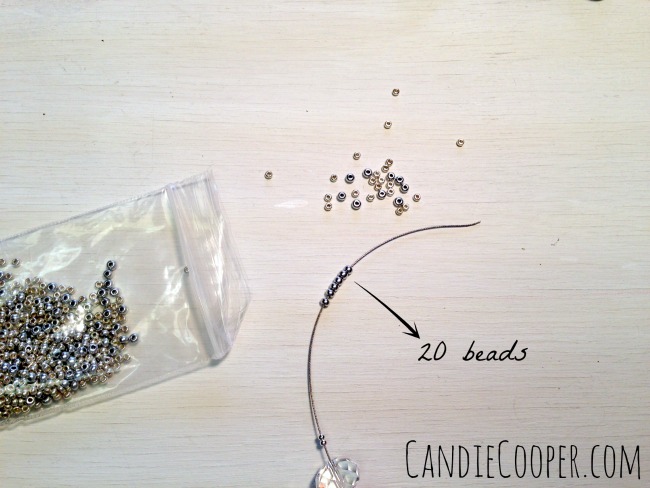
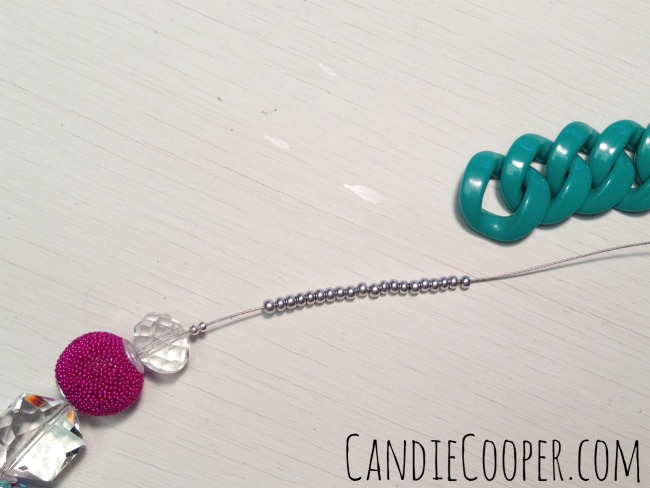
String a row of seed beadsNow string 20 silver seed beads onto the wire.  Don’t be like me and mix and match your silver seed beads (see in the bag), thinking, I won’t care if I have to pick out the same colored ones.  I do care, past self.  That was a bad idea.

Row of seed beadsOk, so now we have 2 crimps and 20 seed beads.

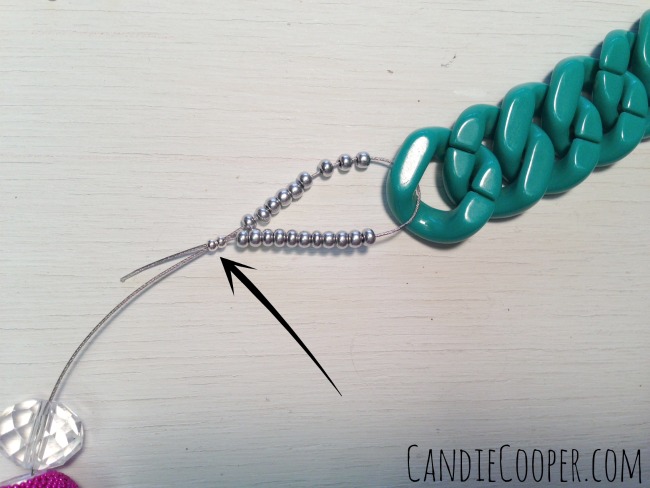
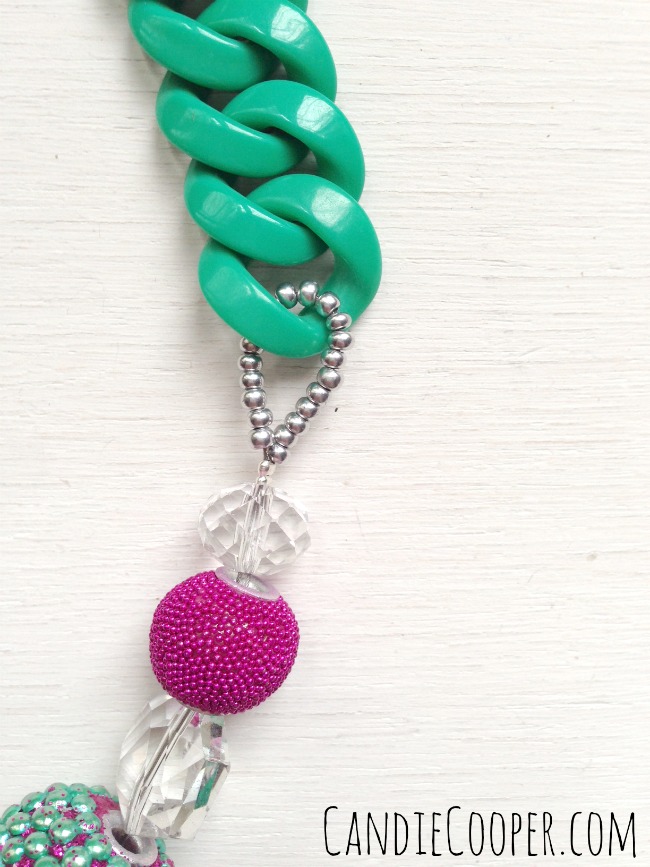
Thread the tail of wire through 2 crimp beadsLoop the tail of wire through the end of the chain and back through the crimp beads, creating a seed bead loop.  Now, you might have a couple questions….

1)  Why are you using 2 crimp beads?

A)  Because of the flat crimping technique and the large beads, I want to add double the security.

2)  Why the seed bead loop?

A)  See the splits in the chain?  The seed beads add a bit of thickness (and design aesthetic is a bonus) so the wire can’t sneak out of the split.  This gets us out of another potentially embarrassing moment.  I’ve had jewelry break on me in front of people and it’s SO humiliating.  I always say, “who made this anyway!?!?” with a big smile and a wink.

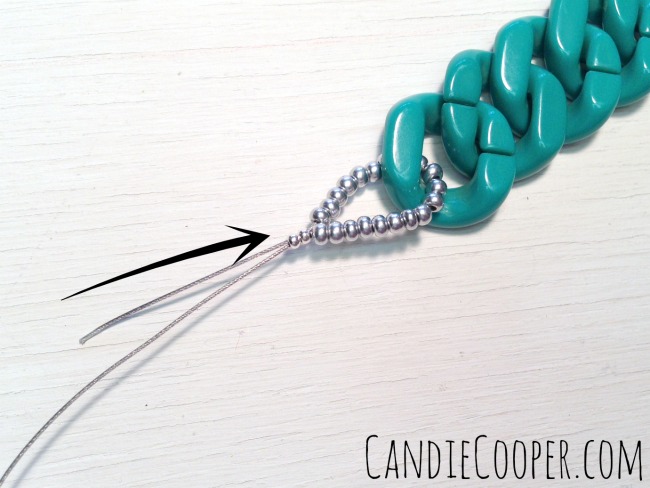
Slide crimps up next to seed beadsSlide the two crimp beads up next to the seed beads to cinch up the loop.

Jewelry Making How to flat crimpUse your chain nose pliers to smash the crimp beads down.  That’s right, I said smash.

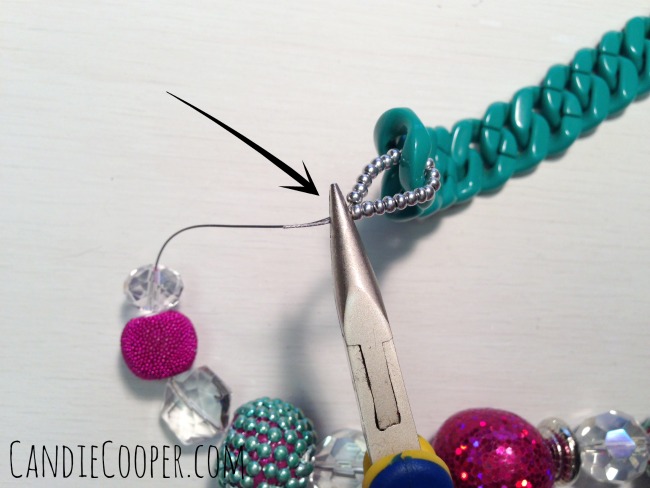
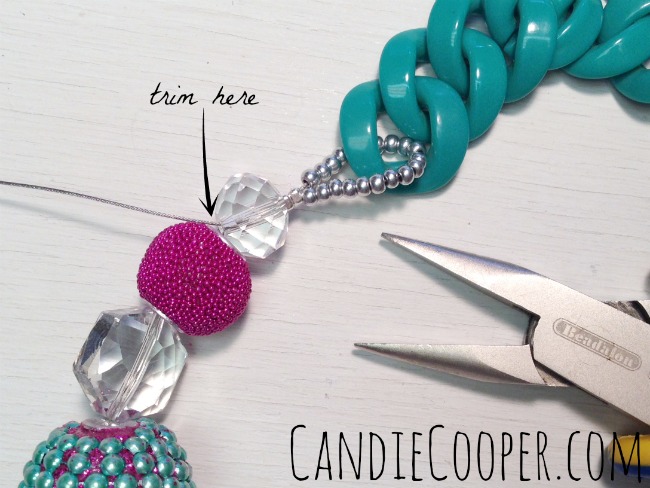
Trim the wireSlide the big colorful beads up, threading the tail through the first bead and trim away the excess.

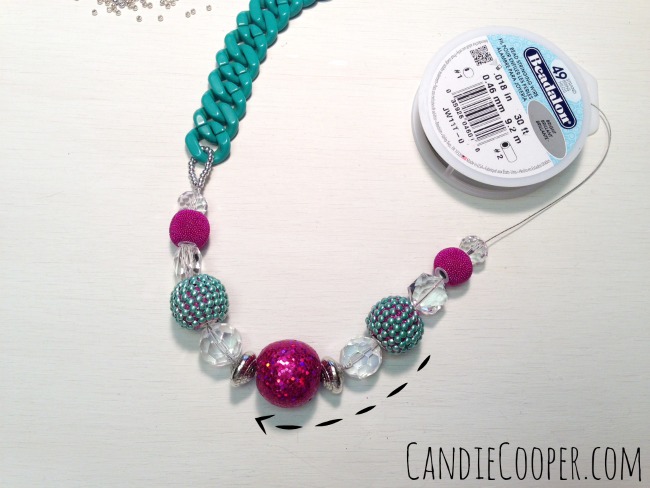
Slide the beads towards the finished endNow, scoot all the beads over towards our crimped end.  Trim the wire so you have 4″ approximately.

Row of seed beadsString 2 crimp beads and 20 seed beads.  Run the tail of wire through the chain, down through the crimps and first bead, pull out all the slack in the beaded section.  This can take some finagling.  Use your chain nose pliers to tug on the end of the wire to help remove the slack.

Finished with crimpingLooks good!  I use the seed bead loop for so many designs.  It is my beady lasso of sorts.

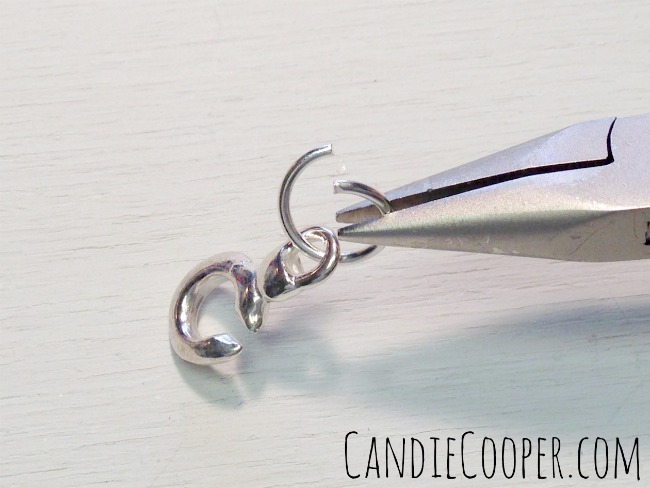
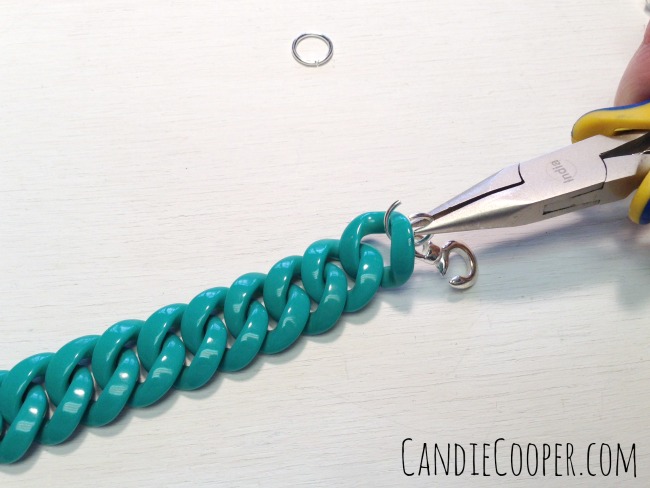
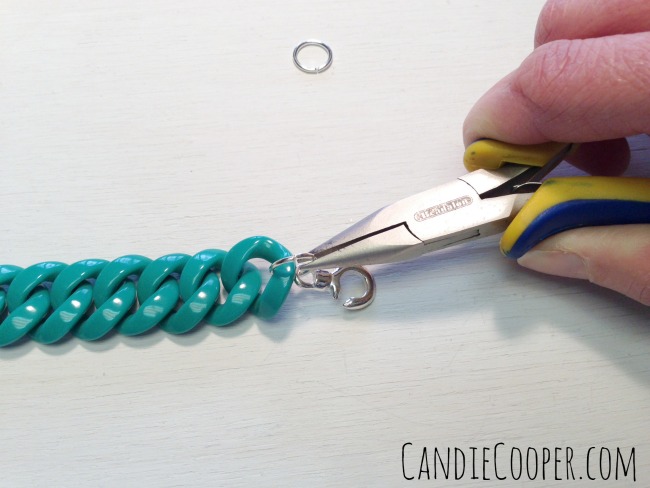
How to open a jump ringLet’s finish’er up!  Open a jump ring with chain nose pliers–from side to side.

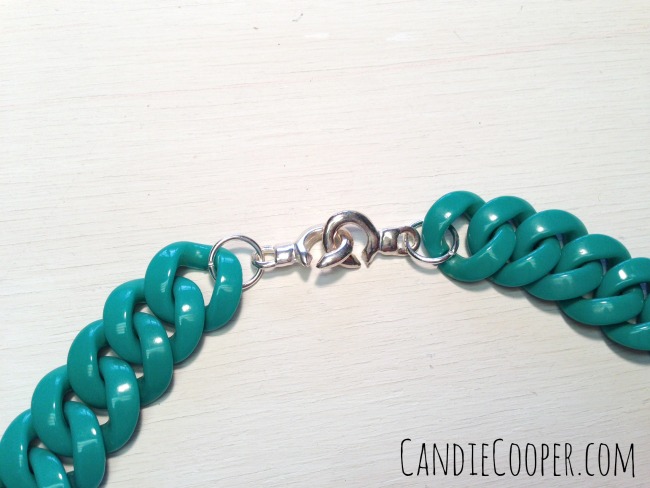
Connect the claspConnect one end of the duet clasp to the end of the chain.

Close the Jump ringClose the ring so it’s nice and snug.

Connected duet claspRepeat for the opposite side.  It’s a cute little clasp pair, don’t you think?

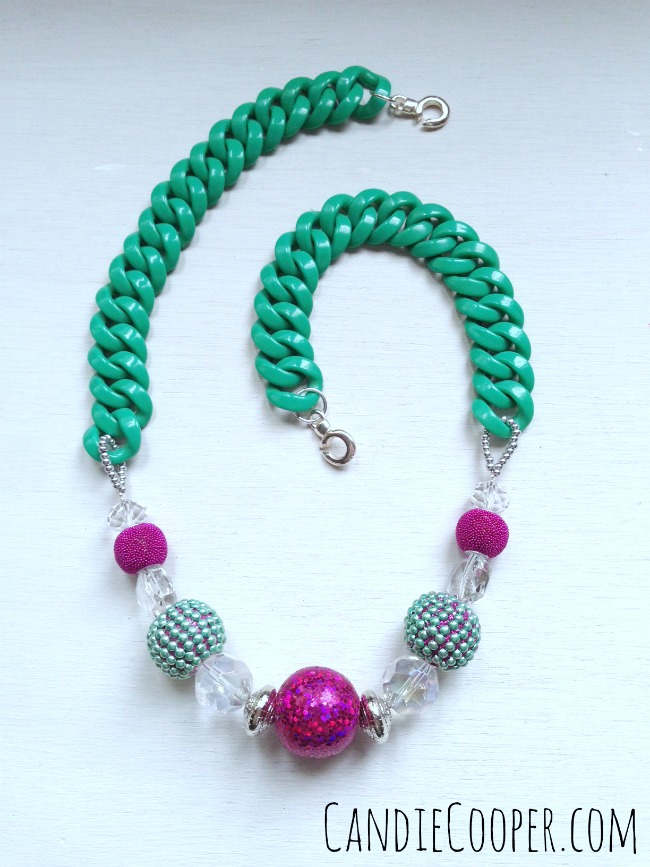
Jewelry Making DIY Necklace 2Praise the Lord, we made it!  A burst of color for you!  I’m so excited!

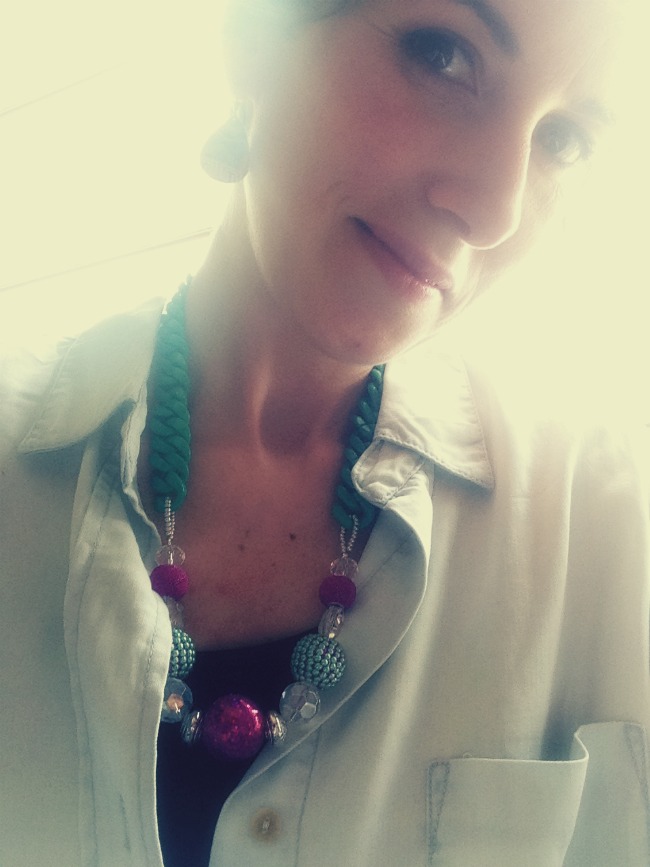
Orchid Burst NecklaceAnd here I am wearing it so you can see the full look and how it hangs.

Expect more resin chain projects here.  I only bought every color they had.  Have you made anything with them?  I wanna see!

Happy day!

XO.

Candie

Make a Statement Necklace Class in Philly

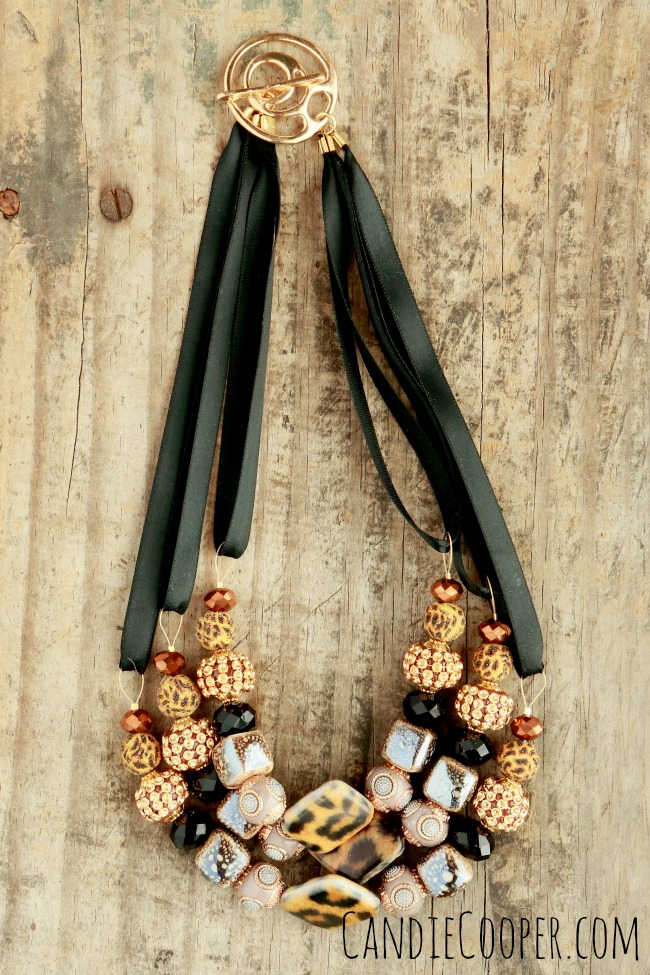
Candie Cooper Leopard Statement Necklace.jpgGood day to you!  I wanted to show you some detail shots of a class I’m teaching in Philly next month at Beadfest Spring.  It’s the statement of all statement necklaces.  Big and bold, sassy and classy!  I’m teaming up with Jesse James Beads—they have such exciting and unique beads like the ones above.  All the supplies are kicked in from the awesome people at Beadalon.

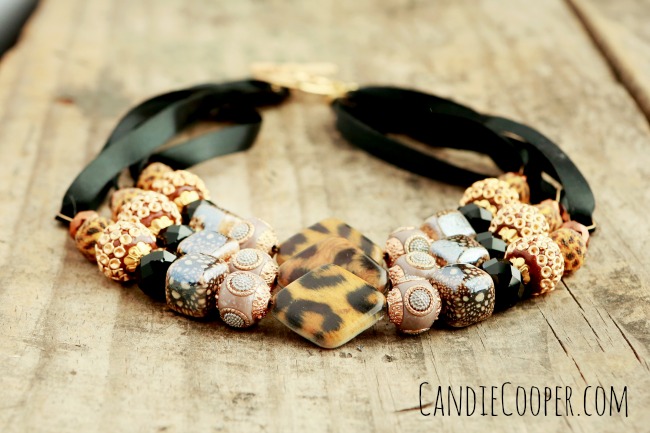
Candie Cooper Leopard Print Necklace 2.jpgJust look at that!  Stalk and pounce!  That doesn’t sound right, but you get my reference right?  Like a big cat! Rawr!

Do you live in the Philadelphia area?  You can come make this necklace with me and experience the CC freak show first hand!  Lucky!  And guess what?  It’s only $26!  That includes all the supplies too.  Literally, just bring yourself.  It makes me want to hop around just thinking about it.  We will have fun!

Before I forget, we will actually have several bead choices.  So if leopard isn’t your thing, we will find something for your unique style!  Jesse James Beads and I want you to be happy!

Here is a link to the class page and sign up info.

Fingers crossed I get to meet you!

Smiling,

Candie


How to String a Bracelet

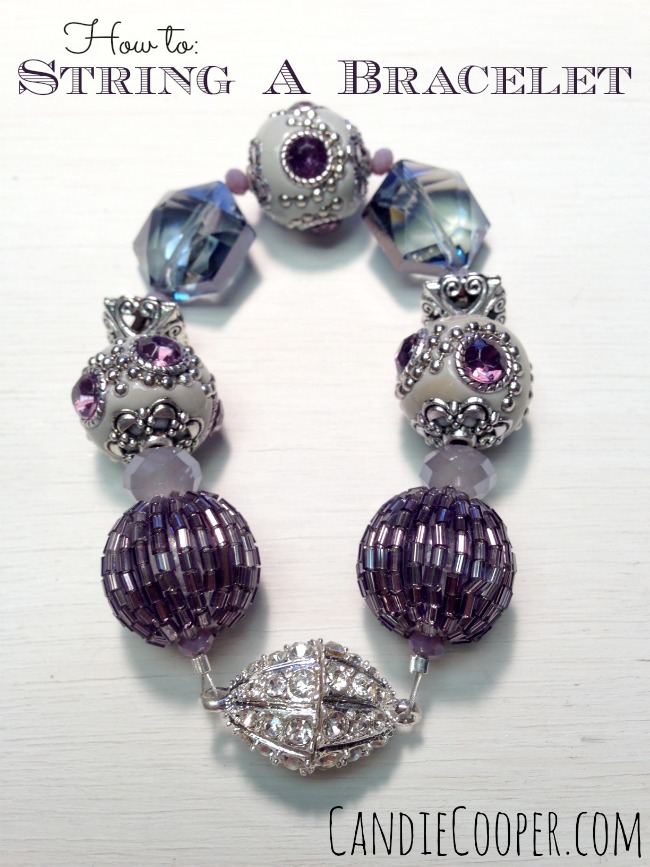
How to String a BraceletAre you ready for your life to be changed forever?  Here is a tutorial I created this afternoon to explain how you can transform a pile of beads into a beautiful bracelet.  It’s to kick off my first ever classes at Beadfest Philly in April.  I’m so excited!!!  It only took a mug of chicken soup, 2 raspberries, a cup of coffee, piece of fruit leather and a little chocolate for me to pull it together.  I hope you find it a useful resource and something you want to share with your friends and family.   And if you live in the Philly area, I hope you’ll come take a class with me at Beadfest.

Let’s get rollin’!

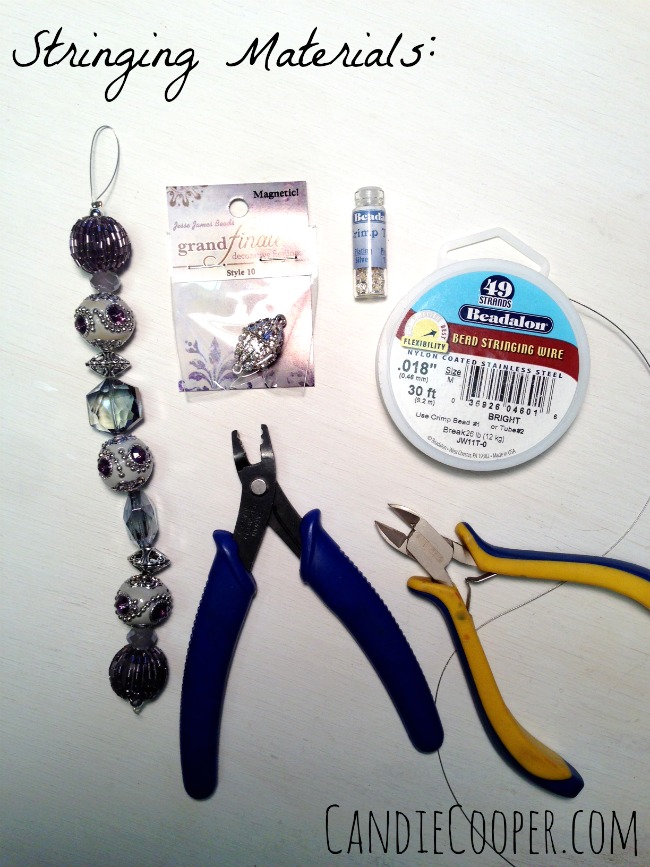
Stringing MaterialsThese are the basic materials needed.  Before I forget, this post is brought to you by Jesse James Beads and Beadalon.  They both help keep the lights on in my studio.

Back to the materials:  Wire cutters, crimping pliers, 49 strand .018 nylon coated beading wire, crimp beads, beads and a sparkly Upper Clasp.

One thing that is so very important:  the crimp beads must correspond to the wire diameter.  Look at the bottom of the wire spool–it says use with crimp bead #1 or crimp tube #2.  The crimp bead and tube packages will be marked with #__.

I promise, I’m not making this stuff up.

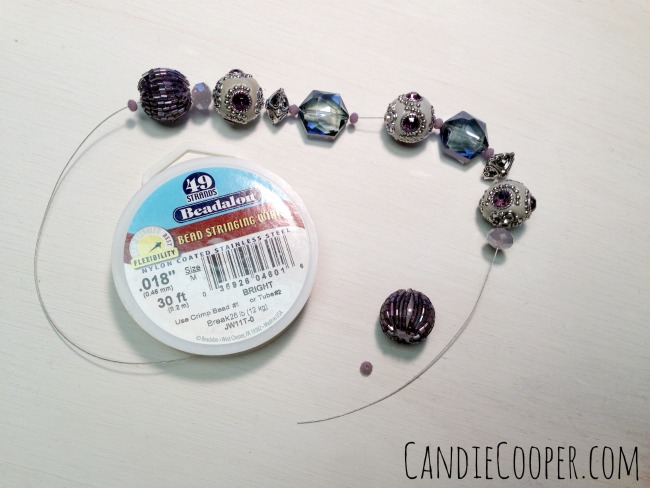
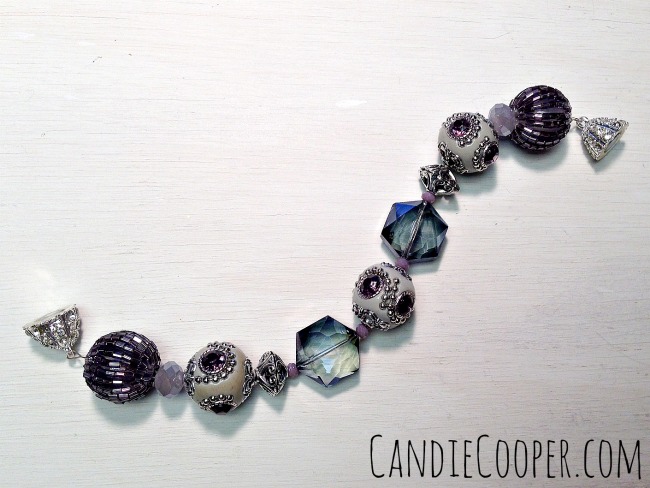
String the beadsI always use 49 strand .018 Beadalon wire for my stringing projects.  It’s so versatile and can hold the big chunky beads with no problemo.  The Jesse James Beads were strung (almost) exactly like they were on the wire.  I added a few tiny 4mm glass beads in the middle and at the end.  The nice thing about JJB is they come in 7″ strands.  My wrist is 7.5ish so by the time I strung the beads and included the clasp length in the total bracelet length, I had a perfectly sized bracelet.

Row of beads length + clasp width + approx 1/4″ for wire connections = your bracelet length

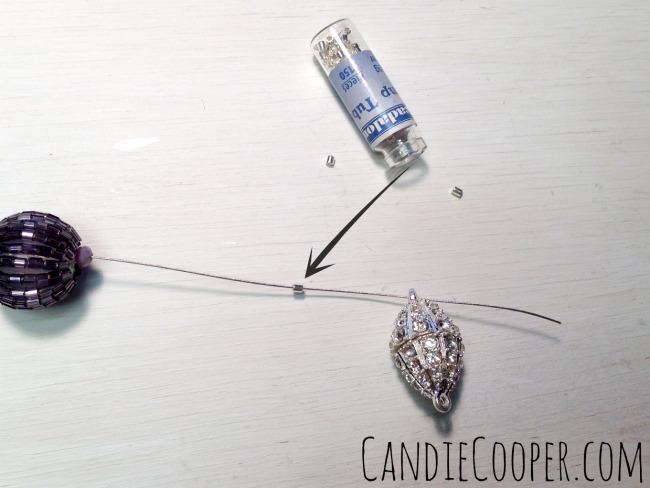
Crimp beadWhen you are happy with the bead section, string one crimp bead followed by one end of the clasp.

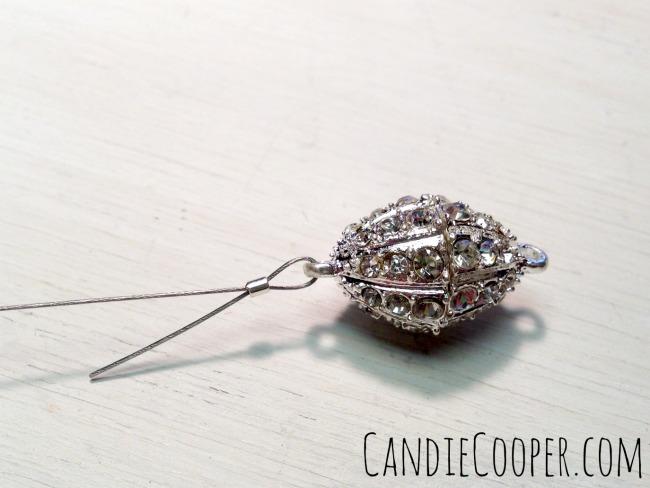
crimp on claspRun the tail of wire back through the crimp bead and slide it up next to the clasp.  Leave a little room for the clasp to move freely.

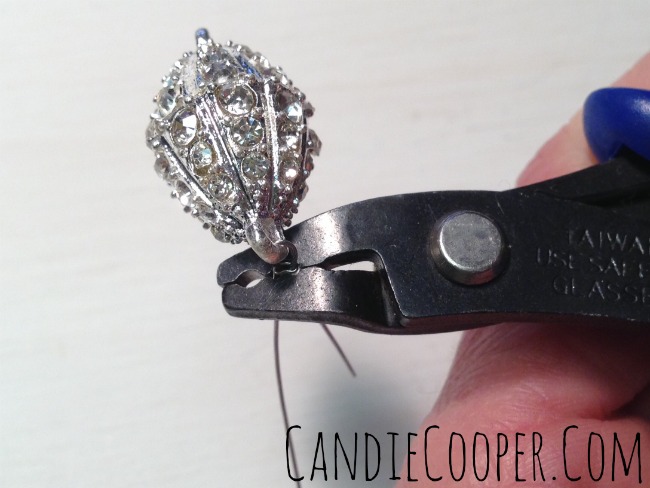
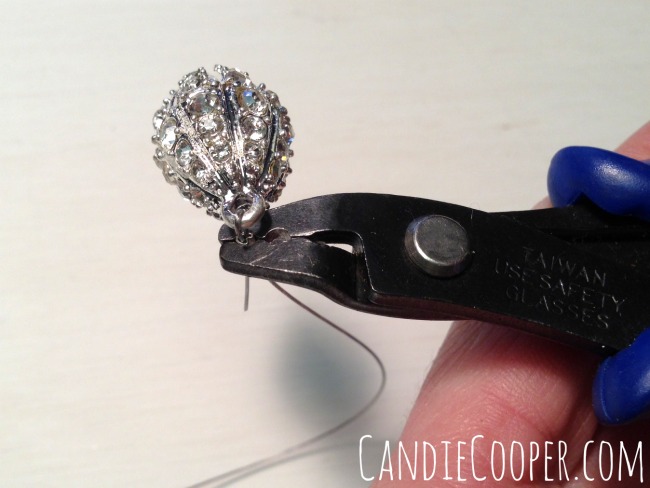
Crimp 1Crimping pliers have two openings in the jaw–the “U” shape and the “EYE.”  That’s what I call them at least.  First, hold the wires so everything stays in place and put the crimp bead in the “U” shape. Clinch the crimping pliers together to mold the crimp bead into a “U” shape.

Crimping 2Turn the crimp bead 90 degrees and place in the “EYE” shape.  Clinch again so it folds the crimp bead over (kinda like a squashed “C”).

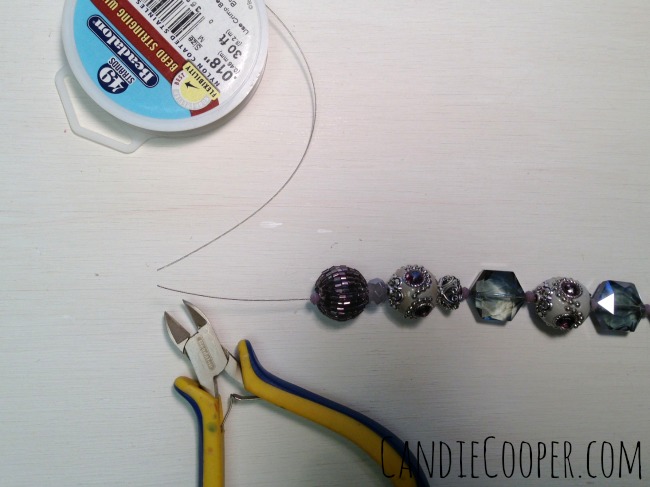
cut the wire from spoolSlide all the beads to the clasp/crimped end of the bracelet and cut the wire from the spool so you have an 1.5″ or so to work with.

I string with the spool attached so I don’t waste wire.  You can pre-cut the wire too.  For me, that’s just too much of a commitment though (laughing).

Pull out the slackRepeat for the other side, stringing a crimp bead and the second part of the clasp.  Run the tail of wire through the crimp bead and pull out all the slack.  Not so tight that the beads can wiggle a bit though.

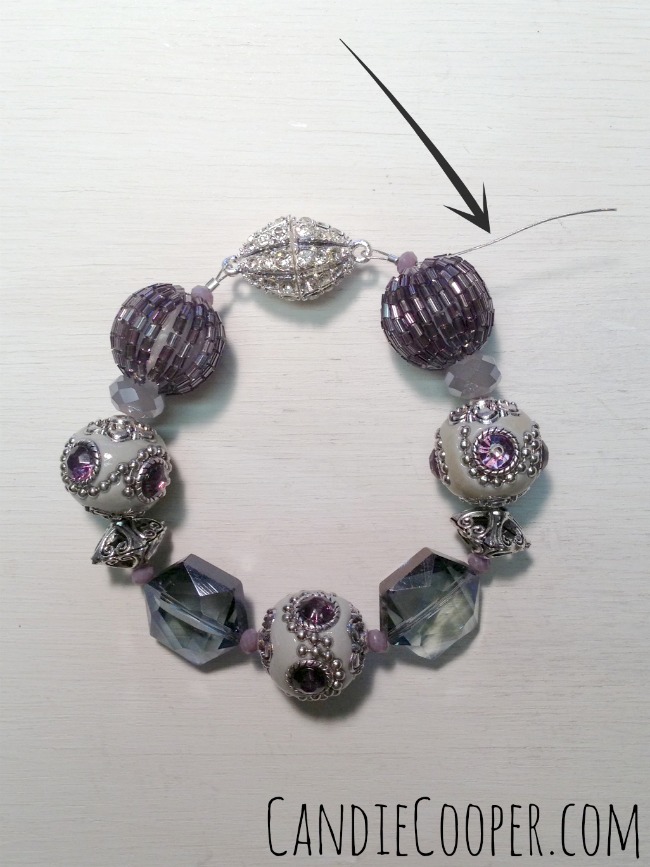
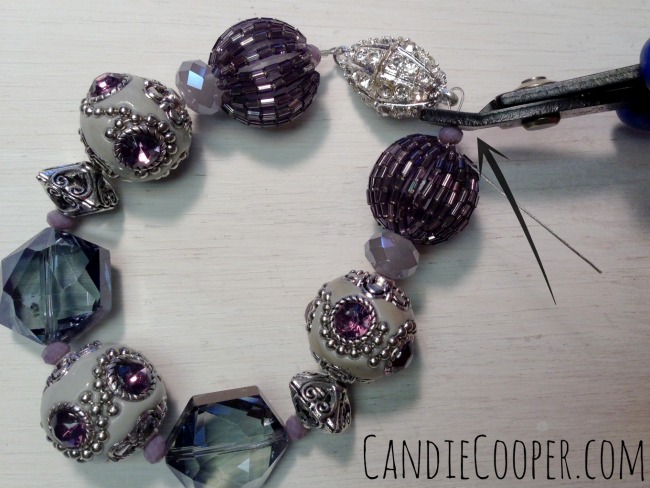
Final crimpCrimp again as you did before.  It’s helpful to put the flush side of the crimping plier up against the beads (see arrow above).

Cut the wireNow cut the tail of excess wire.  Check twice that you have the right wire and cut once (ancient bead stringing secret).

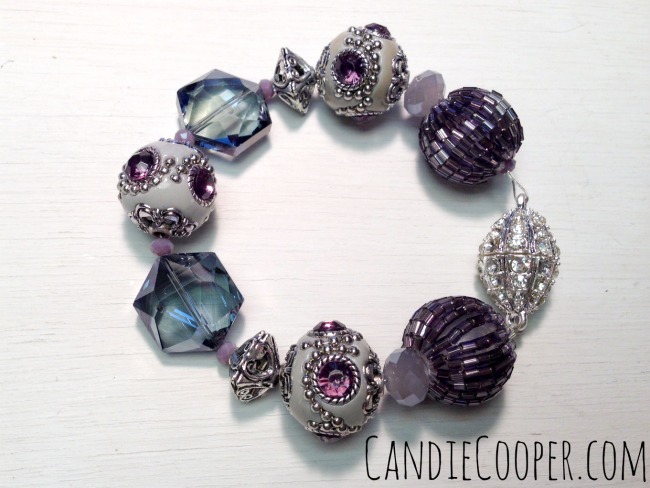
bracelet 4And that my dear friends, is all there is too it!  Are your ready to get this bead stringing party started or what?! Hokey Pokey time!!!

Bracelet Un-latched Now they are doing the loco-motion!  Woot-woot!

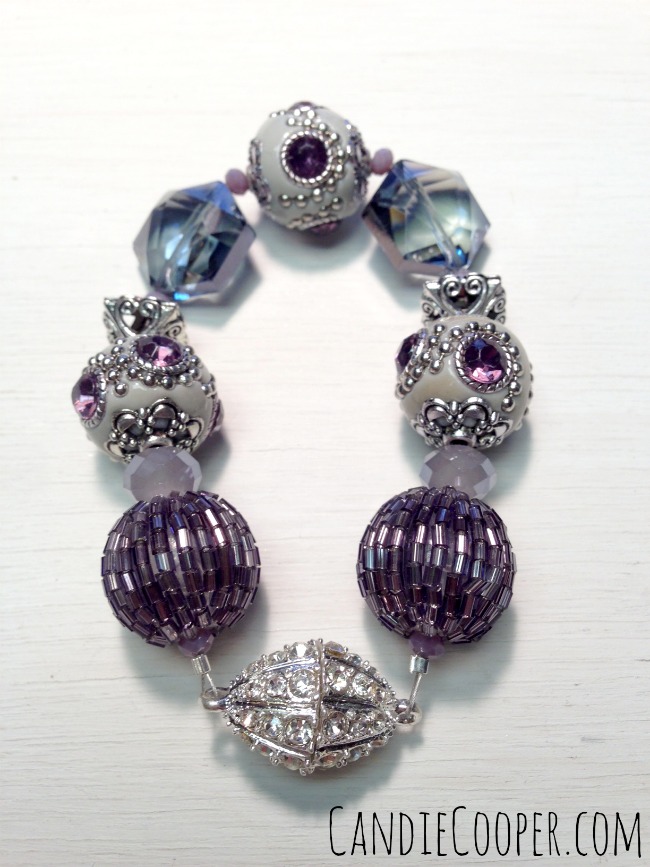
bracelet 3Here they could be doing a little line dancing or the funky chicken dance.

No wait.  They are doing the Macarena.

Heyyyyy Macarena!  These beads came to play, y’all.

Speaking of party….guess what?  I’ve got a little giveaway for you!

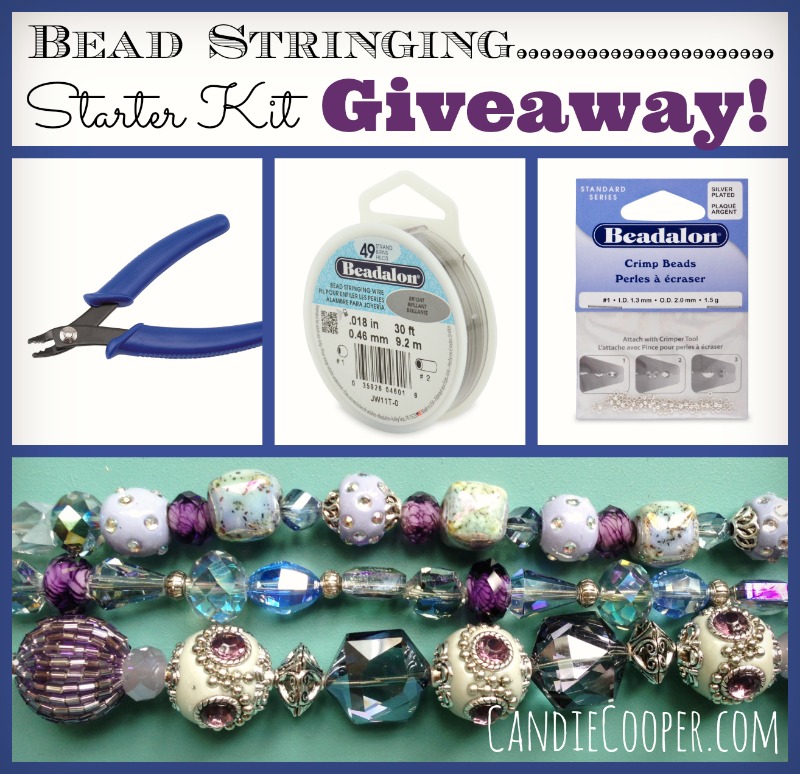
Bead Stringing Starter Kit GiveawayThis is a beginning bead stringing kit!  It has Beadalon wire, crimping pliers and crimp beads along with the infamous Jesse James Beads below.  It will also include a sparkly Upper Clasp like the one on my bracelet above.

Is that Macarena song stuck in your head too?  Mine too.  Sorry about that!

a Rafflecopter giveaway

Happy entering and thanks for showing the like love to these dear sponsors!

St Patrick’s Jewelry Ideas and a HUGE Paypal Cash Giveaway

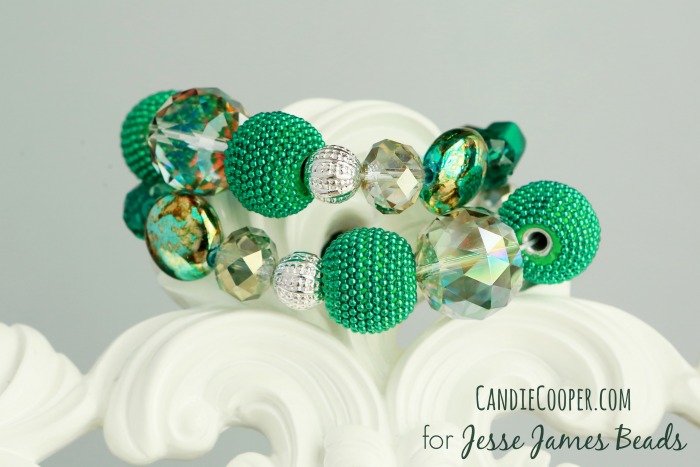
Candie Cooper Stretch BraceletsHello there!  I wanted to show you a couple ideas for making your own St Patty’s jewelry this morning.  This first ideas is super easy:  Stretch bracelets!  All you have to do is grab some 1mm diameter elastic, string enough beads to go around your wrist (7.5-8″), tie the two ends in a knot and dot the knot with clear nail polish.  Party on!

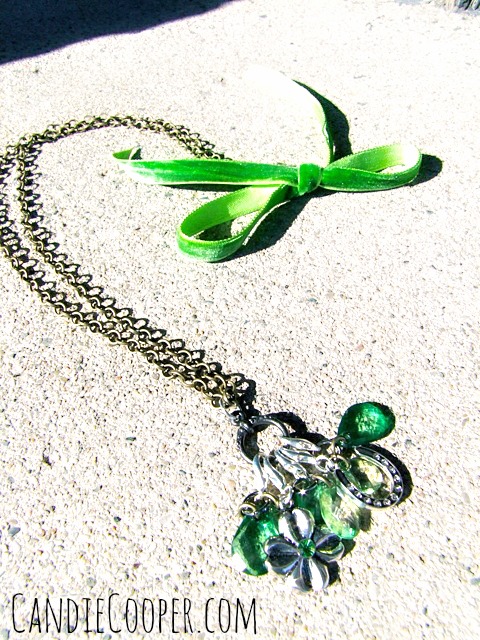
candie cooper lucky charm necklace.jpgThe second idea uses lucky charms that have been attached to the toggle end of a clasp with lobster clasps to make it interchangeable if you like.  You can connect one or ten!  Connect the toggle ring to the two ends of chain, then attach two large jump rings to the ends of chain at the back of the necklace.  Thread a pretty piece of ribbon through the rings and tie in a bow.  Slip over your neck and spread the luck!

Speaking of spreading the luck, I AM SO EXCITED to be participating in a $500 Paypal cash giveaway with these amazing bloggers (see the links below).

Logo FINAL

Giveaway Sponsors:

Candie Cooper Designs | Chase The Star | Cooking On The Front Burner | Cooking With Curls | C.R.A.F.T. | Debbie Doos | Dear Crissy | DIY Candy | I Should Be Mopping The Floor | Little Miss Celebration | Live Laugh Rowe | Love Bakes Good Cakes | Mom On Timeout | Mom’s Test Kitchen | Sew Woodsy | Smart School House | Something Swanky | That’s What Che Said | The 36th Avenue | The Little Kitchen | The Mandatory Mooch | The Weary Chef | What’s Cooking, Love? | Yummy Healthy Easy |

Sending you lots of luck, I am!!

<3 Candie

a Rafflecopter giveaway

Line Dancing and Jewelry Making with Beadalon

Candie Cooper on Country Music CruiseIf you honked, you came to the right place.  This is the second installment of this post with more pictures from teaching on the Country Music Cruise with Beadalon and Jewelry Television.

Candie Cooper Country Music Cruise 9Remember I was with my buddy and fellow Beadalon design team member, Katie Hacker?

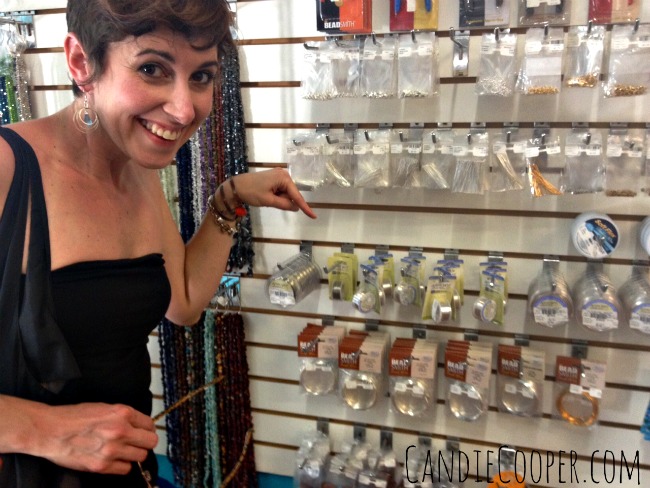
Candie Cooper Country Music Cruise 7We were so excited to find Beadalon products, Artistic Wire and stringing wire at a jewelry making/gem shop in San Juan named Turquesa.  I love the sound of it–Turquesa.

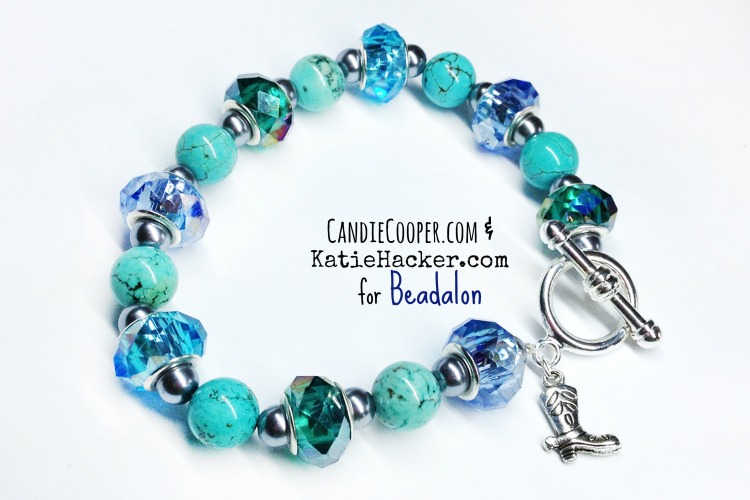
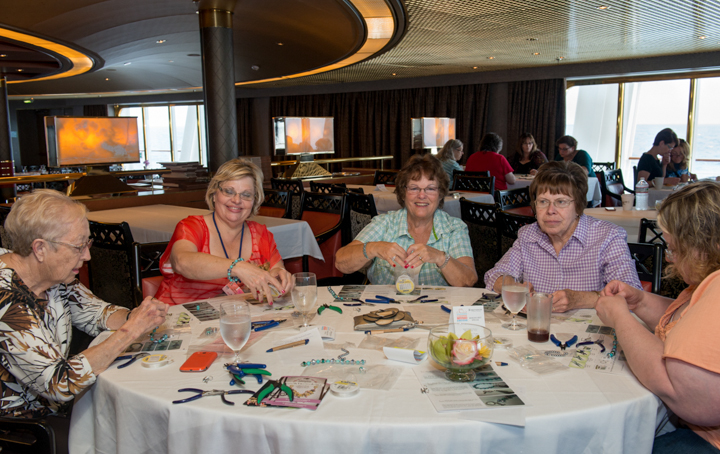
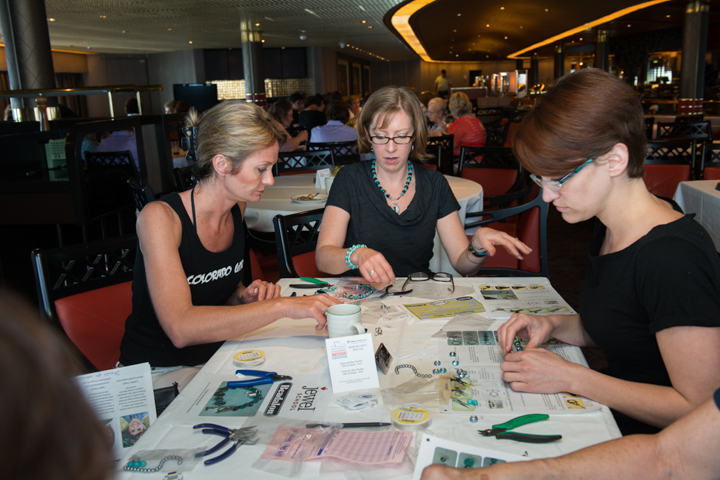
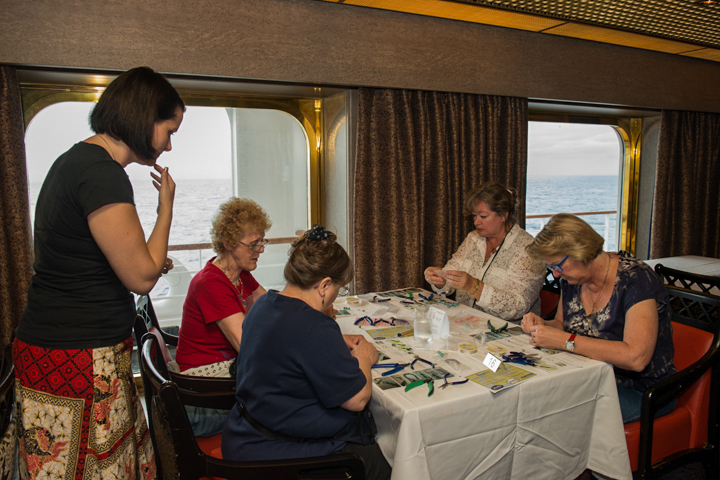
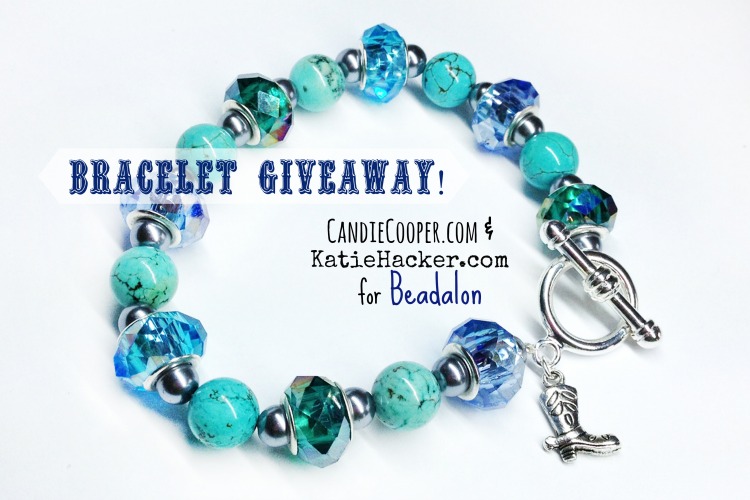
Candie Cooper Katie Hacker Bracelet.jpgOn the last day at sea, we taught the “Boot Scootin’ Bracelet” so students could learn basic stringing. Check out the photos from the class!

DSC_9975Our students were so delightful!  It’s been neat to keep connected with them on Facebook.

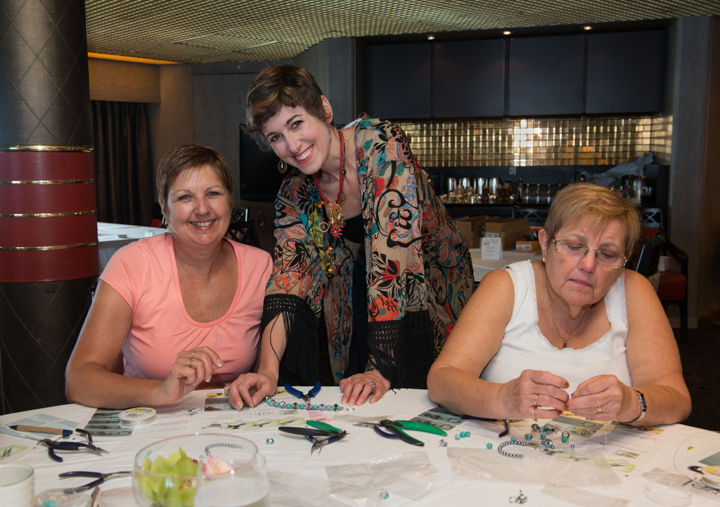
DSC_9979There’s Katie working with two of our buddies!

DSC_9974And Christiane from JTV teaching—see the water right outside our classroom!?  I still can’t get over teaching on a boat.

DSC_9981And yours truly helping a student size her bracelet.  I loved getting to meet all of these wonderful women.  They were so patient and kind.  On another note, you should never wear a “shirtain” (get it? shirt that looks like a curtain) to teach jewelry making in.  That fringe on the sleeves!  Seemed like a good idea until it was dripping all over the table, getting hung up on tools, etc…

It was a good idea for line dancing though!

To be fully honest, I was in ballet from 1st grade until I graduated high school.  From that point, I hung up my organized dance shoes.  That is, until I hopped aboard the Country Music Cruise complete with line dancing instructors!  It was fun to be the student and learn the different dances (of which I cannot remember one step now.  Eeesh).  It also reminded me how much I love dancing and hopping around to music.  More of that in 2014, please!

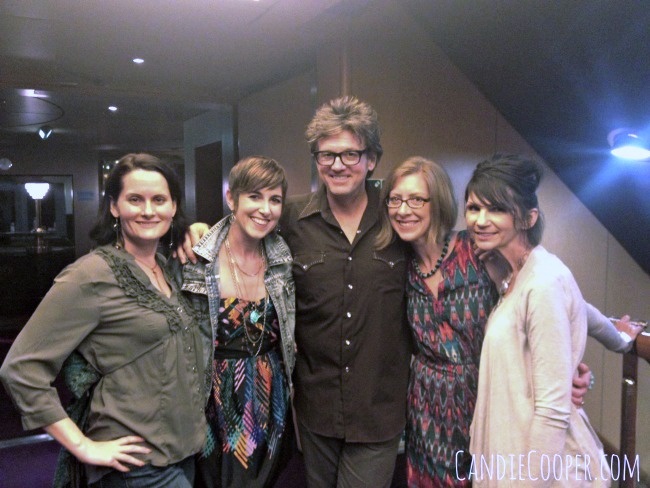
Candie Cooper Country Music Cruise 12We also met the amazing artist, Chuck Mead.  His band, Chuck Mead and his Grassy Knoll Boys played many times on the cruise and we couldn’t get enough of their sound.  Here’s a link to his playlist.  We brought home his CD and would’ve brought home a t-shirt or three if they had them.  We are official Chuck Mead groupies.

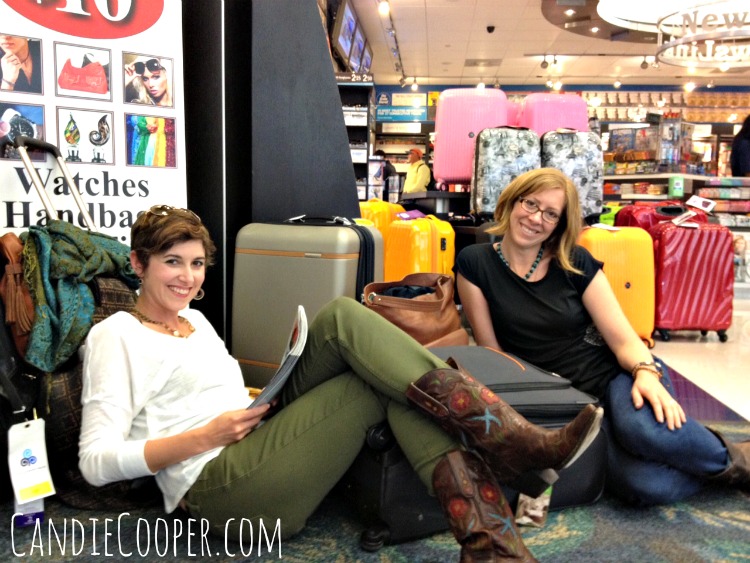
Candie and Katie on the Country Music CruiseBefore we knew it, it was time to head home!  Our boots were made for walkin…well, flying with joy filled hearts from a great trip back to snow covered cornfields and our loving husbands.

So now, because we love all our friends and fans so much, Katie and I are giving away 2 Boot Scootin’ Bracelets!  One from me and one from her with a very special thanks to BEADALON from us.

Candie Cooper Katie Bracelet Giveaway

Enter below for a chance to win!  And just for fun–here’s a song to jam to while you’re entering!

Love ya!

Candie

a Rafflecopter giveaway

Follow Your Arrow Crystal Heart Necklace

Candie Cooper Follow your heart arrow necklace 1A

Candie Cooper Follow your heart arrow necklace 2A

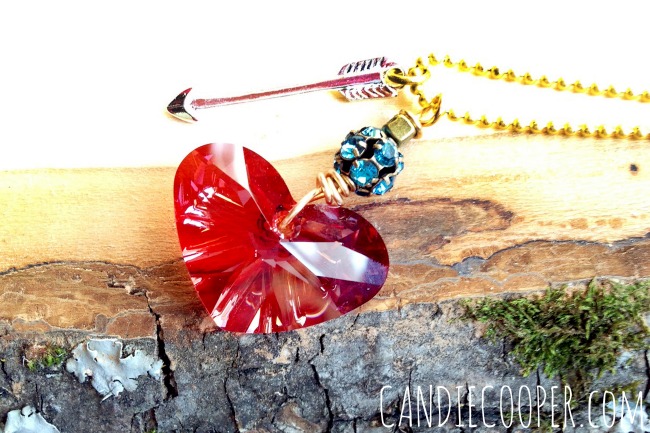
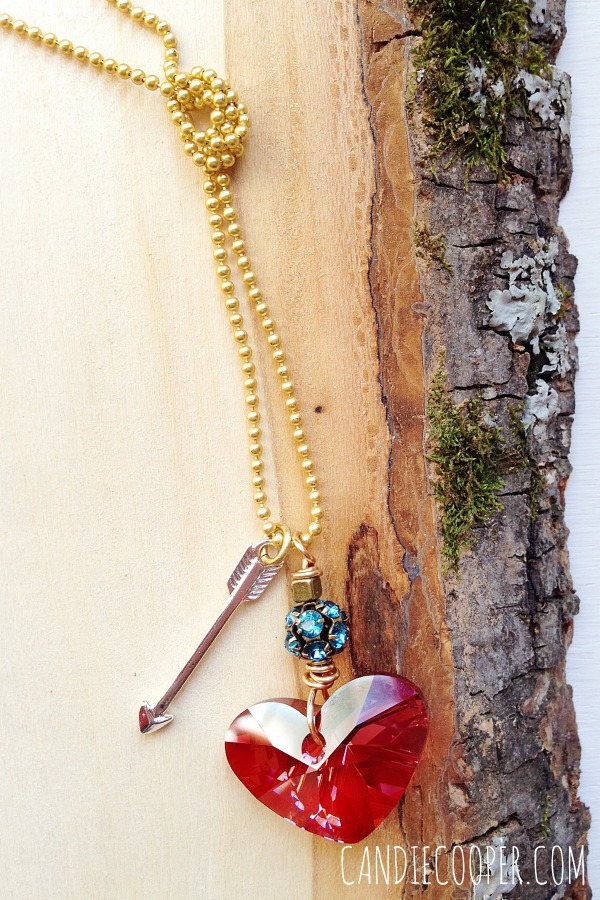
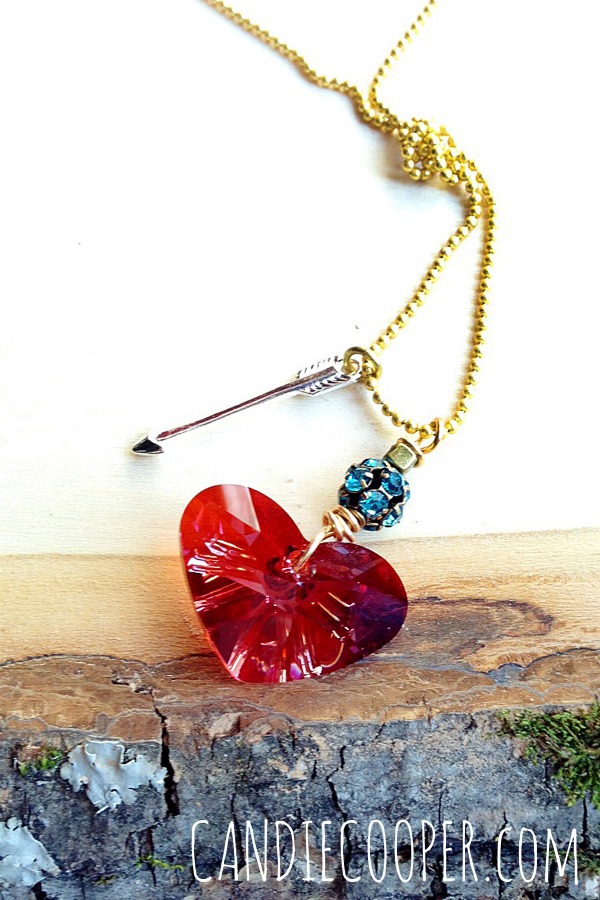
Candie Cooper Follow your heart arrow necklace 3AIt’s no secret that I love hearts.  This is a sweet layering necklace I made with a Swarovski heart and a teal Swarovski crystal bead from Ornamentea.  It’s topped off with a tiny silver arrow charm—-a little reminder to follow your heart.

Lots of Love.  Always.

Candie