How to Form Leather Flowers

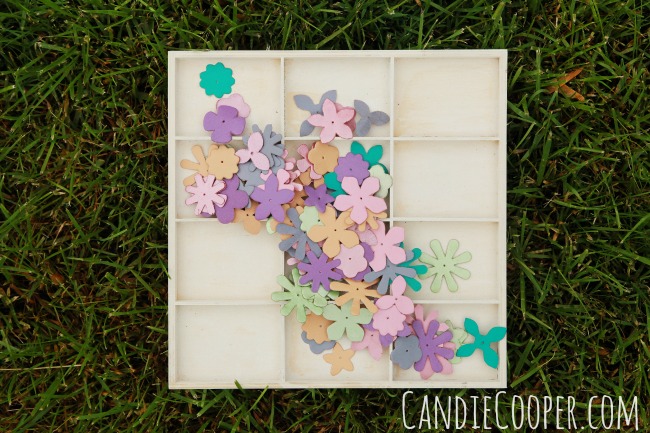
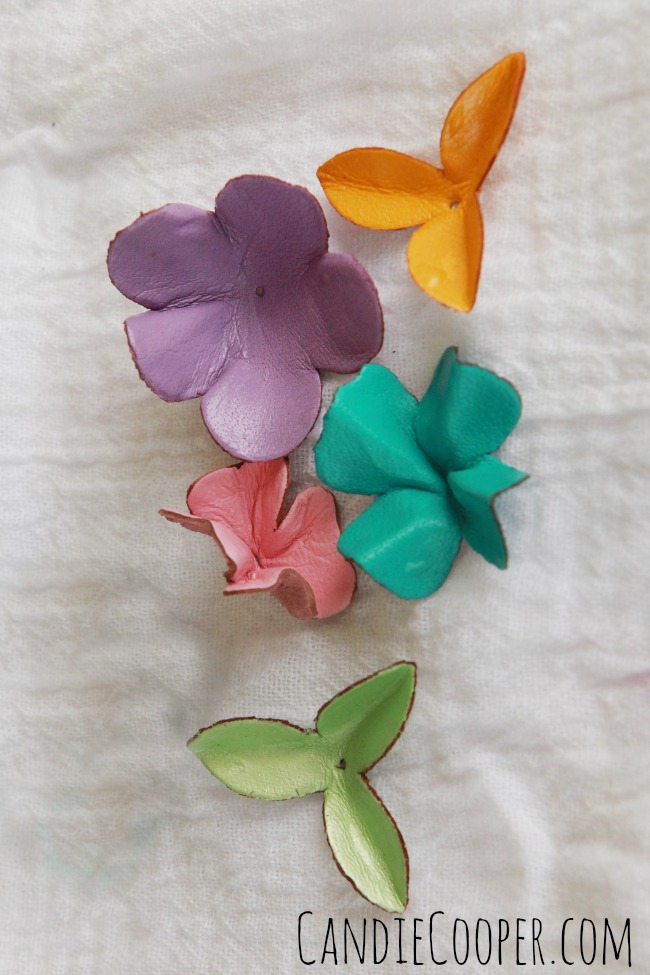
This post brought to you by LeatherCord USA.Making Leather Embellishments with LeatherCord USA flowersApril showers bring May leather flowers.  This is part I of a two part post all about working with leather flowers to make jewelry and embellishments.  Get excited because these things are like super yummy calorie free candy!  Who can make the sunshine, already!?!Leather Cord USA leather flowersThese are just some of the flower colors available.  I love all the fun shapes and the sizes make them perfect for stacking!How to shape and form leather flowersTo be honest, I’ve never been able to leave well…well enough alone.  So welcome to my brain where I think, “how can I wreck alter these flowers today?”  First up:  FORMING.
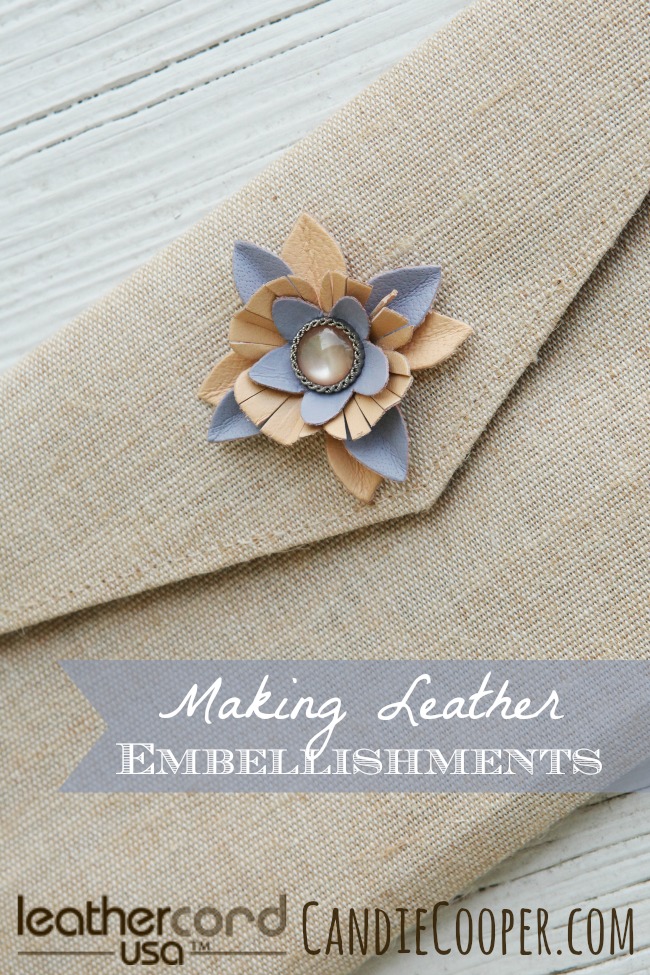
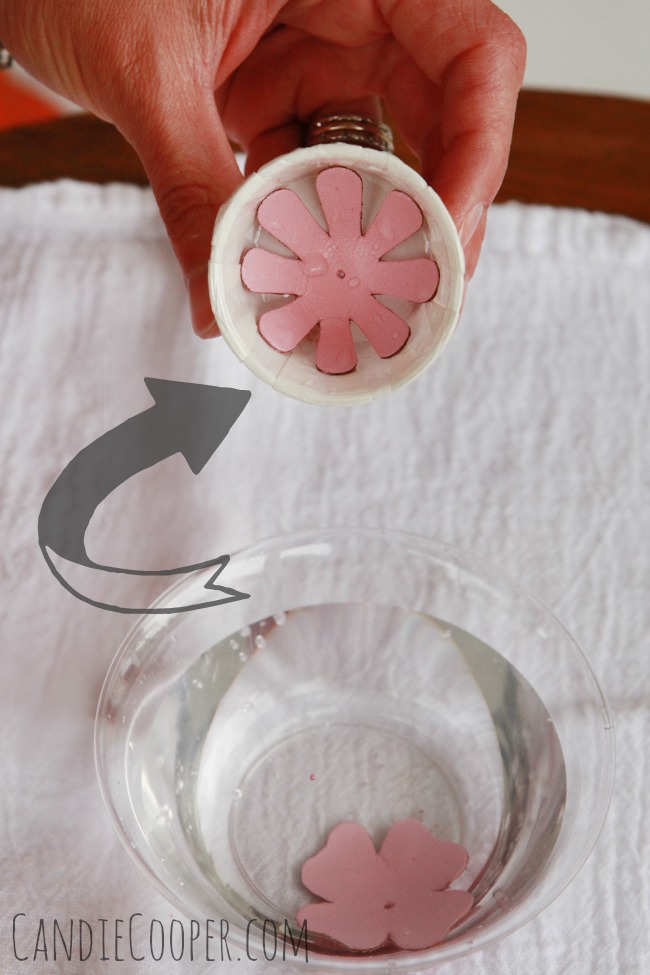
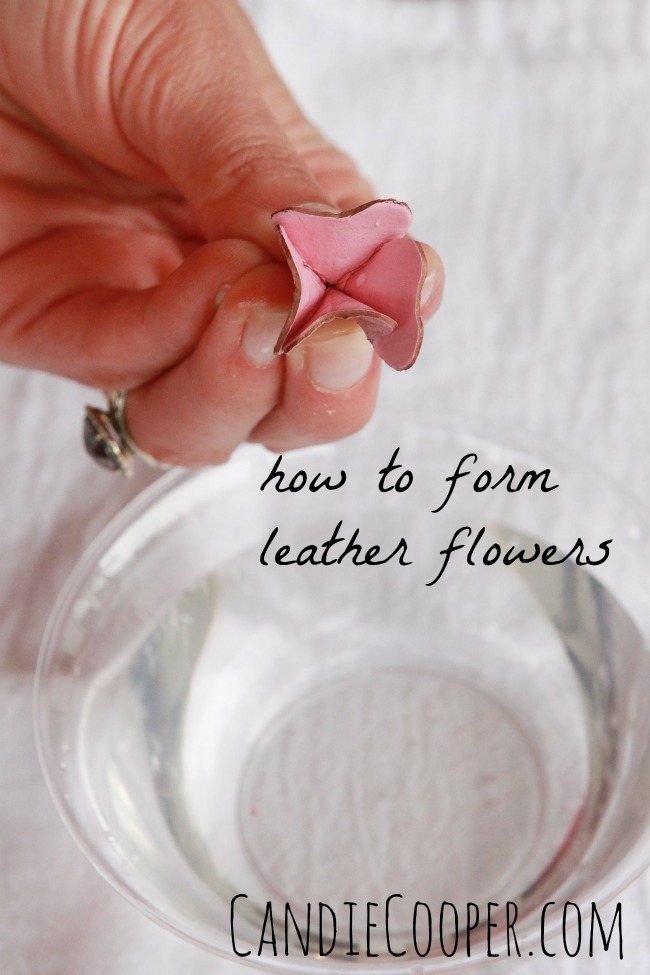
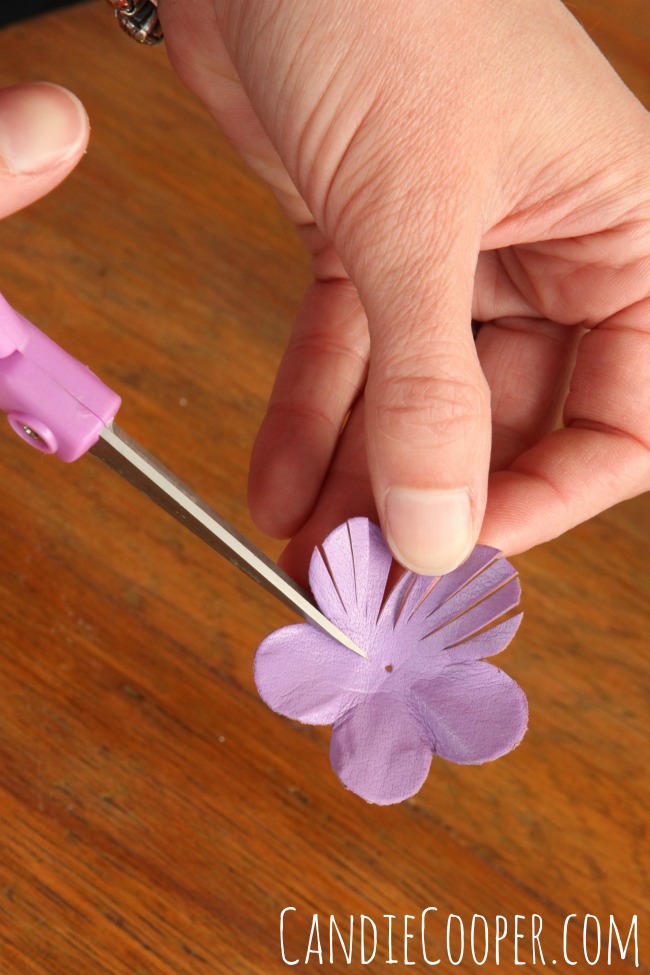
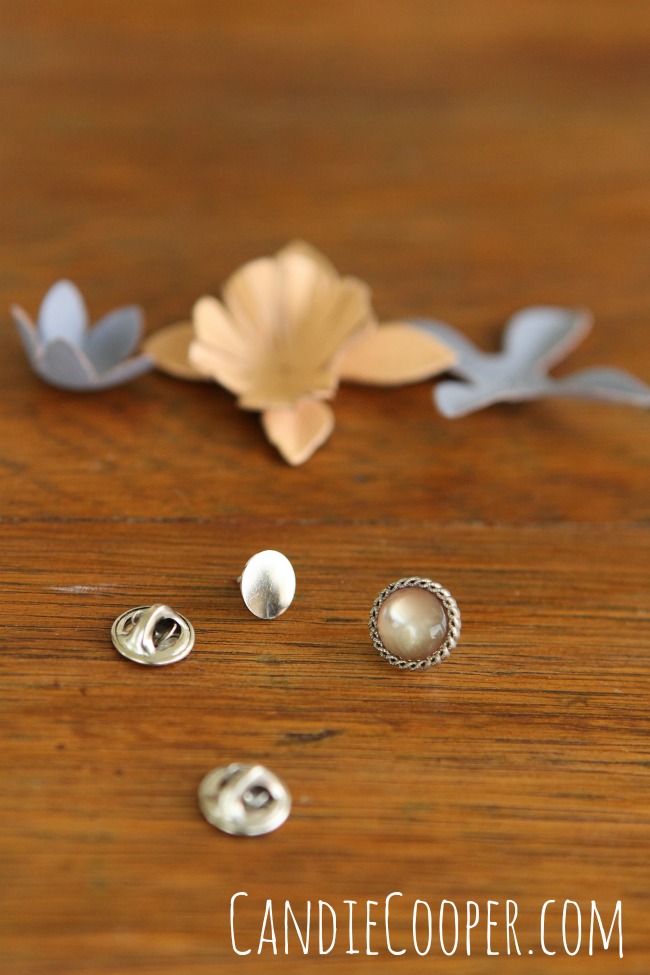
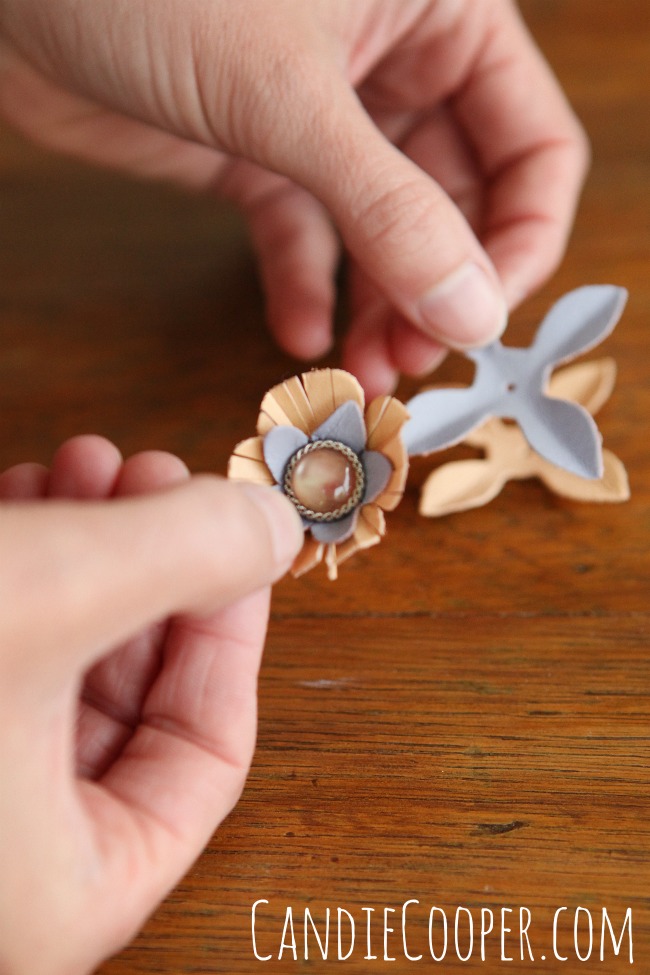
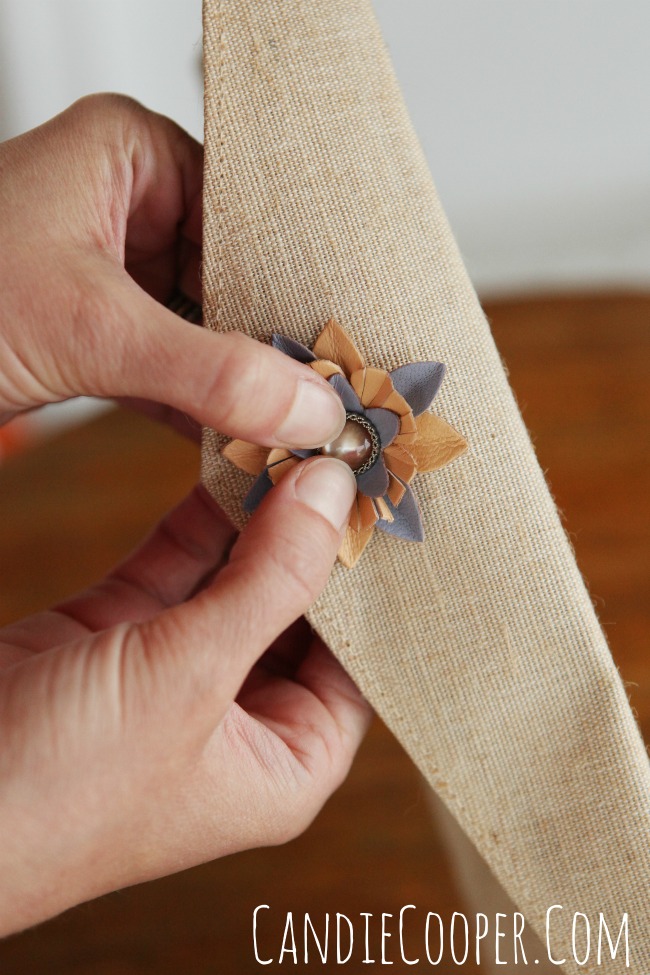
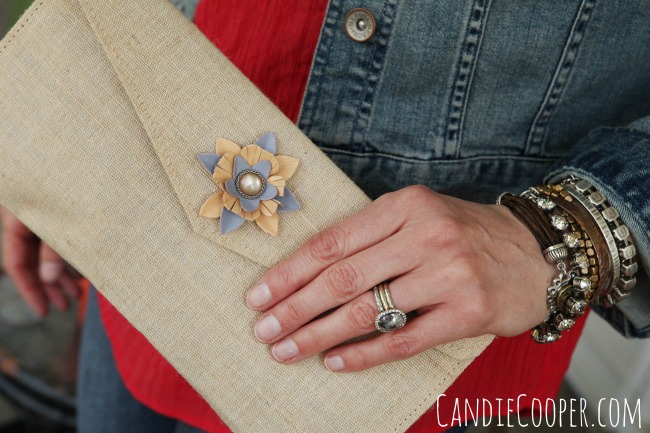
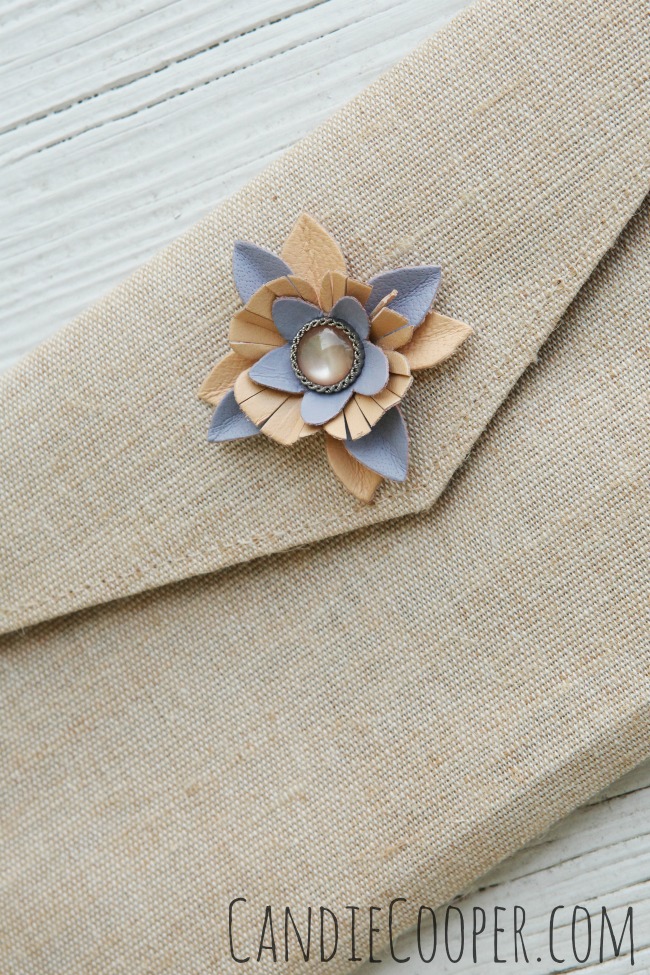
Soak the flowers in a bowl of water for a couple minutes.Forming leatherThen you can push them into shaped containers while they dry so they hold their shape or….How to form leather flowers with watersquish, pinch, fold and twist them with your fingers.  SO many options!DIY JEWELRY MAKING Forming leather flowersOne idea will lead to another and another….  Did I mention this is a two part post?Fringed leather flowersSecond way to wreck form the flowers is to cut and fringe said flowers.  You can re-wet the flowers at any point to form them more.Making leather embellishmentsOne of my most favorite findings are tie-tack findings with a glue on pad.  I’ll warn you now that if you plan on selling these, you’ll hear over and OVER that they will leave a hole in your shirt.  My response:  thank you for the day you were born (but I’m still doing it my way).  For this piece, I cut the back off of a button and glued it to the tie tack.Making leather jewelryThen you can start stacking the leather pieces behind it.Embellishing a linen purse with Leather Cord USA flowersYes, I know it’s going to make a hole in that purse.  Thanks for letting me know (and the day you were born).Leather craft embellishmentsSweet right?  I think these would make the cutest bridesmaid clutches.  I got this linen clutch at the craft store P.S.  You could also stencil it first with an accent color and then embellish with the leather flowers.DIY Jewelry Making  Forming leatherLeather embellishment how toIt’s my birthday this week.  I think I just made myself a present. 😉
See all the leather flowers at LeatherCord USA here.

Leather Jewelry Making

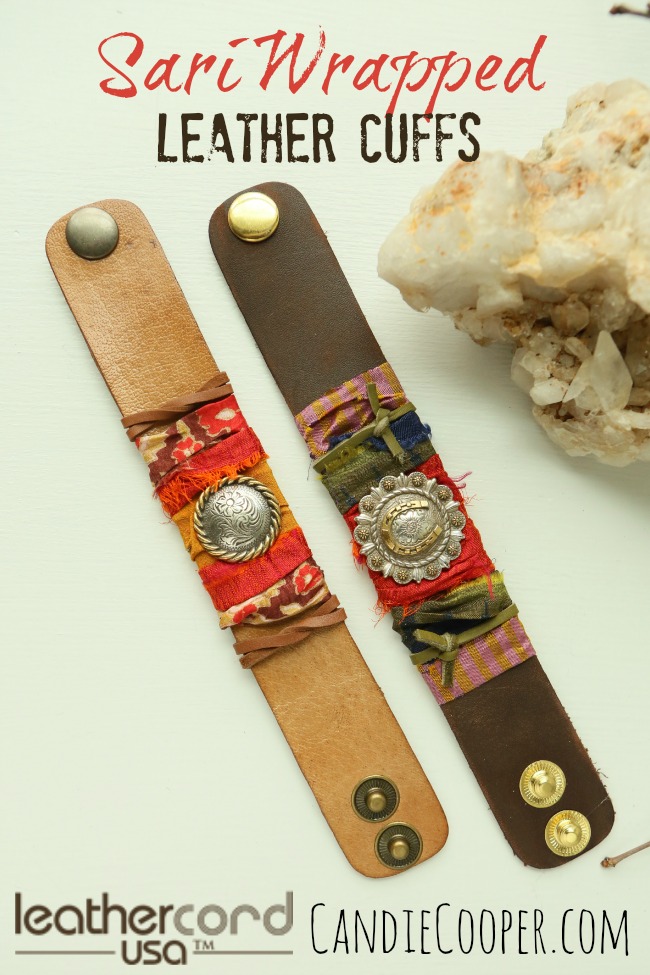
This post brought to you by Leathercord USA!Sari Wrapped LeatherCord USA Cuffs from @candiecooperTonight finds me with an Eric Church song stuck in my head.  I didn’t even like country music until I met my husband and now it’s stuck in my head?  The things we do for love.

Know what else I love?

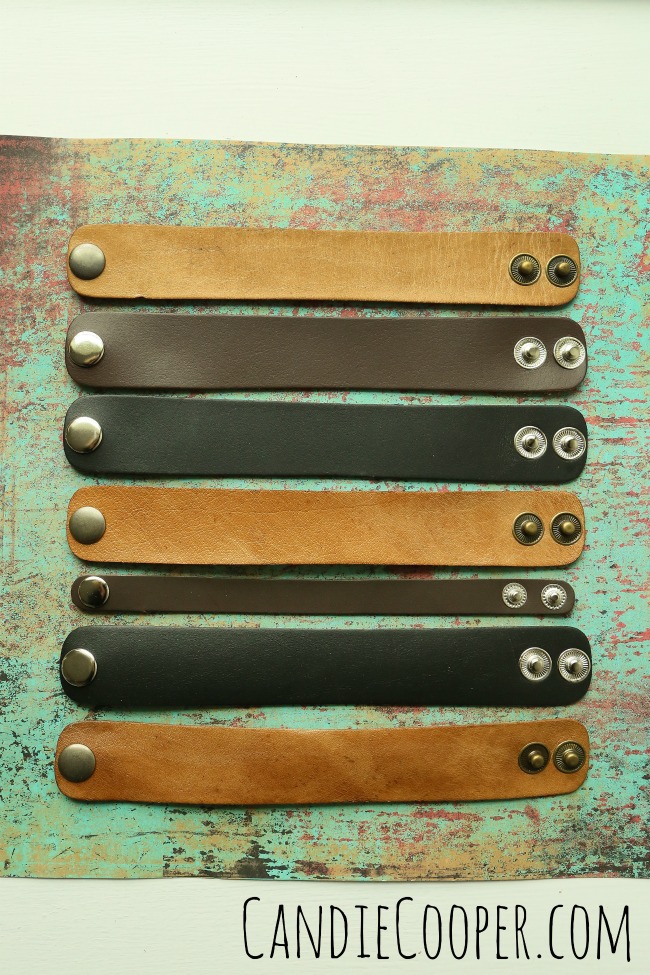
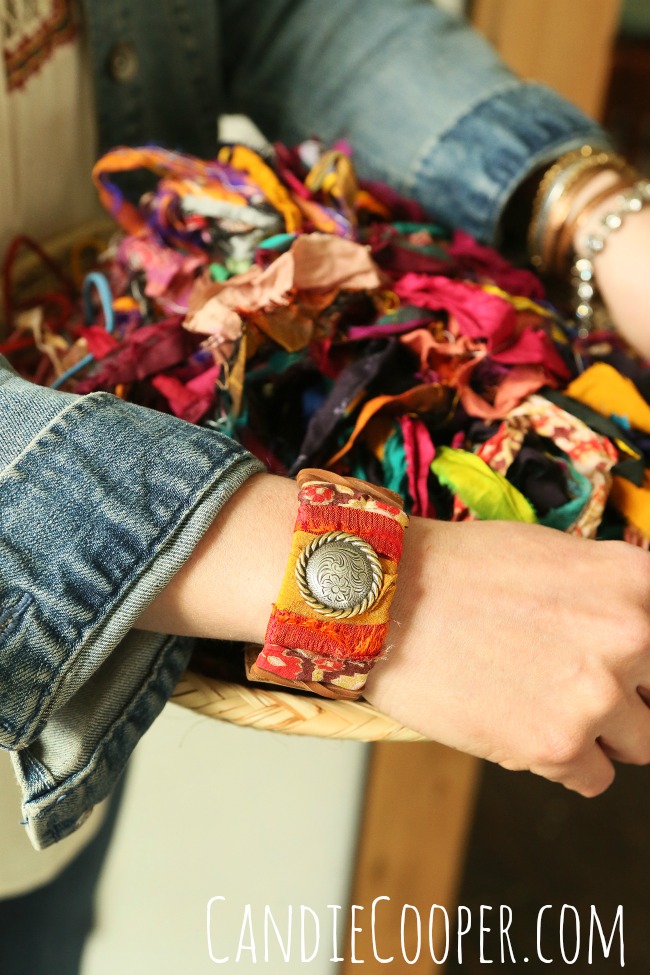
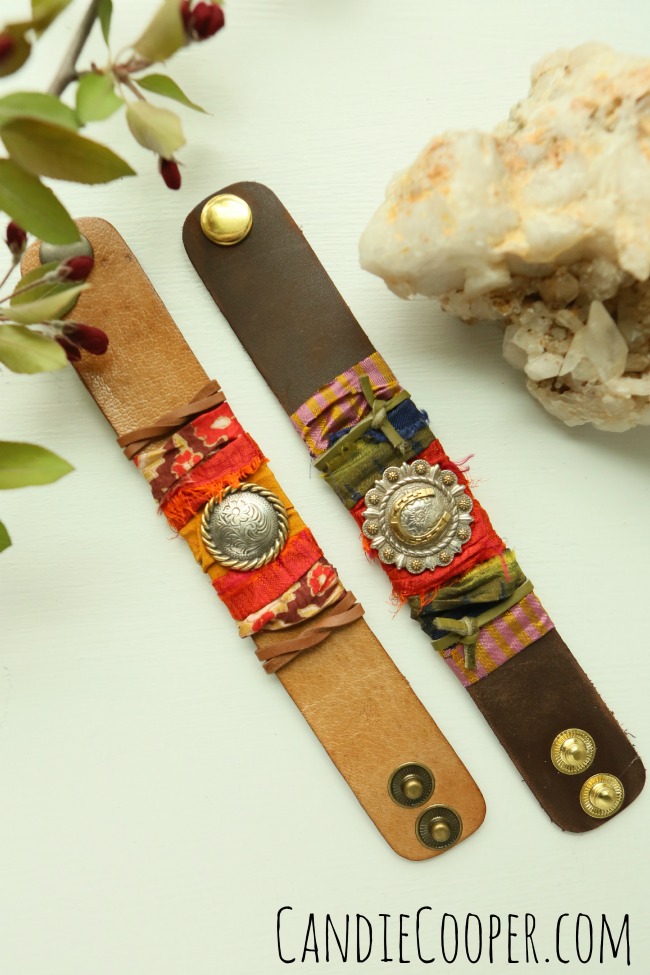
Blank leather cuffs!  That’s what I used to make this project for LeatherCord USA–Sari ribbon wrapped cuff bracelets.
Leather Cuffs from LeatherCord USACheck out all the colors and sizes.  You can even pick the snap color.  In my eyes, these cuffs are blank canvases.  The sky is the limit.  I’ve got a list of things I want to try out on them.  You can get some of your own HERE.
Sari Wrapped Cuff via @candiecooperI fell in love with the red brown color and the distressed tan color cuff bracelets.  That’s what I used in the post.
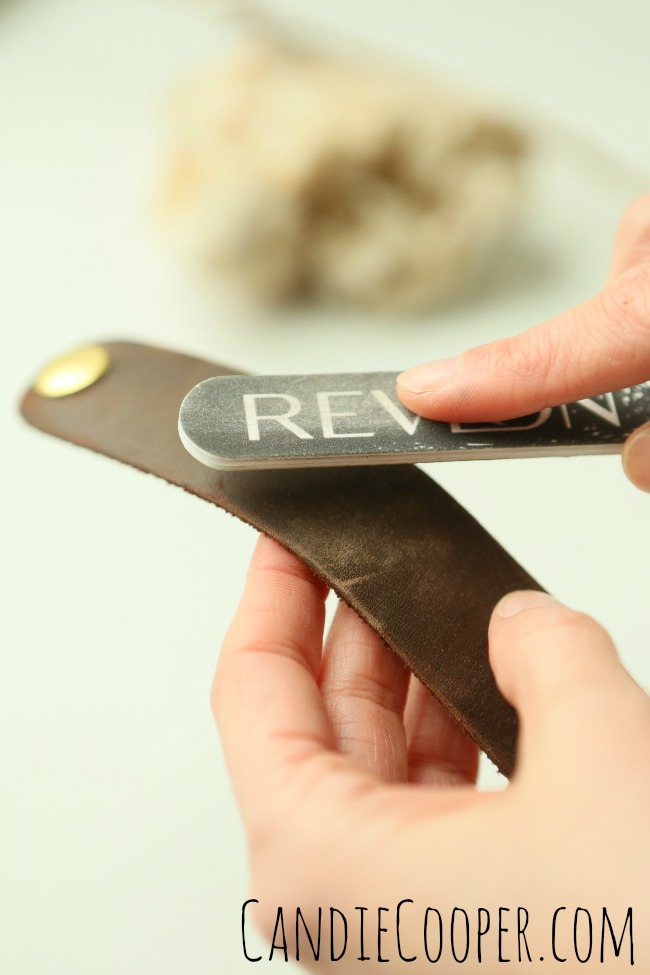
DIY JEWELRY MAKING Distressing leather cuff with a nail fileOne of my favorite art tools is a nail file.  The fine grit makes it perfect for distressing surfaces, like the red brown cuff I have here.
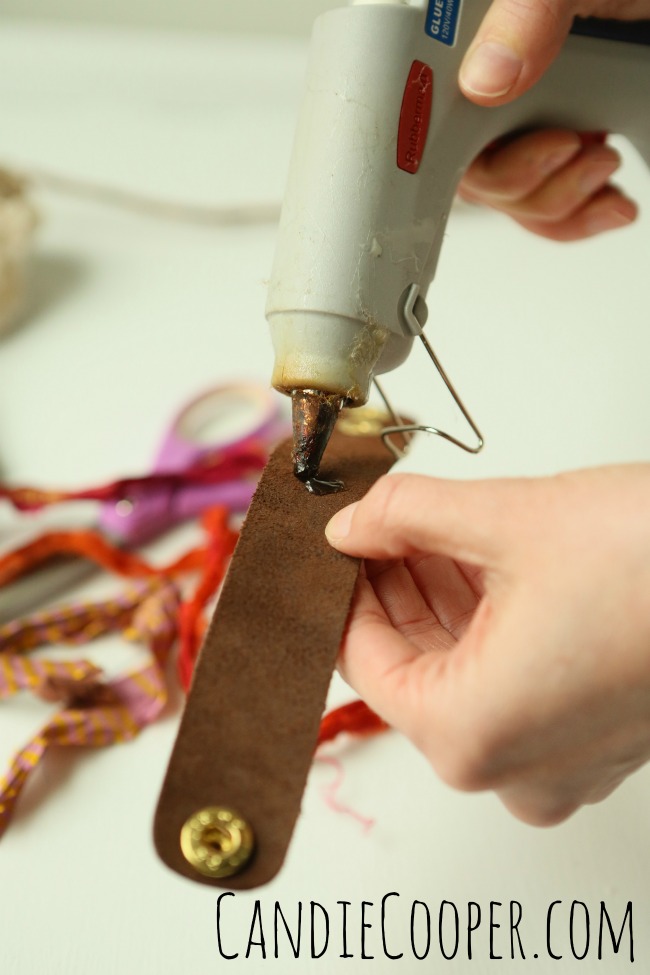
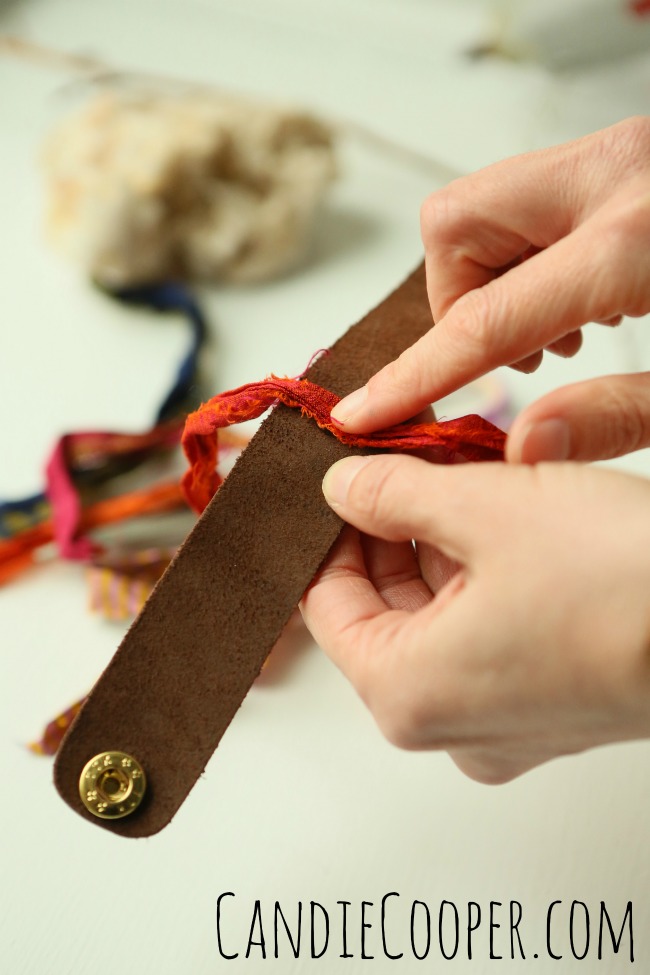
DIY Jewelry Making Sari Wrapped Leather Cuff BraceletYou can embellish it with the sari silk ribbon.  Leather and silk go together like peas and carrots.  I use hot glue to secure the ribbon to the back of the cuff like this…
DIY Jewelry Making sari wrapped cuffNow start wrapping!  It’s worth mentioning that if you don’t have sari ribbon, you can cut strips of silk from a shirt or scarf.
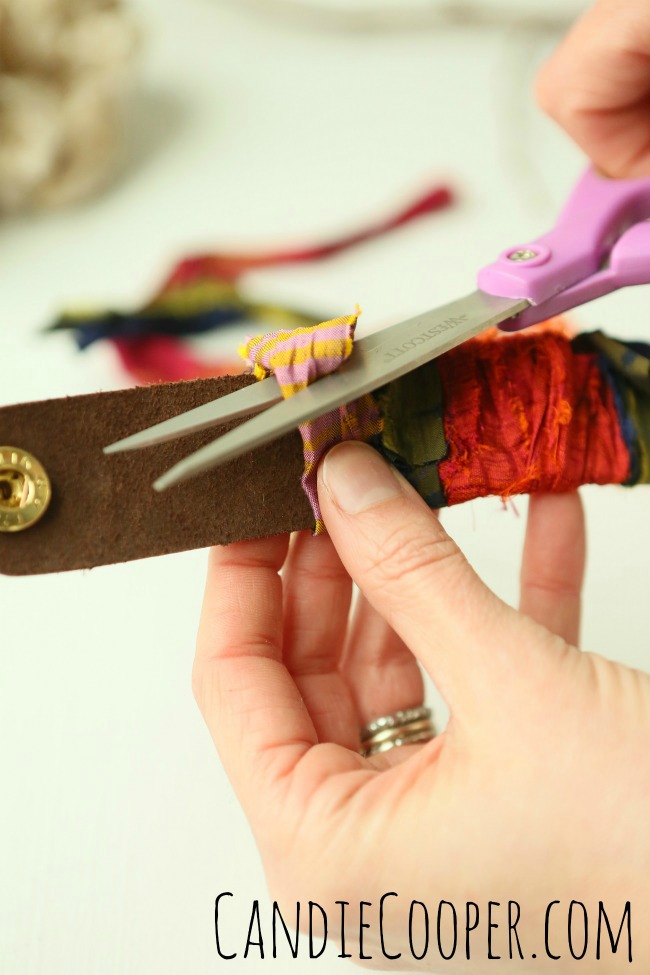
DIY Jewelry Making Wrapping a leather cuff with sari silkAdd other colors and patterns of ribbon on the sides,
DIY Jewelry Making  Coachella Cuff Braceletgluing and trimming as you go.
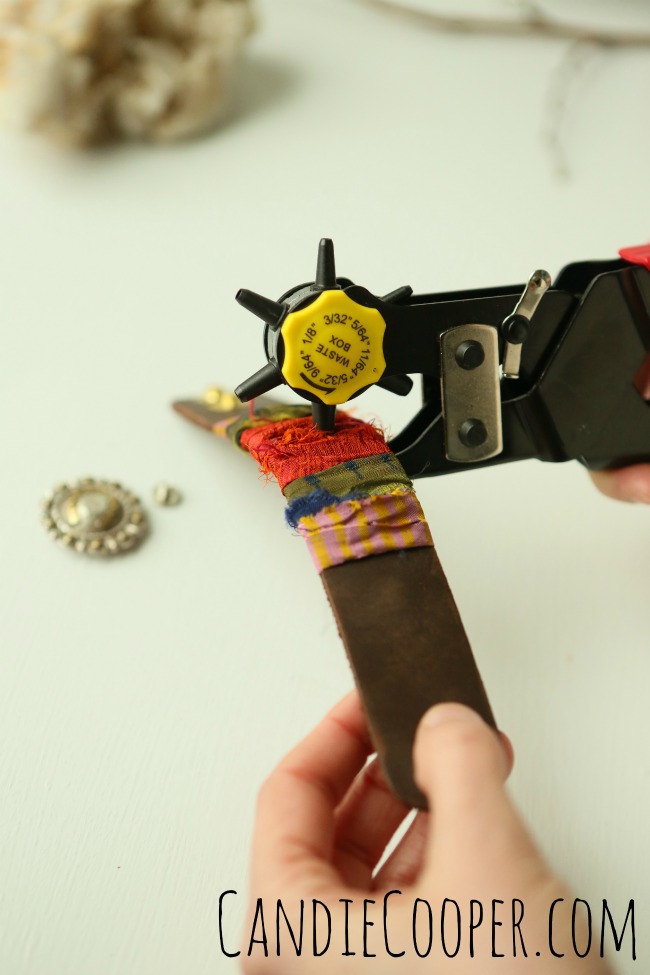
DIY Jewelry Making  How to punch a hole in leatherThis is a punch especially used for leather.  I got it at Harbor Freight.  It was super cheap and went right through the ribbon.
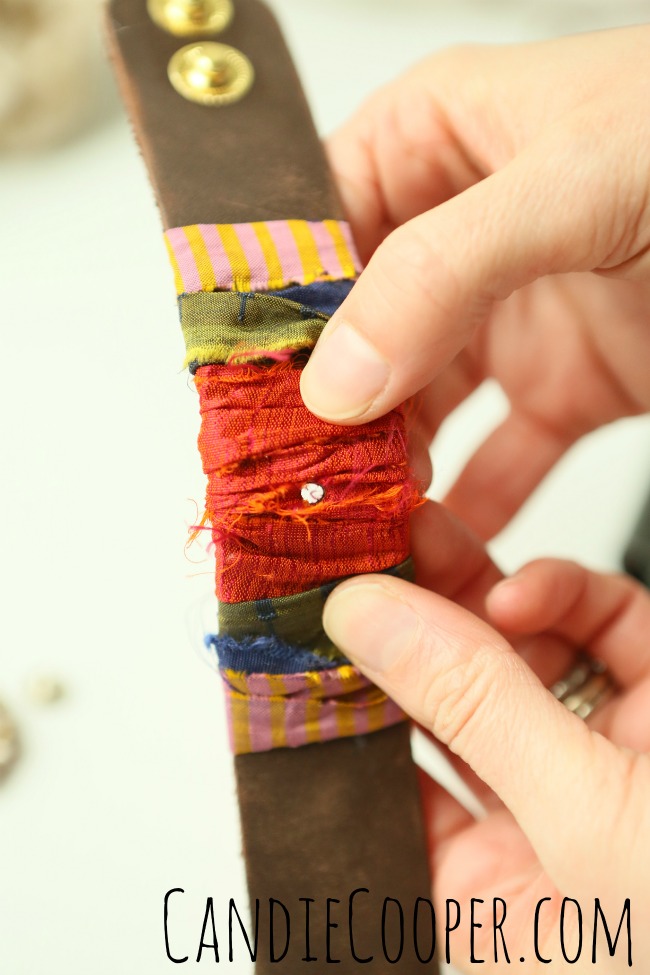
Sari wrapped cuff bracelet Punching hole for concho in leatherHow about that?
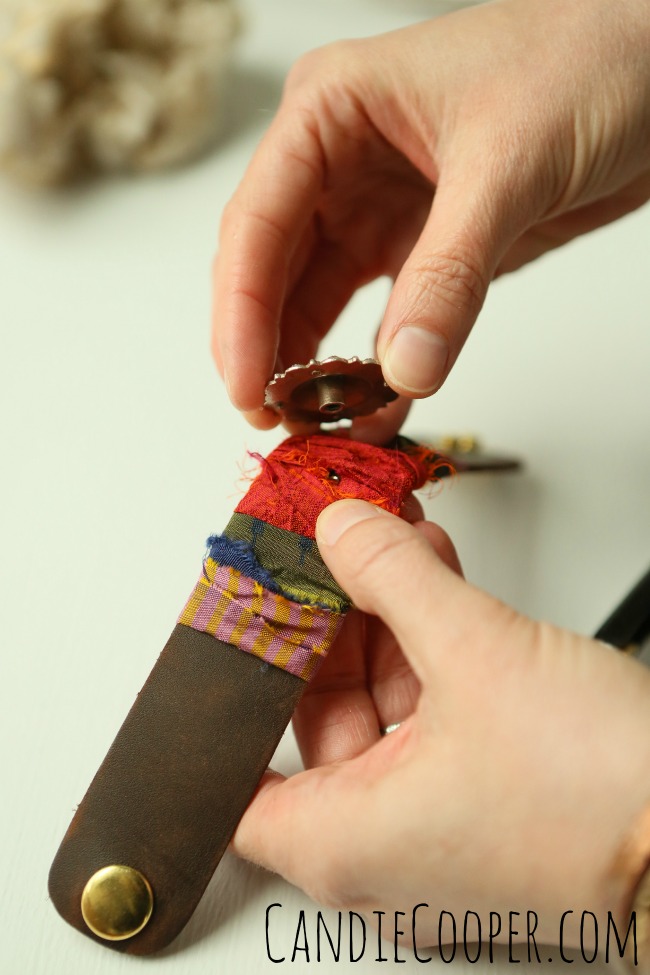
DIY Jewelry Making-  Adding a concho to leather cuffFor a little bit of flare, I’m adding a concho I picked up in Taos.  Did I ever tell you that I went on a road trip with my family across America last summer?  Actually I met them along the way in Albaquerque because I was doing Jewelry Television.   From there, we went to California and back to Indiana.  Basically, I spent 5 days in the car straight with my husband, mom, dad, sister and her kid.  Yeah.  And we still love each other!

The concho has a screw that goes through the leather to attach it.  If you want a permanent bond, you could add epoxy to the screw.

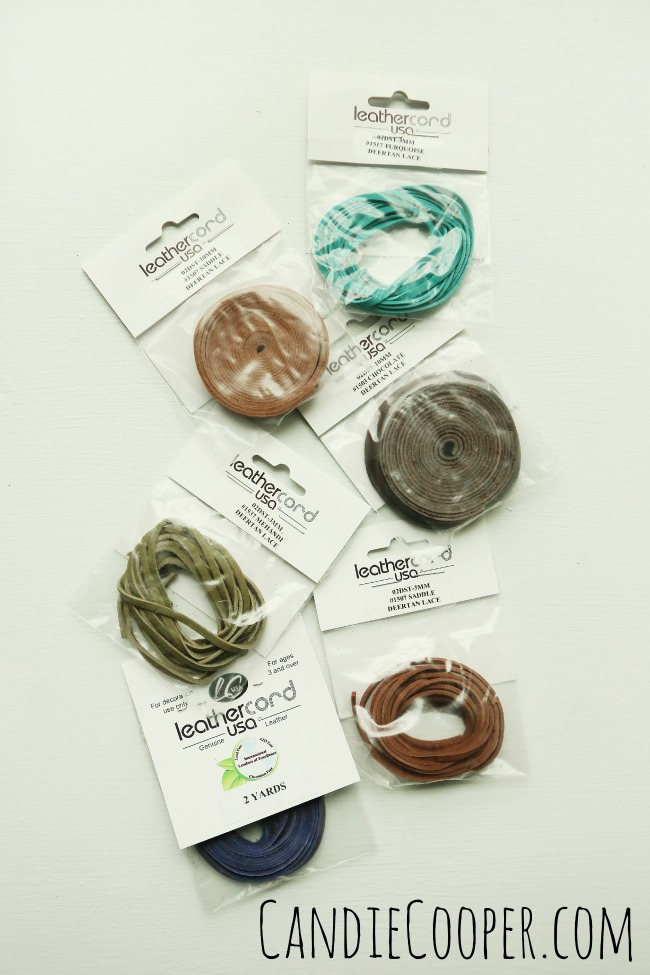
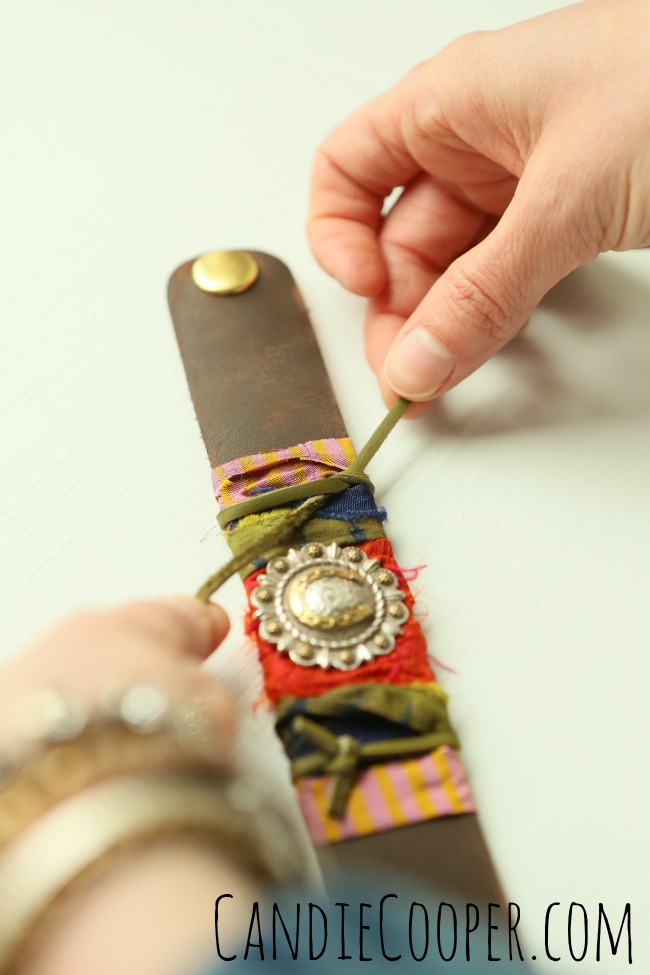
LeatherCord USA deertan lacingTo add a little bit more flare, I added some LeatherCord USA deertan lacing.  This stuff comes in a ton of earthy bright colors as well as various widths.  That’s why I love it.
DIY Leather JewelryYou can knot it like this or knot it on the front and glue the ends on the back like I did for the other cuff.
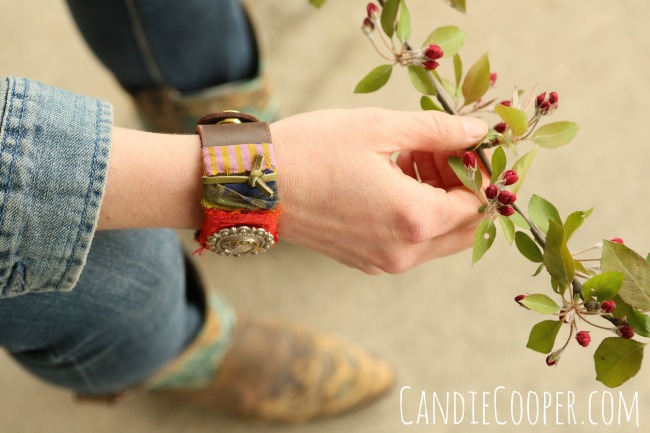
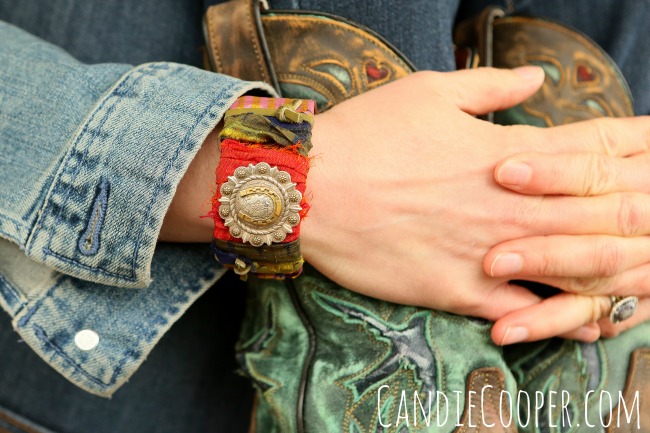
DIY Sari Wrapped leather cuff with LeatherCord USA green lacingI wore this one today with a blue maxi dress and cowboy boots.  Cue Eric Church…
Sari wrapped cuffsHere’s the link to LeatherCord USA cuffs!
DIY Leather Cuff on @candiecooper

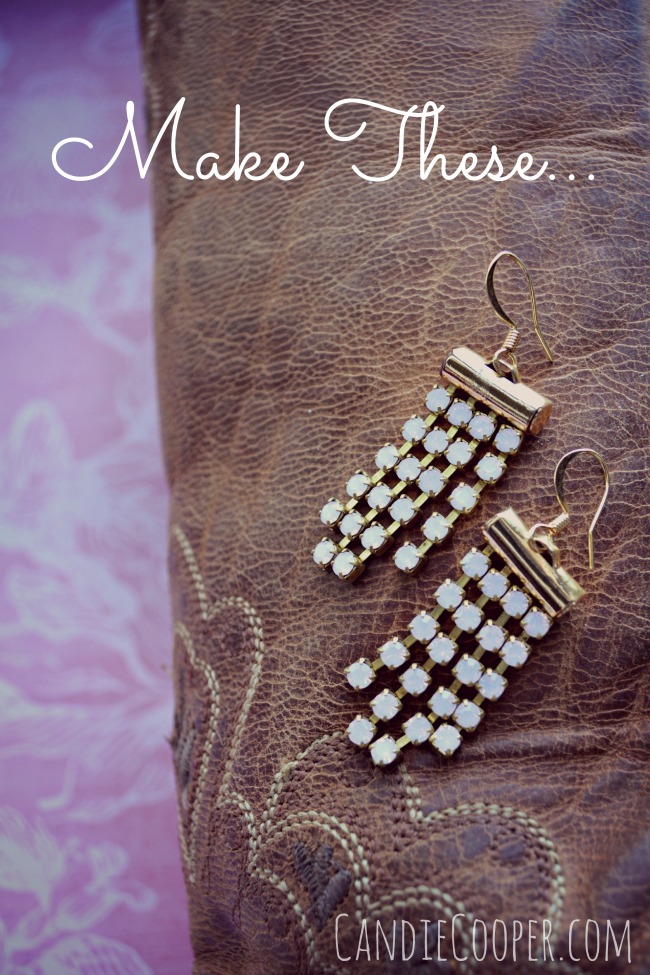
Just For Fun-Rose Opal Earrings

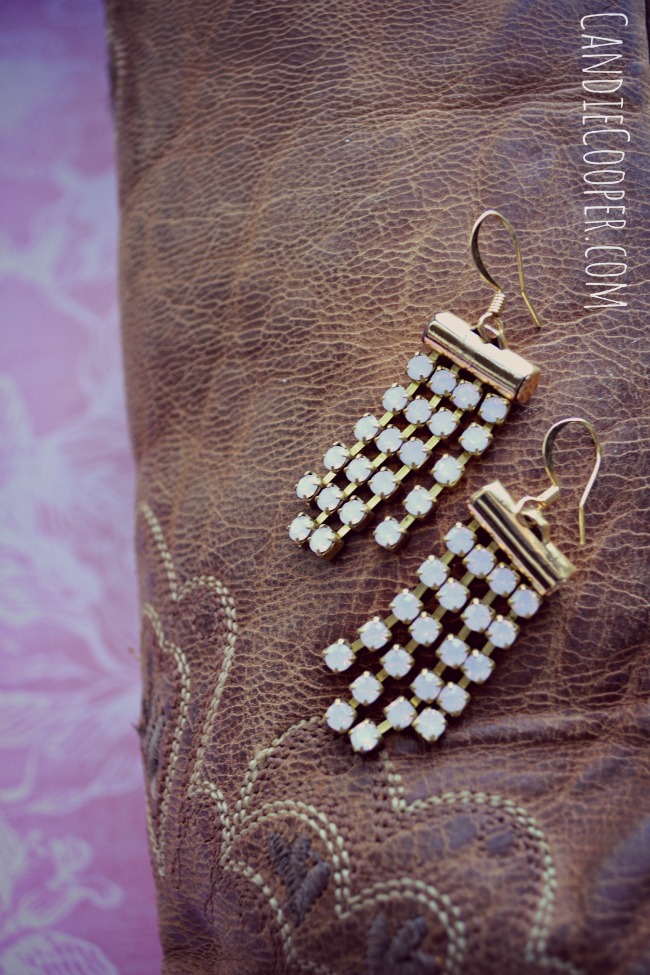
DIY Earrings from @candiecooperYesterday the rain hammered down on the roof.  I did a bit of housecleaning, picked up some nice things to eat for dinner and then surrendered to the couch.  Oprah’s channel was having a “Where Are They Now” marathon.  I’d never seen it, but watch one episode and you’re hooked.  Seven hours later….  LOL  There were lots of other things I could’ve, should’ve been working on, but instead I just spaced out.  I think I was in need of some couch potato time after working the last two weekends.

I feel better.

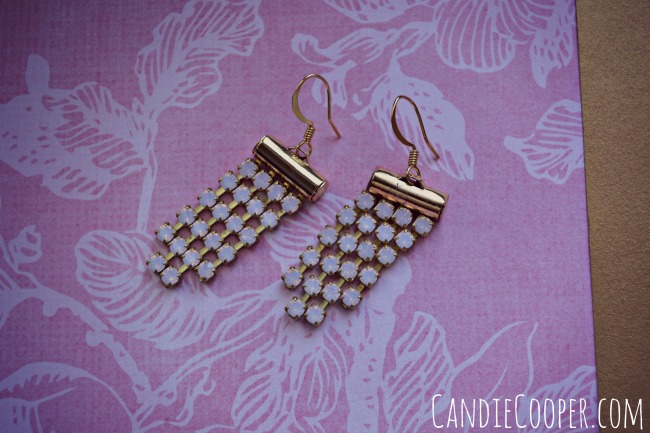
Now about these earrings…  Remember those sparkle statement bracelets I made awhile back?  I made some earrings with the same findings.   SO EASY!  You can whip them up in 5 minutes.  Great for DIY brides and party goers.  This is especially on my brain because I’m off to a bridal shower at noon.DIY Rose Opal Earrings

DIY Sparkle Earrings from @candiecooperMaterials from Jesse James Beads:

TUTORIAL

Rose Opal Chain

1 set 13mm Slide Connectors

Ear Wires

Check out the tutorial bove.  For the earrings, remove the clasp findings from the slide connectors.  Slide in chain and trim to desired length.  Open the ear wire and string the focal piece.

DIY Layering Bracelets with Bracelet Boutique

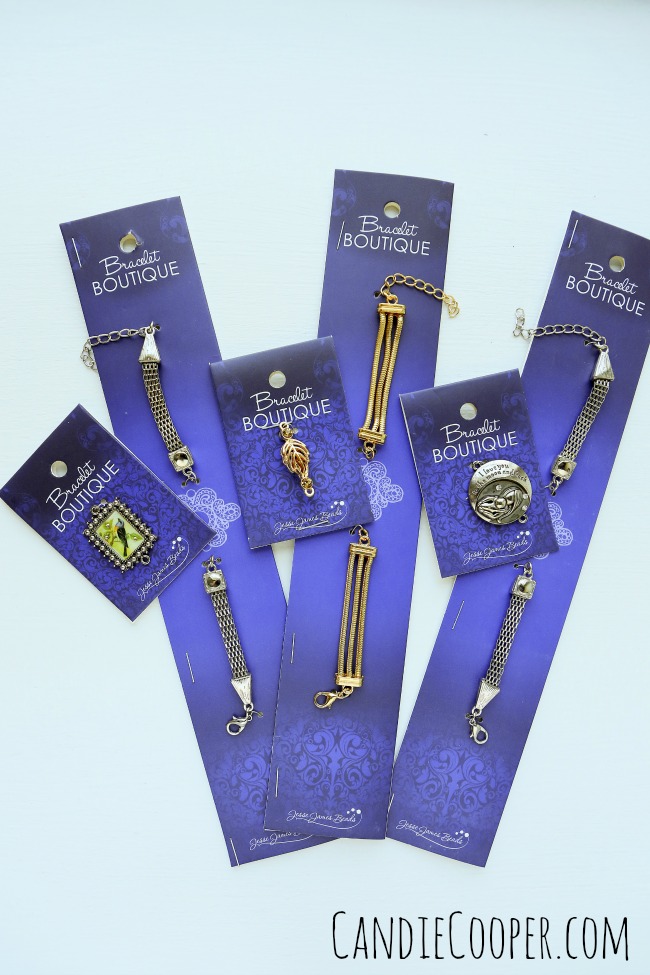
DIY Layering Bracelets with Bracelet Boutique components at Joann FabricsIt’s so exciting to finally share a project I’ve been working on with Jesse James Beads called Bracelet Boutique.  We started collaborating on it a year ago and I’m thrilled to say it’s available in Joann Fabrics stores now (direct links at the bottom of this post).Bracelet Boutique available at Joann Fabrics storesBasically, this is a 1 + 1 program where you can make a bracelet that suits your style in seconds.  Great for beginners, girls night out activities, and seasoned makers can use the components in different applications such as links, earrings, macrame’ focals and so on.

There are 42 focal pieces with 10 different bracelet options which makes for 420 combinations.

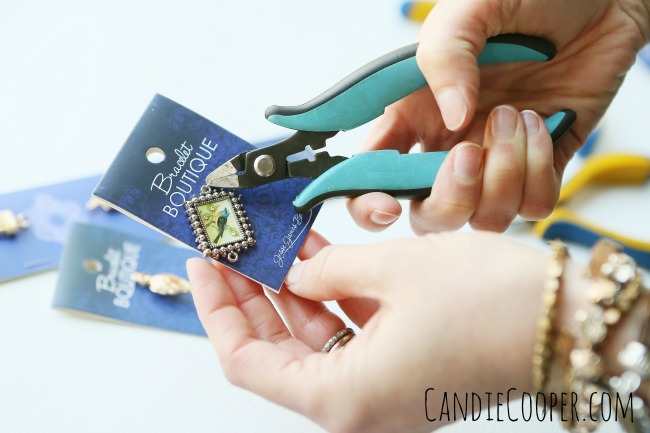
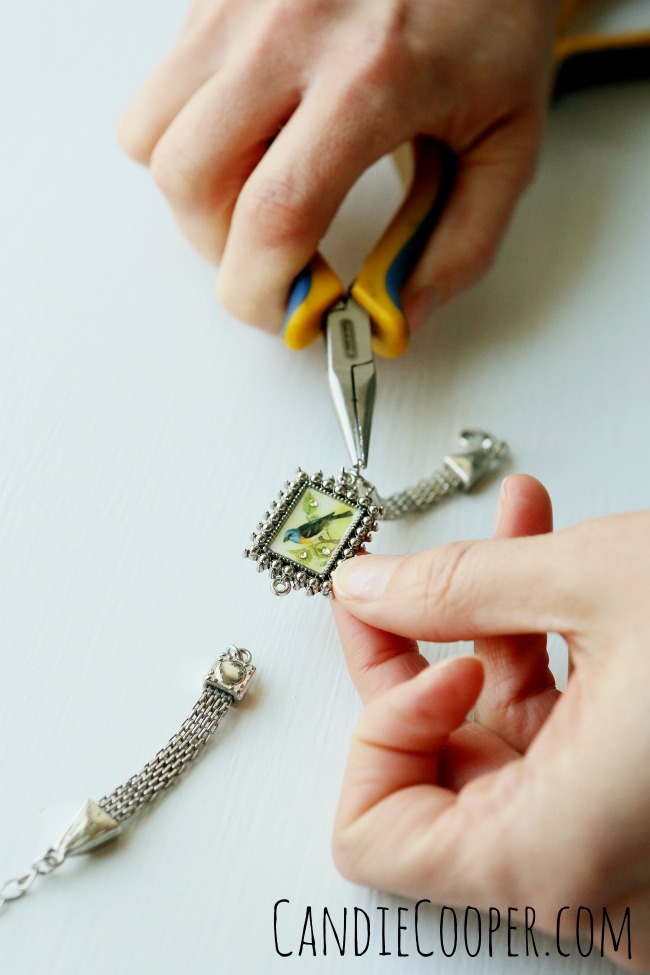
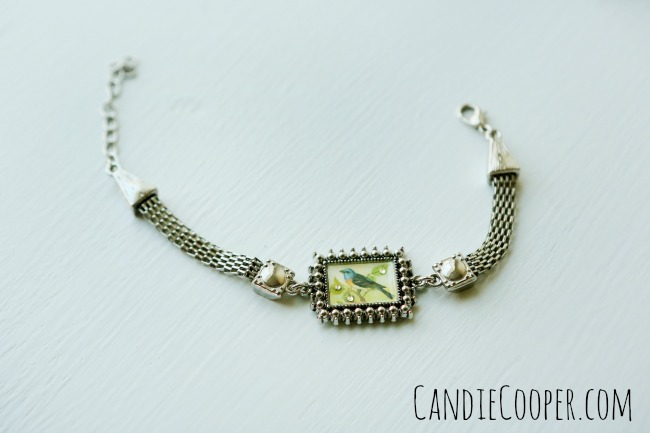
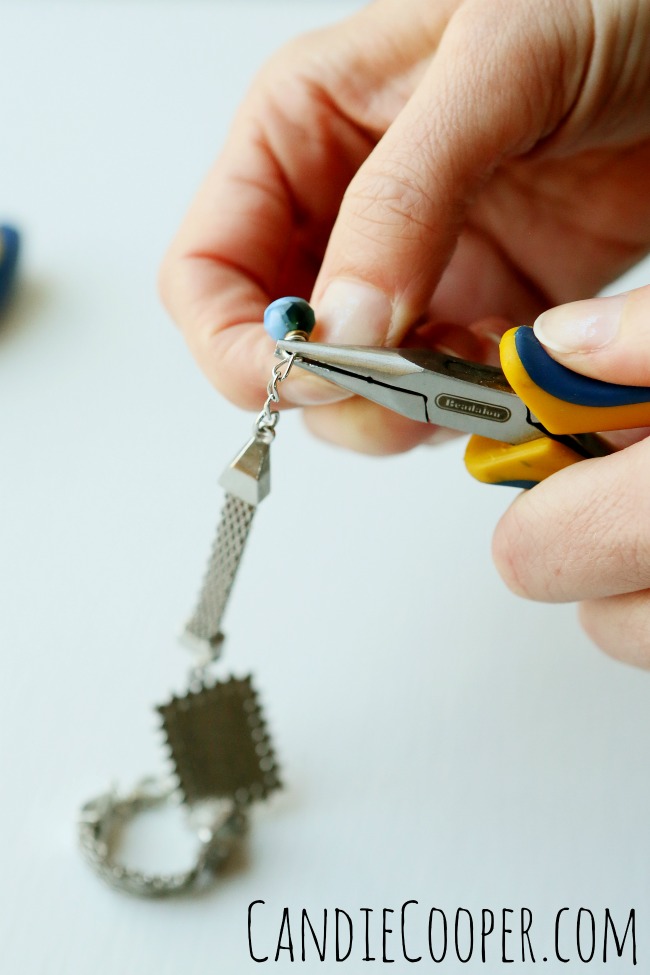
Picture me doing the Roger Rabbit dance move.DIY Jewelry Making with Bracelet Boutique from Joann FabricsFor Easter, hubs and I picked out some bracelet pieces to make our moms.  This is the first one I’ll show you.  It’s a bird image with tiny crystals set in the resin.  DIY Jewelry Making with Bracelet Boutique from Joann FabricsAll you have to do is open the jump ring and attach the bracelet sides.  Everything you need to make the bracelet is included.DIY Layering Bracelets  Bracelet Boutique at Joann FabricsYou can leave it like this or….DIY Jewelry Making Clasp embellishmentattach a dangle to the extender for a little clasp embellishment.
Bird Bracelet component from Bracelet Boutique and @jessejamesbeadsIt’s that easy!  You can make bracelets to match your other handmade jewelry in a snap.

Bracelet Boutique is on a skinny tower in Joann Stores now.  Look for the blue cards!  DIY Layering Bracelets using Bracelet Boutique at Joann FabricsThe paisley with brown cord bracelet is also part of the Bracelet Boutique collection.  Happy day!

MATERIALS:

Bird Link

Bracelet Links

How to Make Tassels

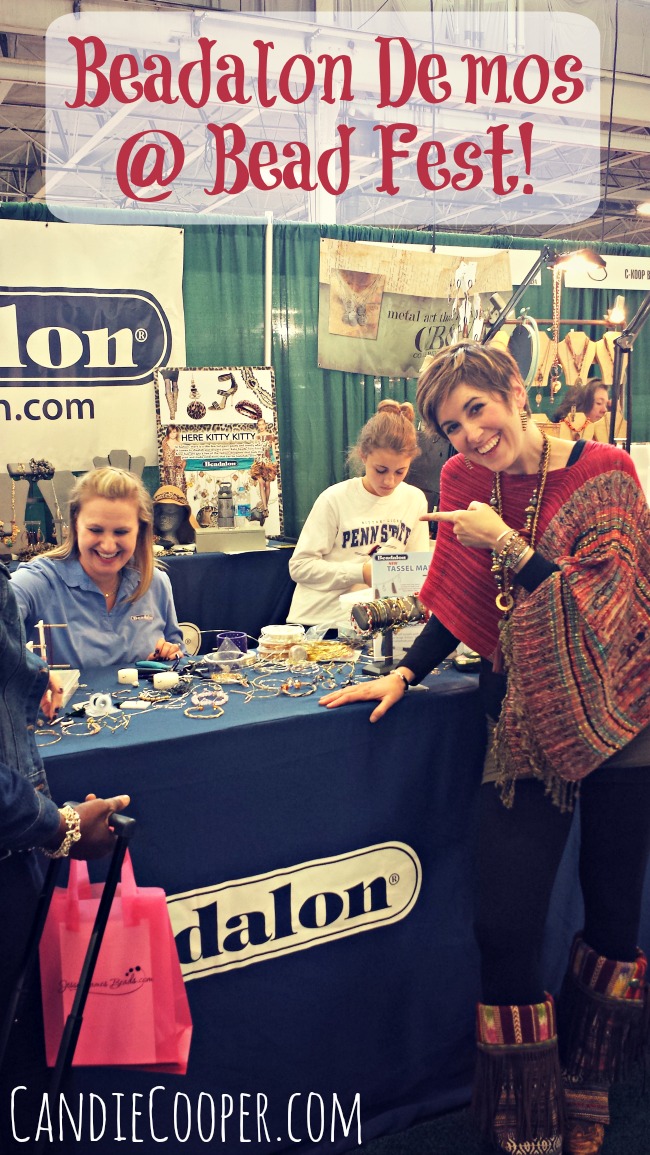
This post brought to you by Beadalon!Beadalon Break 2015-a week full of DIY Jewelry Making  tutorialsI spent the last day of Spring Beadalon Break at Bead Fest in Oaks, PA!

Guess what?  Beadalon was there too!

Meredity Roddy of Beadalon with Candie CooperSo I got an up close look at their new Tassel Making Tool!  This thing is great for jewelry makers and crafters.

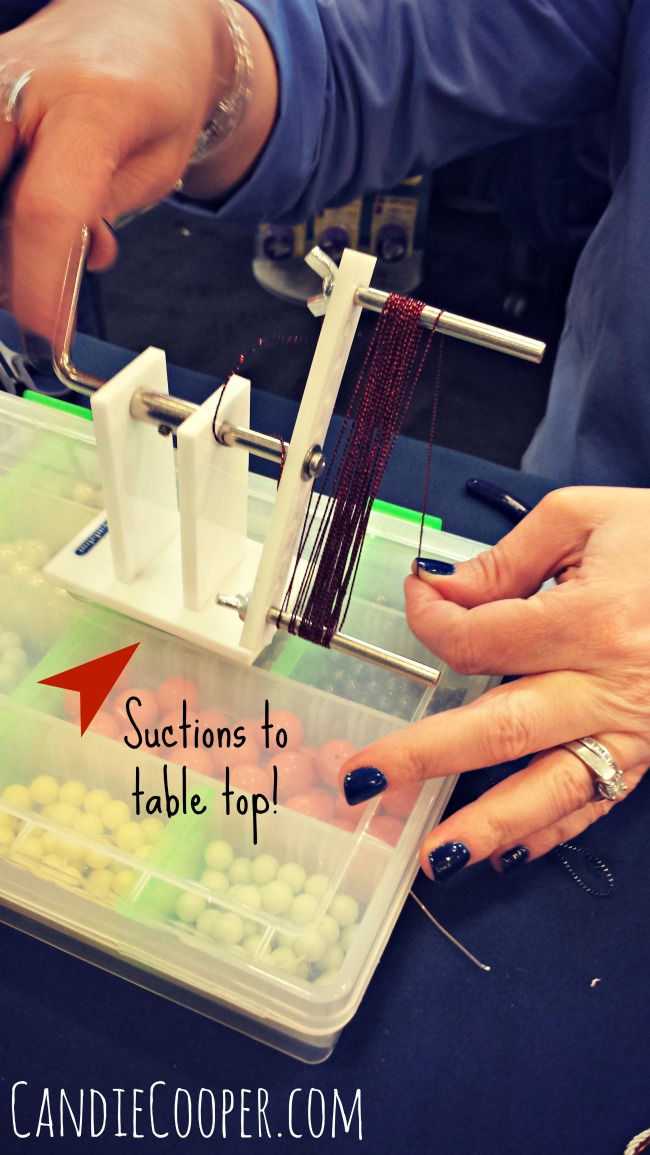
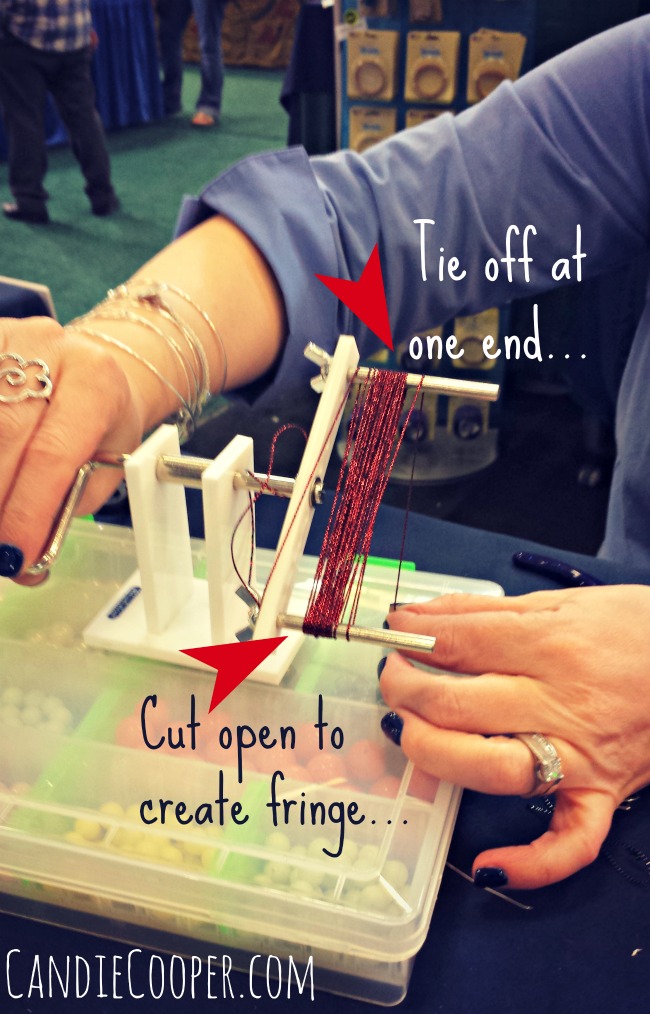
I put Madeline Roddy on the spot and asked her to walk me through tassel making basics with the tool.  It was super easy! Watch and see…Beadalon Tassel MakerSuction the tool to your work surface.  I think we all have a bead box (or 75 laying around) that we can stick this thing too like Meredith did.Tassel Maker from BeadalonWind the desired amount of cord (check out this twinkle thread from Beadalon) around the two mandrels.  You can change the distance to make shorter fringed tassels (or make them long and custom cut the length).  When you have enough cord wound, thread a short piece of cord through the wound threads and tie off next to the mandrel.

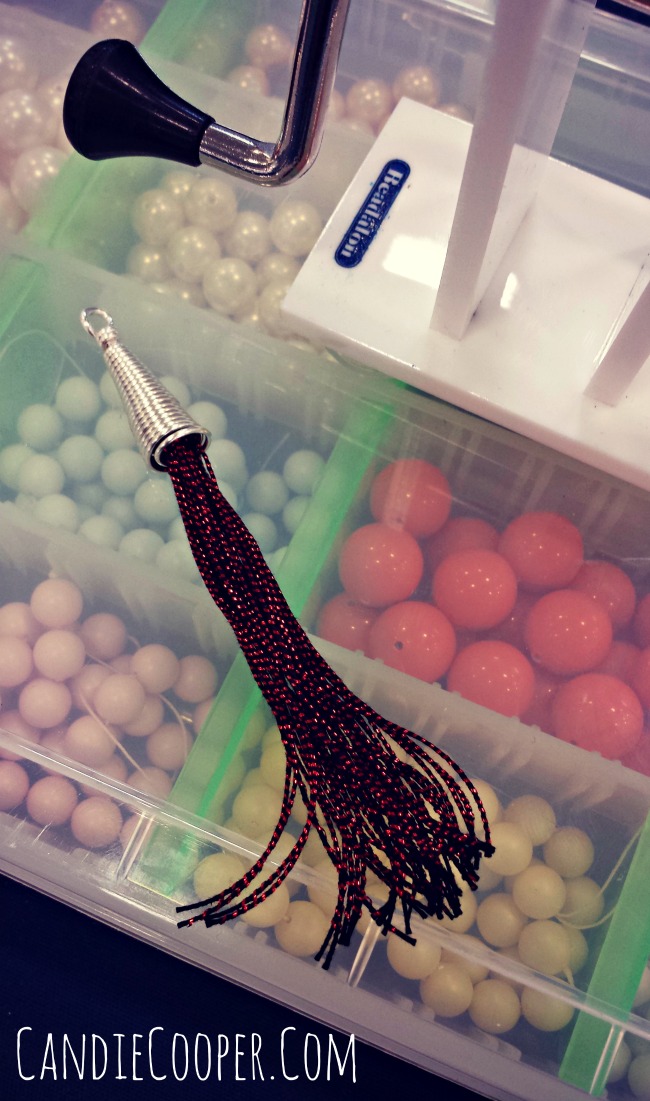
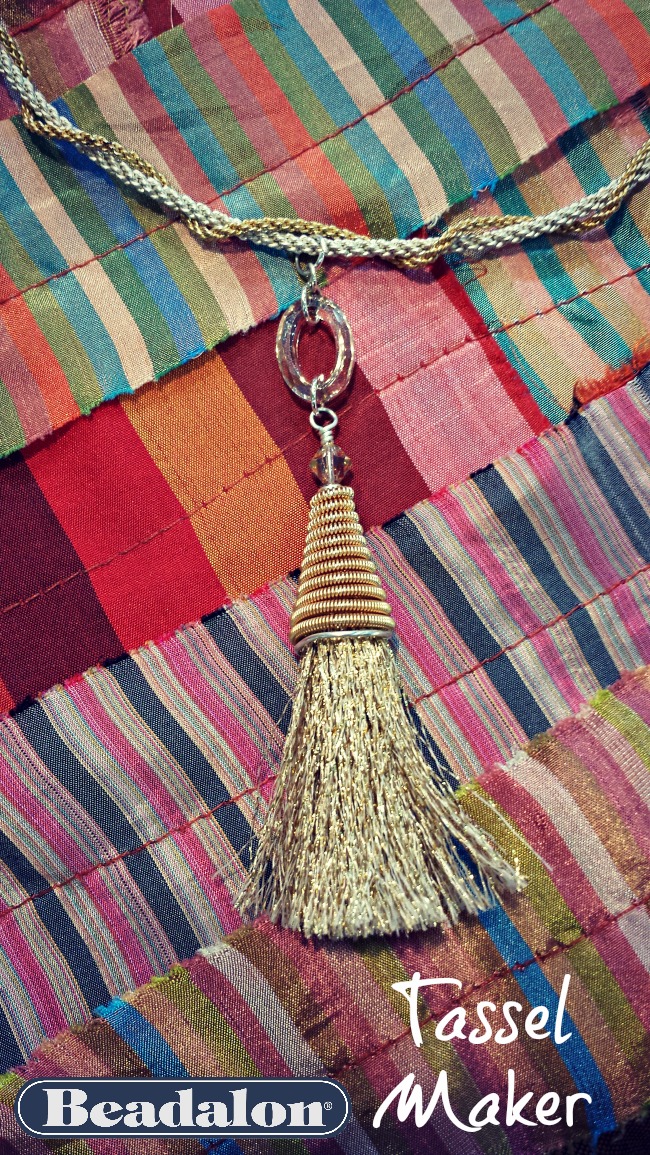
Cut the bottom cords open next to the mandrel.How to make tasselsNow you can hook the tied piece to an eye pin and thread it through a bead cone to give it a nice finished look.  This bead cone was made with the ConeTastic.Tassel Jewelry Idea with Beadalon's Tassel MakerCheck out this fancy pants tassel piece I spotted in the Beadalon booth.  So pretty with the metallic thread!

Here is a video of the Tassel Maker from Beadalon so you can see it fully in action!

Beadalon Bracelet Jig Stretch Bracelet Part II

Beadalon Break 2015-a week full of DIY Jewelry Making  tutorialsGreetings Day Fivers!

Where has the time gone?  So in the last post, I showed you Beadalon’s new bracelet jig tool.  Now let’s turn that piece into a bracelet topper.
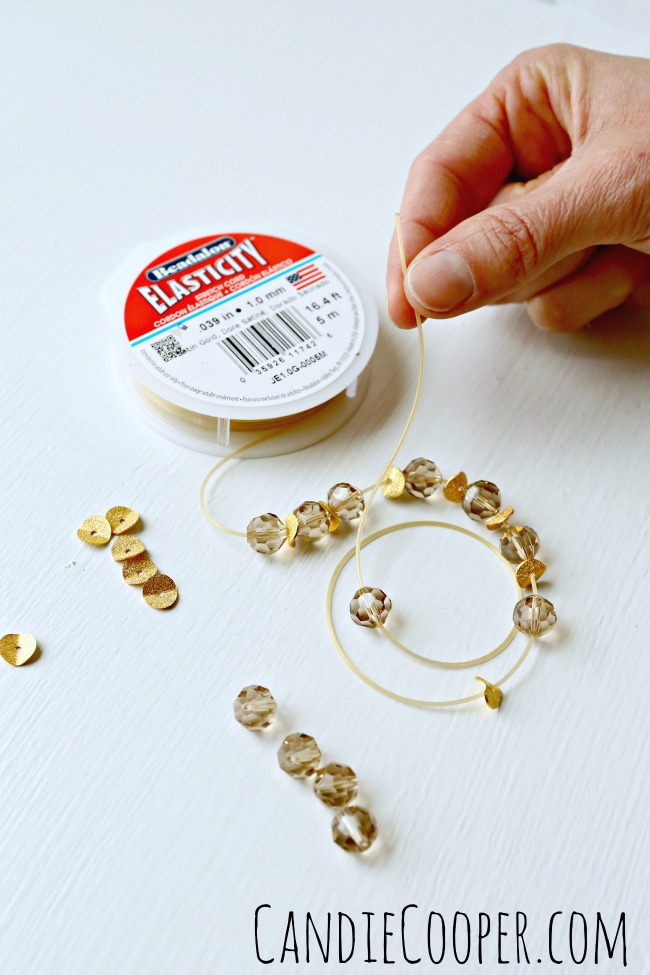
Finish the end with wrapped loopsWhen you pull the piece from the bracelet jig, you’ll have something like this.  Finish the ends with wrapped loops.Making stretch bracelets with Beadalon ElasticityFor the back end of the bracelet, I strung a section of topaz colored glass beads with brass spacer beads (easy!) in an alternating order.  By the way, I’m using Beadalon’s 1mm Elasticity, because I like the thickness, but they do have a smaller size just in case.
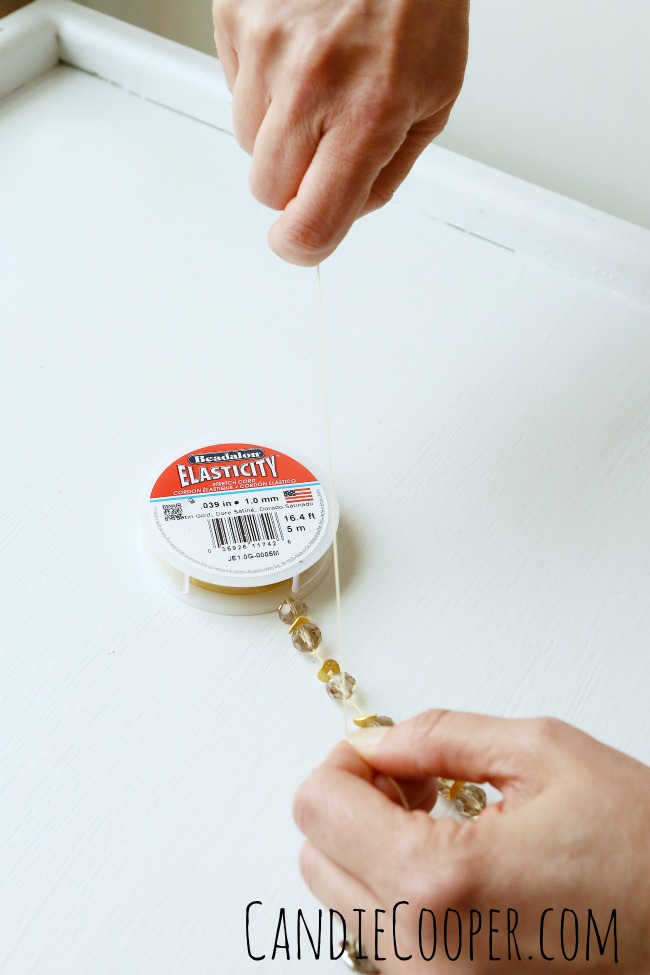
how to tie beading elasticDon’t forget to pull and stretch your elastic to break it in a bit.
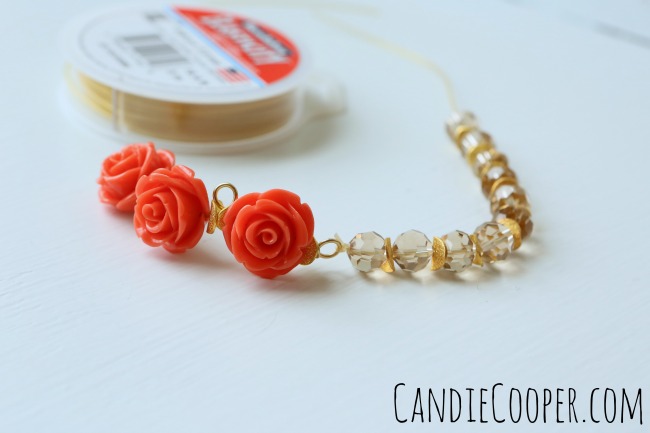
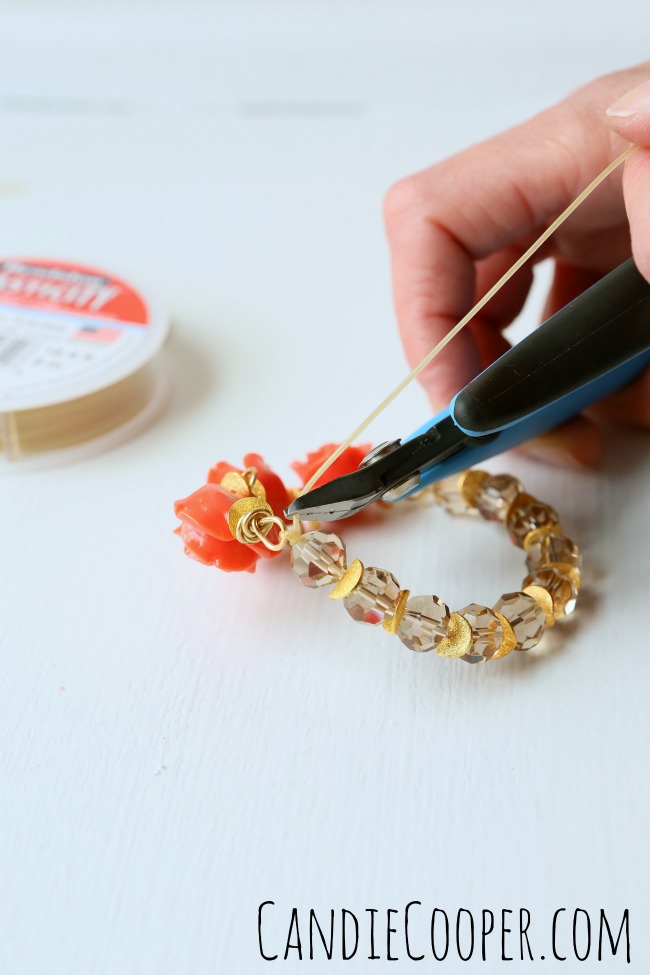
Elasticity beading elasticKnot one end of the Elasticity to the bracelet topper.  I really love using the same color of Elasticity as the wire–blends right in! Trim the Elasticity from the spool, leaving a couple inches to tie the other side.
Cut the elasticTrim the extra Elasticity away, leaving about an 1/8th inch and dot the knot with nail polish.
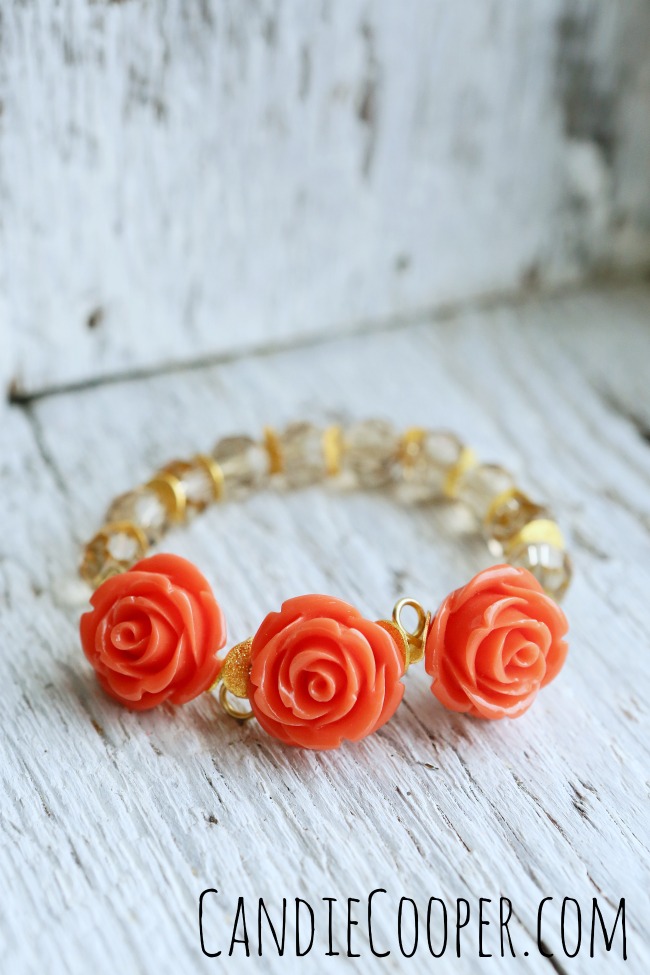
Beadalon Bracelet Jig stretch braceletThe loops from the bracelet jig make a perfect place to connect bead dangles and charms if you like.  For me, I enjoyed the simplicity of this and the dainty flowers.
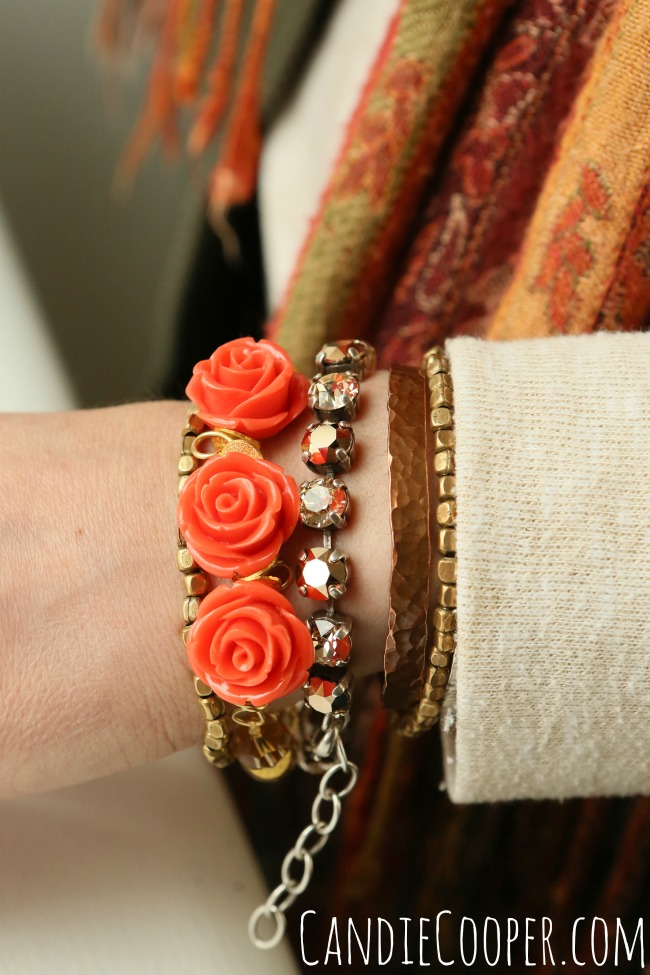
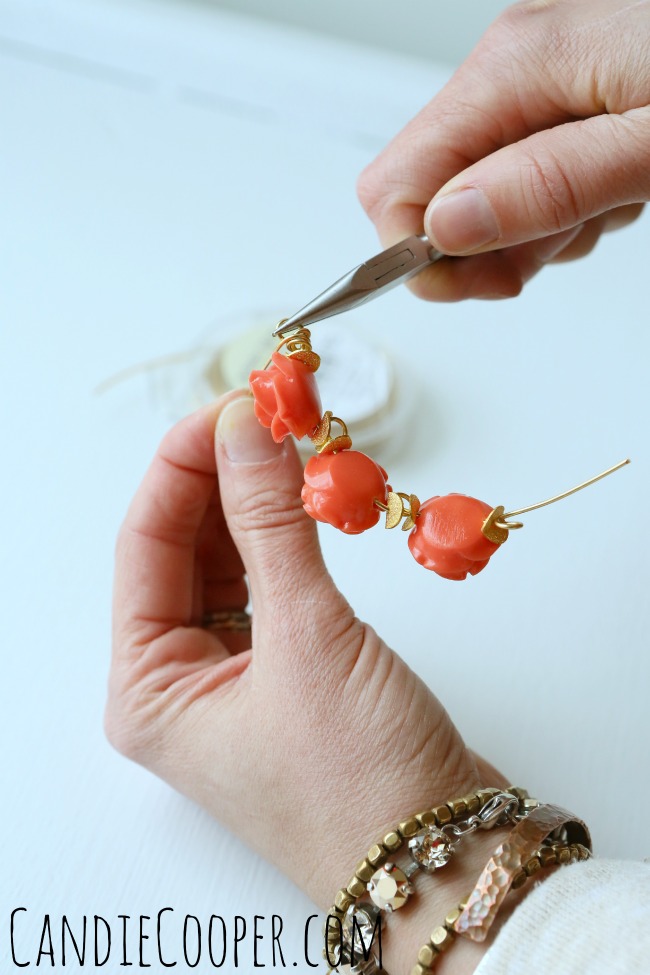
Speaking of, these acrylic flower beads are popping up everywhere at Bead Fest Spring. Hello spring, we’re glad you’re here!!
Stretch bracelet with Beadalon Bracelet Jig

Beadalon Bracelet Jig Idea

Beadalon Break 2015-a week full of DIY Jewelry Making  tutorialsDayyyyyyy FIVE of Spring Beadalon Break!

I have been helping with set up of the Jesse James Beads booth at Bead Fest Spring since 9AM today.  Where does the time go??  I will be teaching 10 classes at this Bead Fest.

No pressure.

(yeah right!)

It’s pouring right now–a good day for ducks, as my dad  says!

And to test drive the new Beadalon Bracelet Jig!

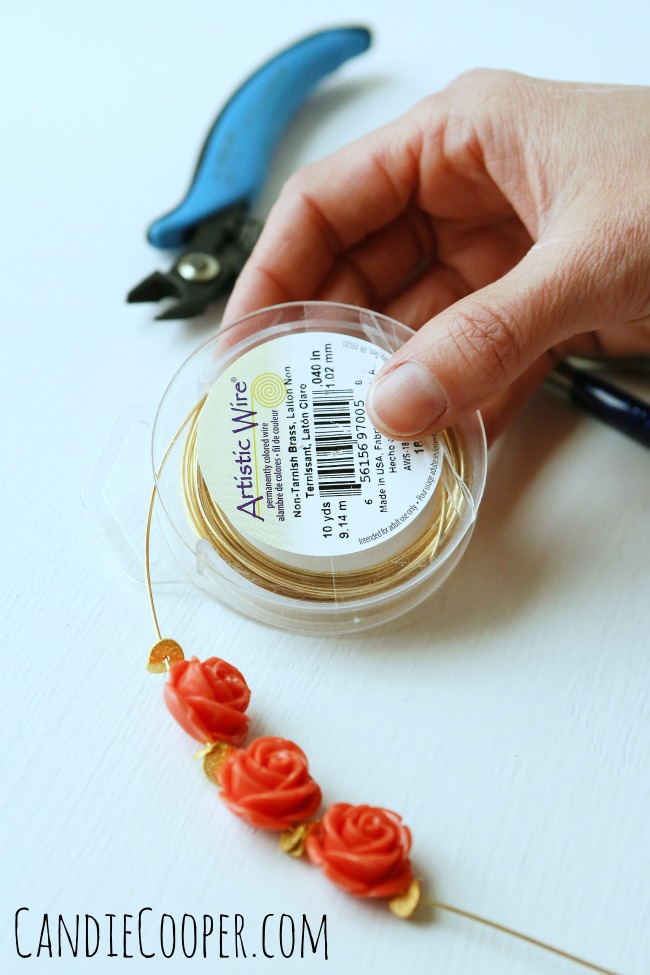
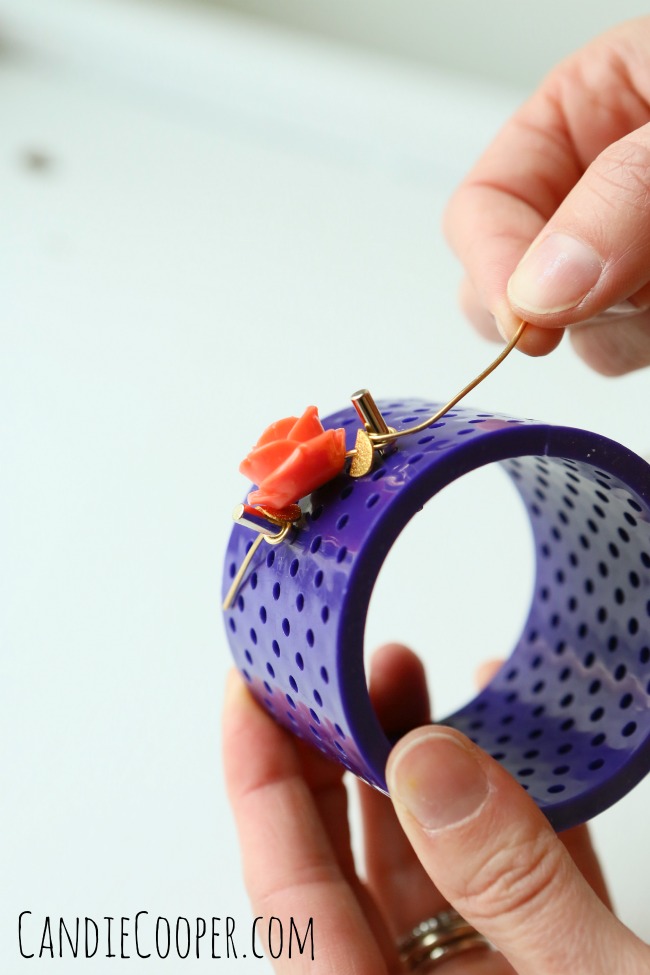
Beadalon Bracelet Jig Project from Candie CooperI’m doing this post in two parts.  For the first part, you’ll need the Beadalon Bracelet Jig, basic plier set plus some bead strands.Using Artistic Wire with the Bracelet JigString the beads onto 18g. Artistic Wire. Wire Working in Jewelry MakingNext, wrap your wire around the first peg on the jig, slide the bead(s) into place, put a peg in next to them and wrap the wire around it.

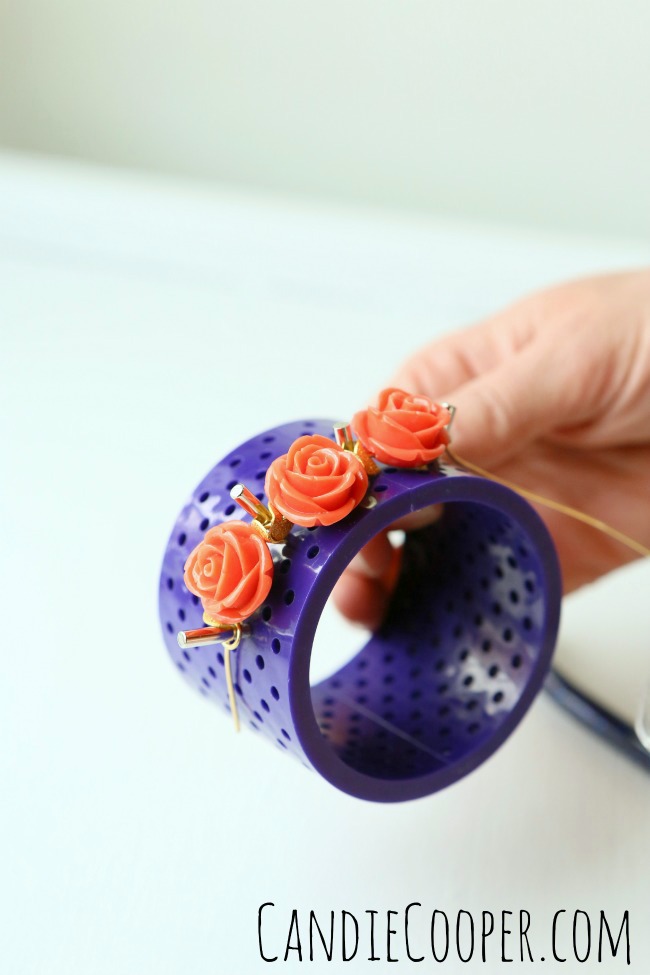
Beadalon Bracelet JigKeep going, adding a peg and wrapping after each flower for a total of 3 (but you could use more!).

Stay tuned to see how I use my Bracelet Jig focal piece.

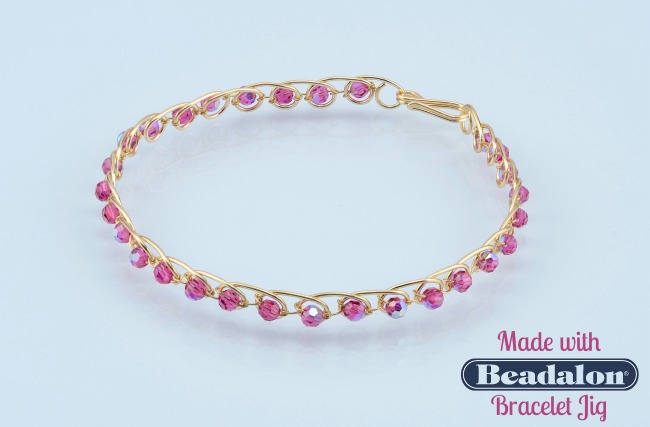
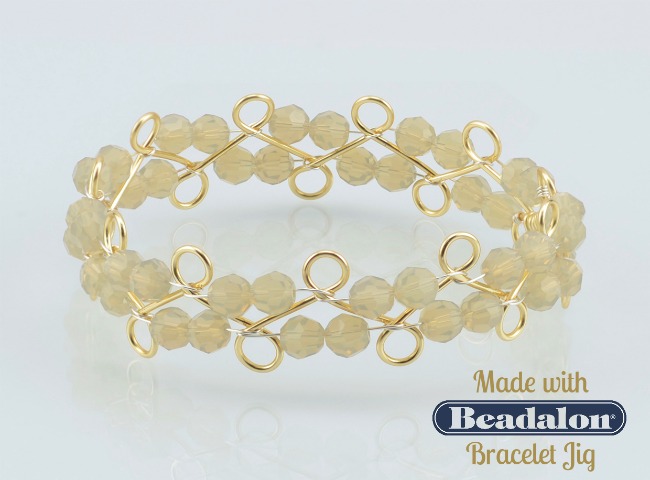
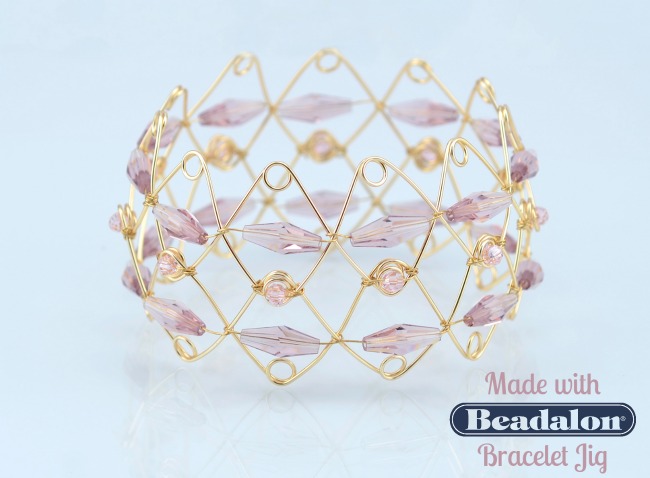
In the meantime check out some of the bracelets below made by Meredith Roddy and Wyatt White at Beadalon!

Candie <3

P.S. In love with those rose beads?  Get your own from JesseJamesBeads.com!DIY Bangle Bracelet Making with Beadalon Bracelet Jig

DIY Bracelet Making

Bangle Bracelet made with Beadalon Bracelet Jig

Aluminum Fabric Earrings

This post brought to you by Beadalon!Beadalon Break 2015-a week full of DIY Jewelry Making  tutorialsDay 4, Party People!

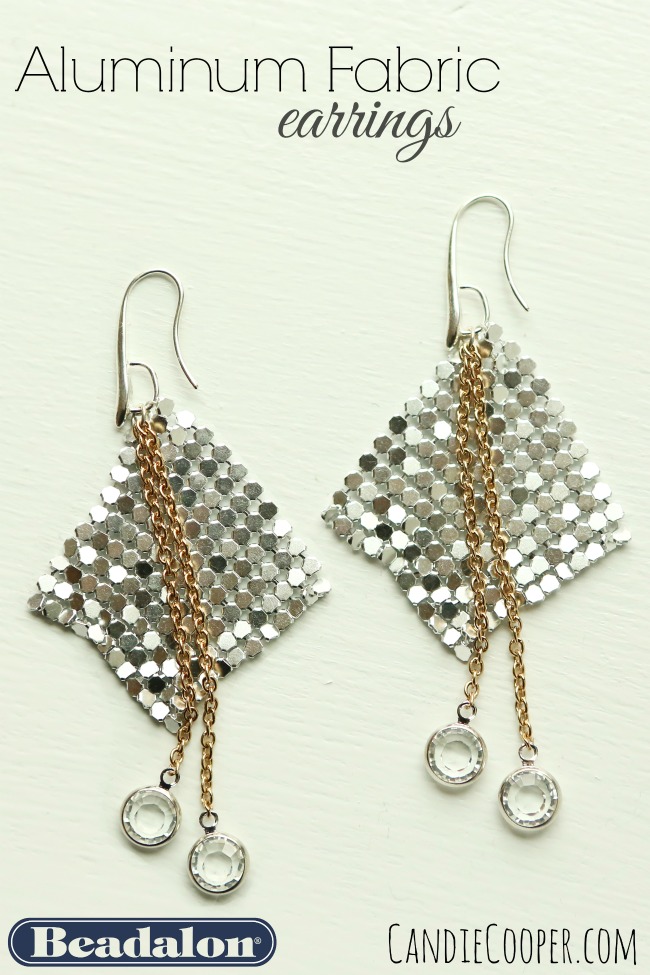
And that calls for some earrings that are ready to party!  Or go to work.  I like them for both!Aluminum Fabric EarringsOh hey gold and silver.  It’s Candie calling.  Wanna hang?

Sorry,

for the pun.

This girl can’t help herself!
Earring making with Beadalon findings

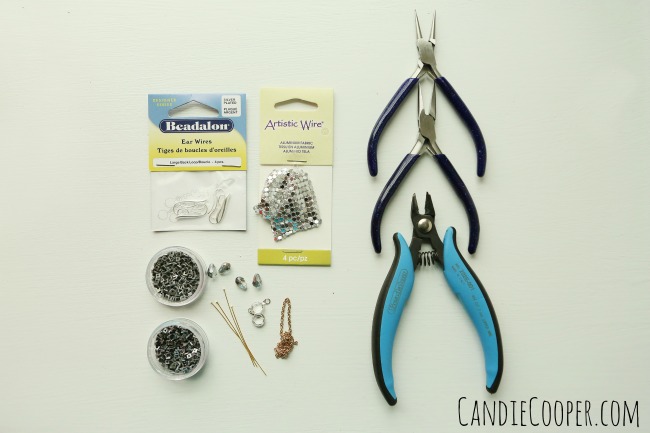
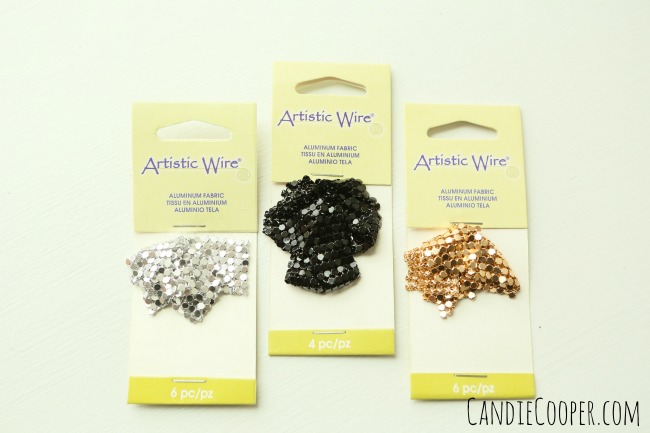
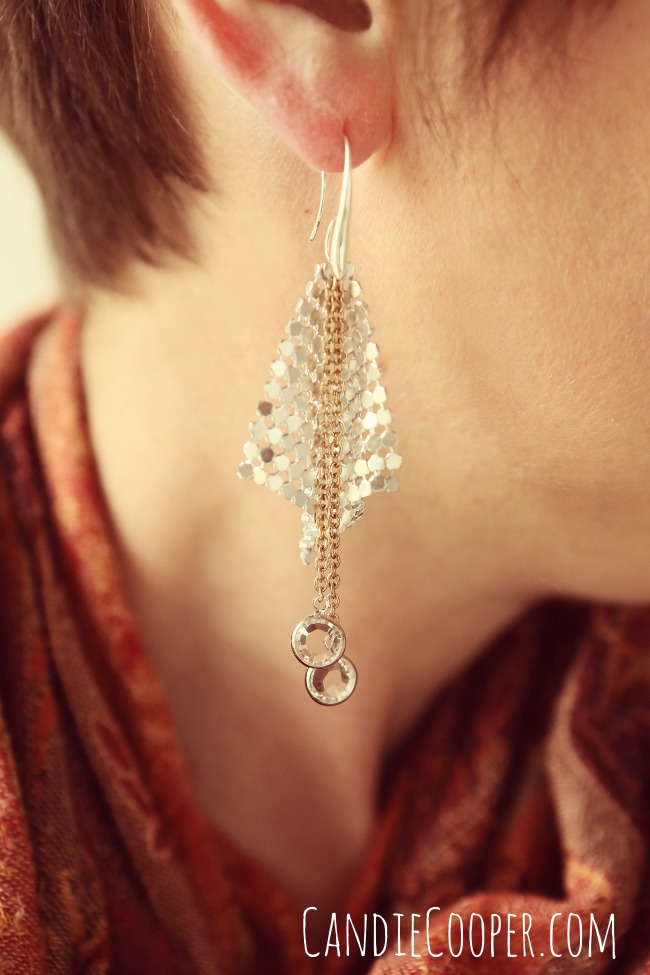
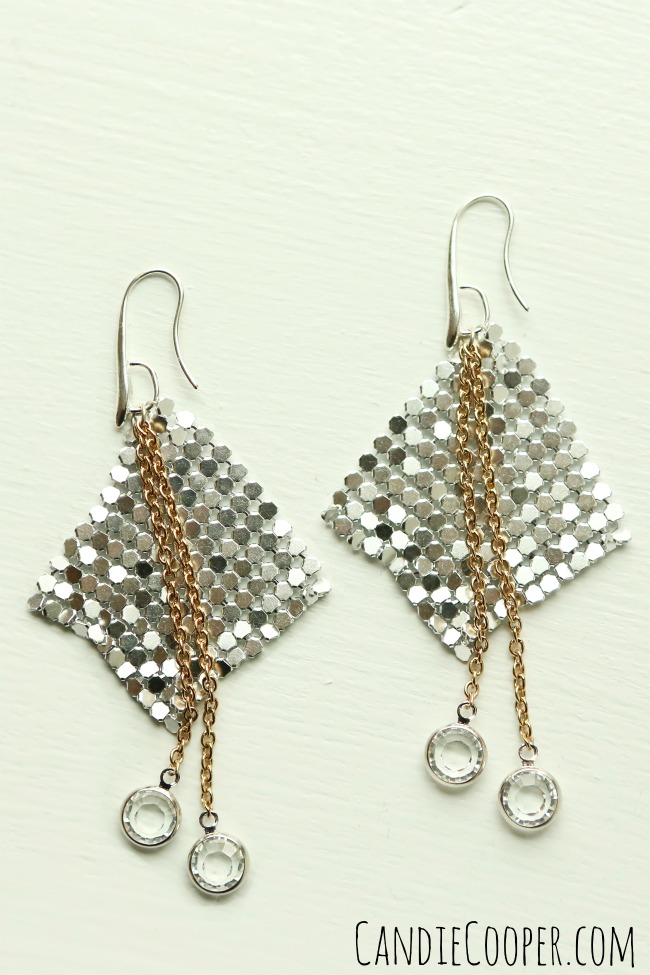
These earrings are super simple (it is hump day after all) to make.  I used two pieces of Beadalon Aluminum Fabric, Swarovski crystal charms,  a few inches of chain and some cool ear wires from Beadalon.Artistic Wire Aluminum Fabric From BeadalonAluminum Fabric comes in 3 different metal colors as well as sizes.  I’m using the squares.  It is super flexible and really does drape and fold like fabric.

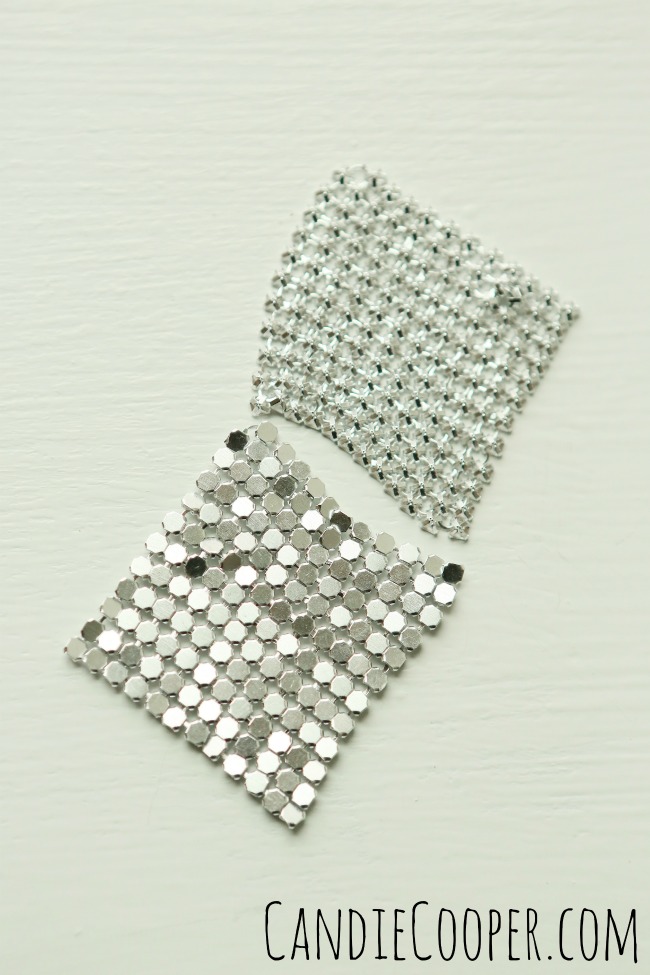
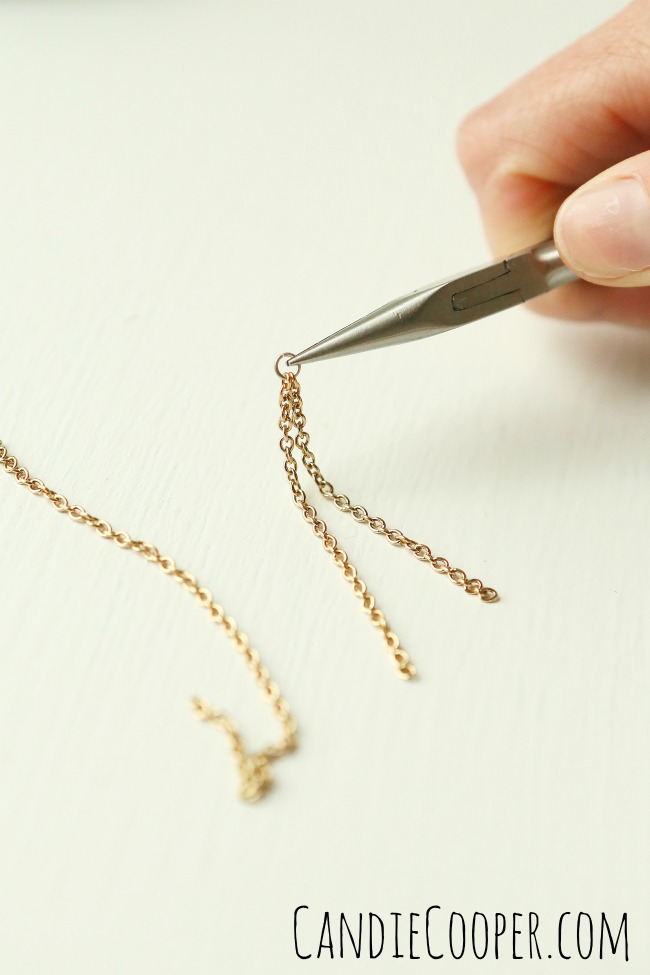
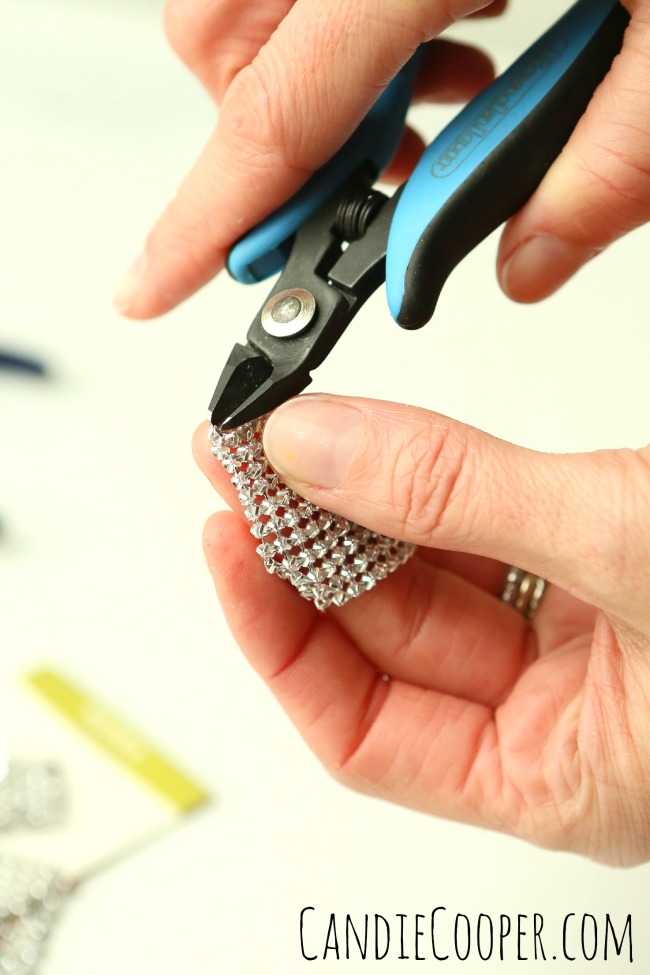
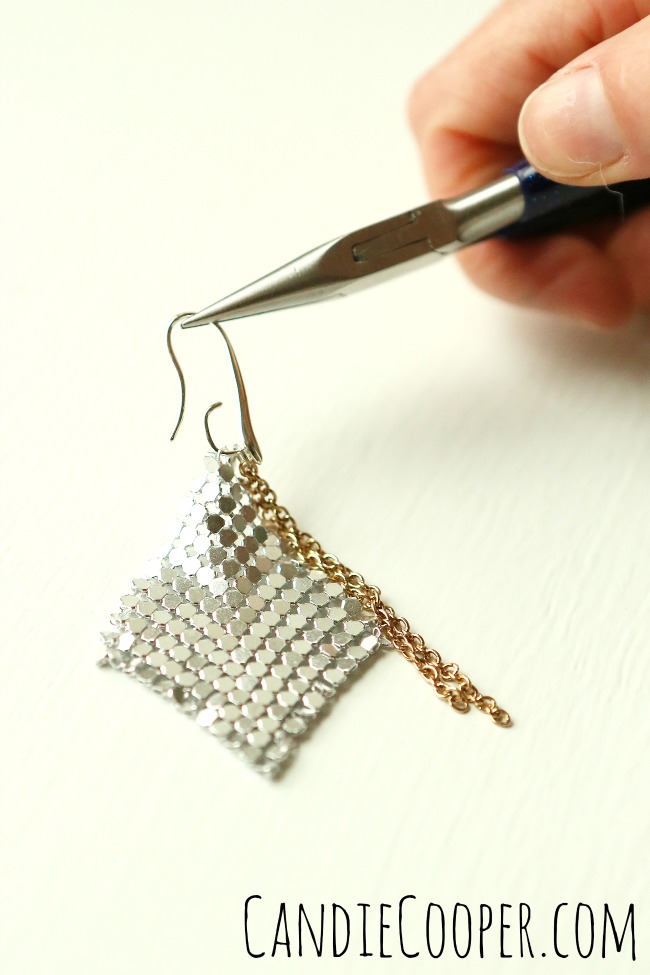
On another note, you’ve probably noticed gold is trending right now and I think you’ll love the warm tone of the gold Aluminum Fabric.  Aluminum Fabric by BeadalonI was looking at this Aluminum Fabric and noticed the back side (on right) is just as cool as the front.  It could be extra nice embedded in resin jewelry or with tiny flat back crystals .Attaching chains with a jump ringCut a couple pieces of chain so they are offset and attach to a tiny jump ring.Aluminum MeshRemove the corner piece of Aluminum Fabric, leaving only a ring where it will hang from.
Easy Earring idea with Beadalon Aluminum Fabric and Swarovski CrystalsHang the pieces of chain and aluminum fabric onto the ear wire.  I love these ear wires because the connection point is hidden. so it gives a really nice finished look.

Also, look how many things you could hang on the loop?!  The wheels are turning…  Stack em’ up!Easy and Sparkly Earring Idea on Candie Cooper's Blog

Aluminum Fabric EarringsI’m ready to hit the dance floor! Who’s with me??

Easy Necklace Making

This post brought to you by Beadalon!Beadalon Break 2015-a week full of DIY Jewelry Making  tutorialsDay 3 of Spring Beadalon Break and I wanna here a heck yeah if you love easy jewelry making!

Picture me “raising the roof”…from Candie Cooper's DIY Jewelry Making Blog
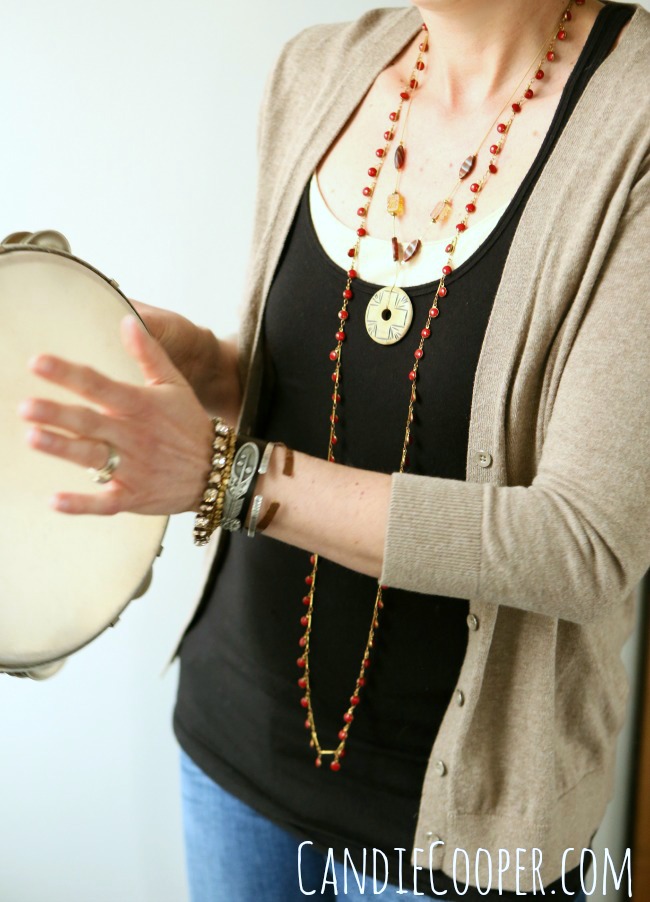
Or playing a tambourine?

Don’t ask.

But, I know you’re curious…


My mom and I share a creative space in which she has a small music studio and sometimes when she’s not there, I use her instruments as props.  That’s all.

Ok, let’s get to it!
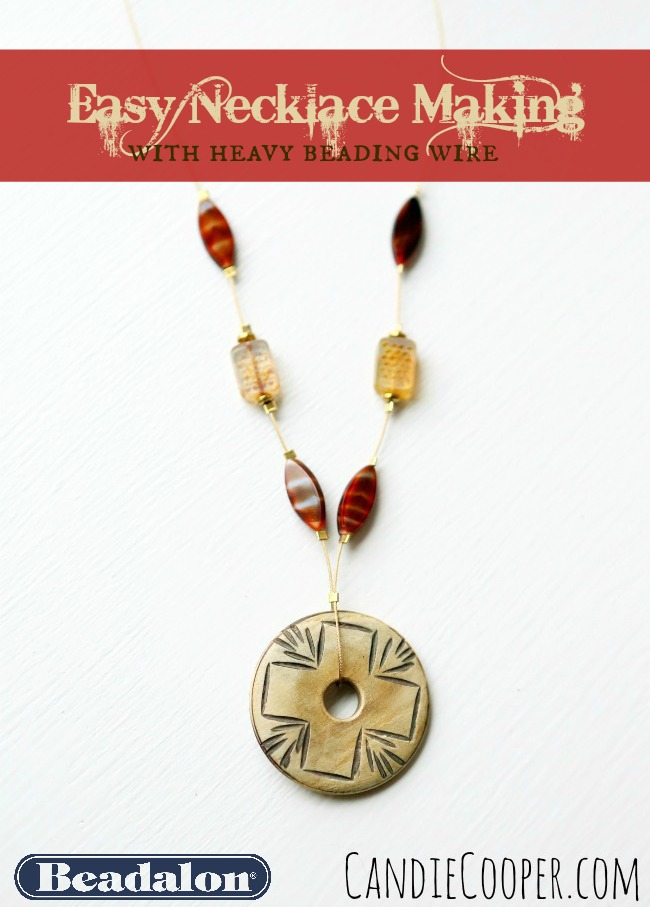
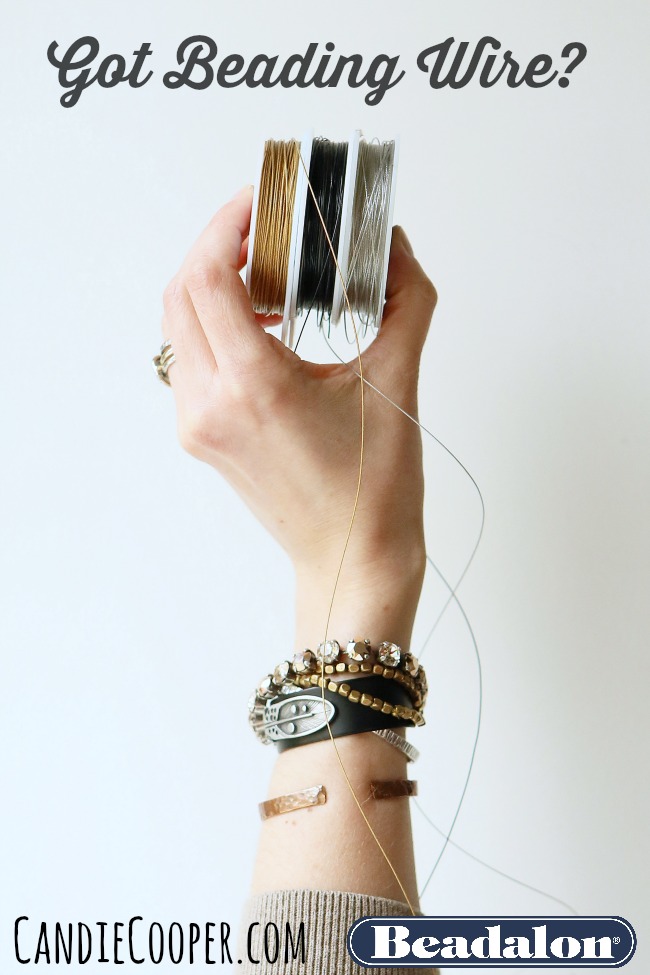
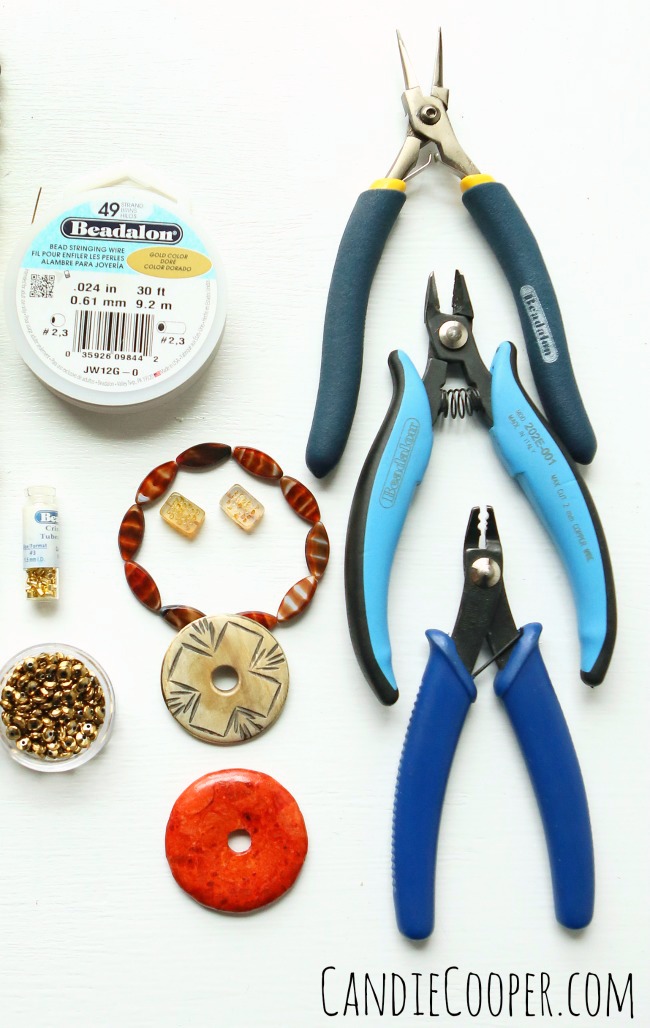
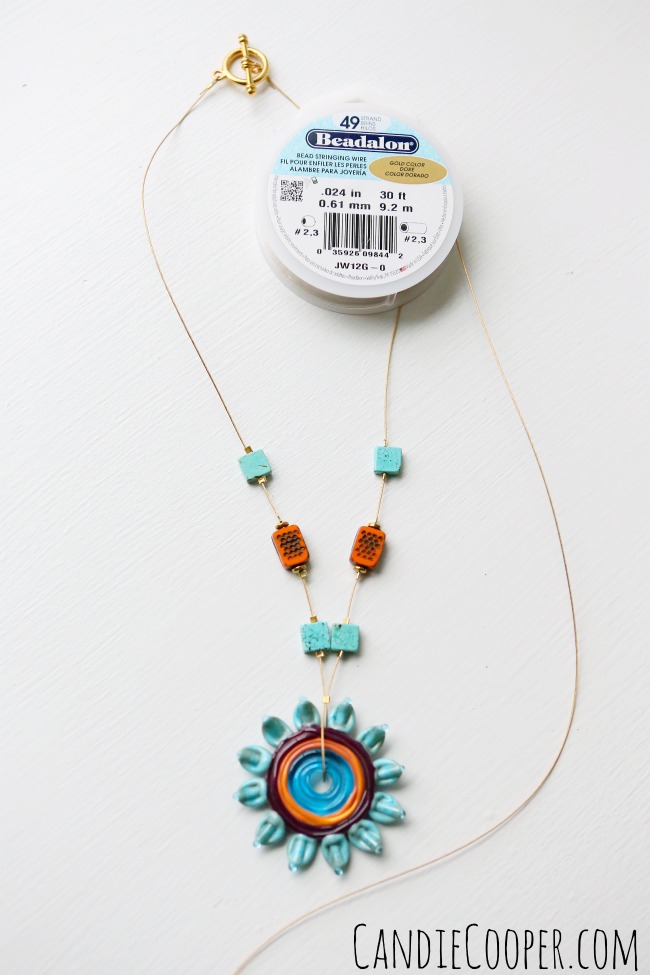
Easy Necklace Making IdeaRecently Beadalon sent a spool of their .024 diameter 49 strand gold beading wire for me to try out and let me tell you—I’m in LOVE!  It’s so thick and glorious.  It looks amazing all by itself!Beadalon .024 Diameter Nylon Coated  Beading WireIt comes in different colors too!

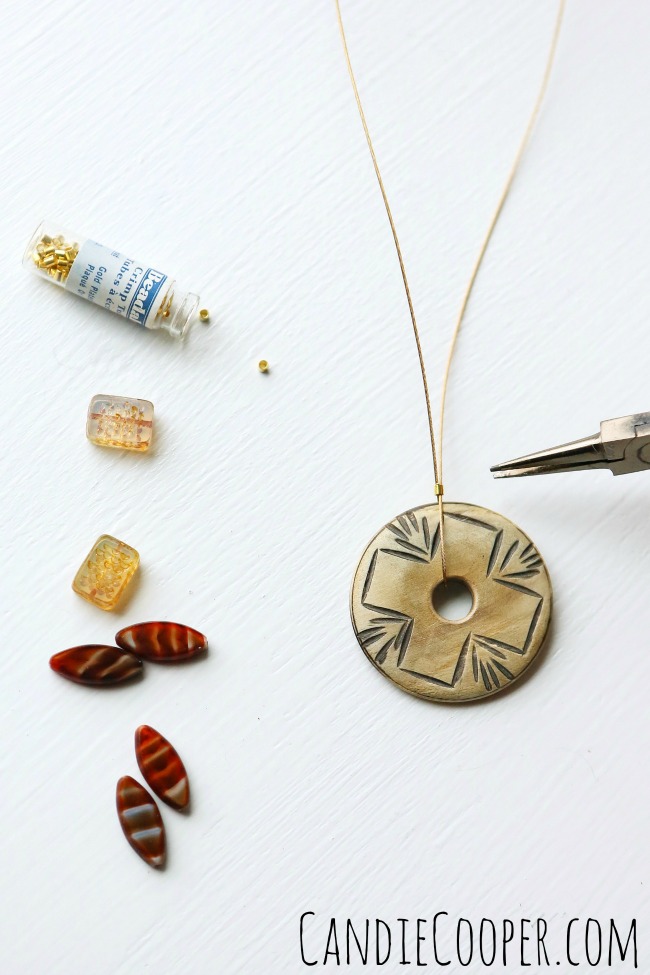
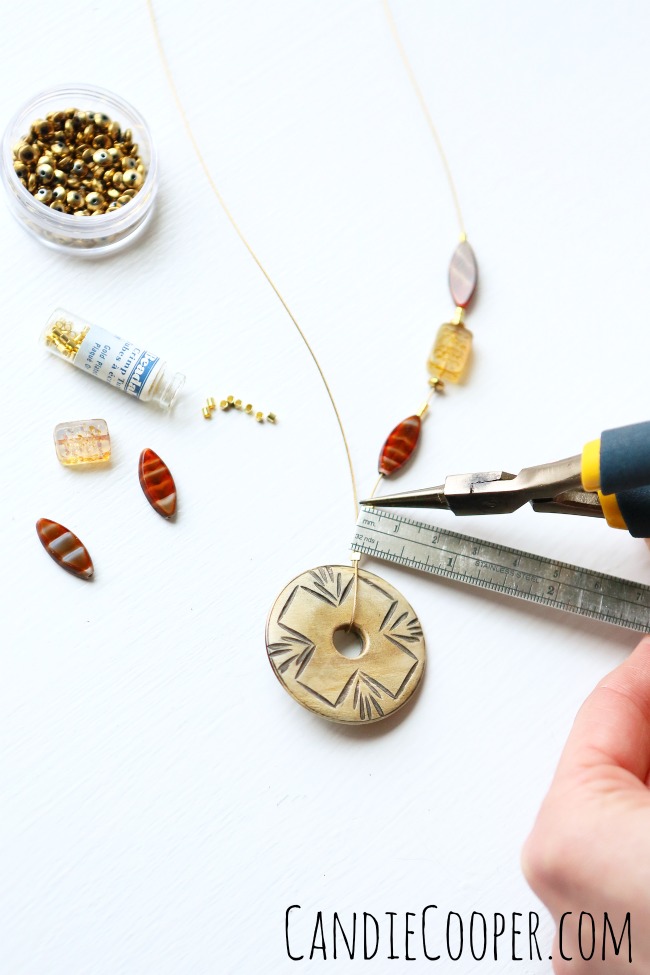
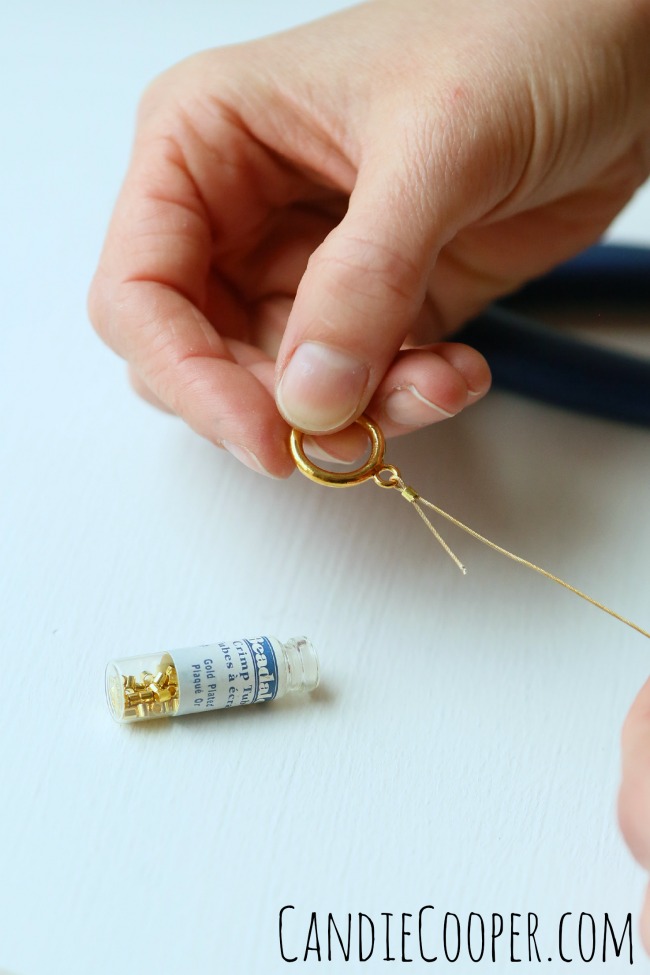
Can I get another heck yeah?Beadalon tools and wireIt only takes a few ingredients to make this simple necklace.  Other than the .024 Beadalon wire, the key item is a donut pendant.  Do you have a pile laying around like me?  Let’s use em’ up!  You’ll also want some #3 crimp tubes for the thicker wire, your basic jewelry making tools set, some beads and a clasp.How to Make a modern illusion style necklaceString the donut bead onto the heavy wire and determine how long you want your necklace.  Trim the end from the spool and slide a crimp bead over both ends of the wire.

Flat crimp the crimp tube with chain nose pliers by smooshing the crimp bead.

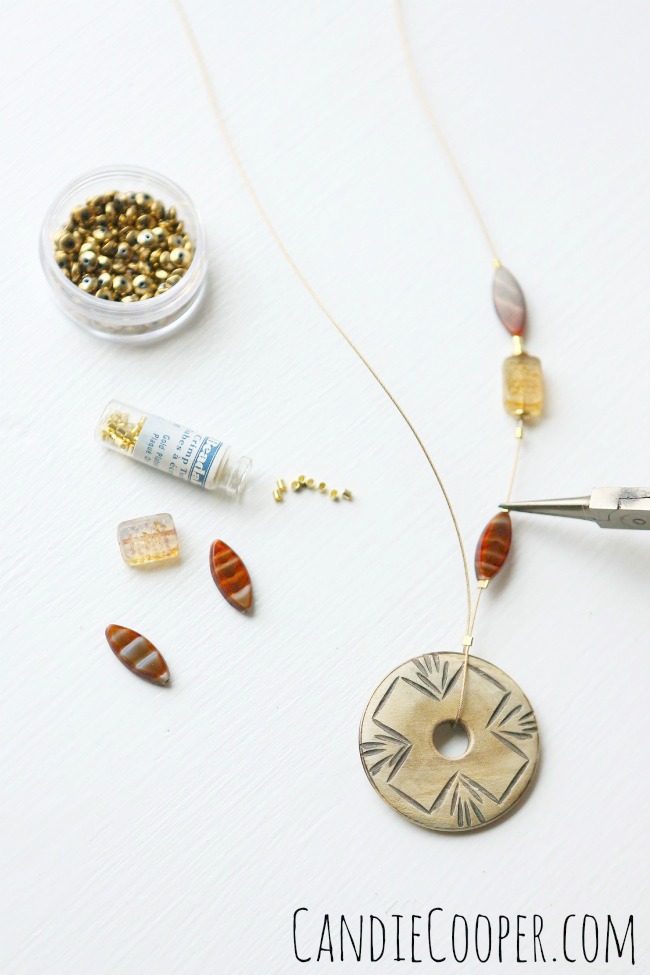
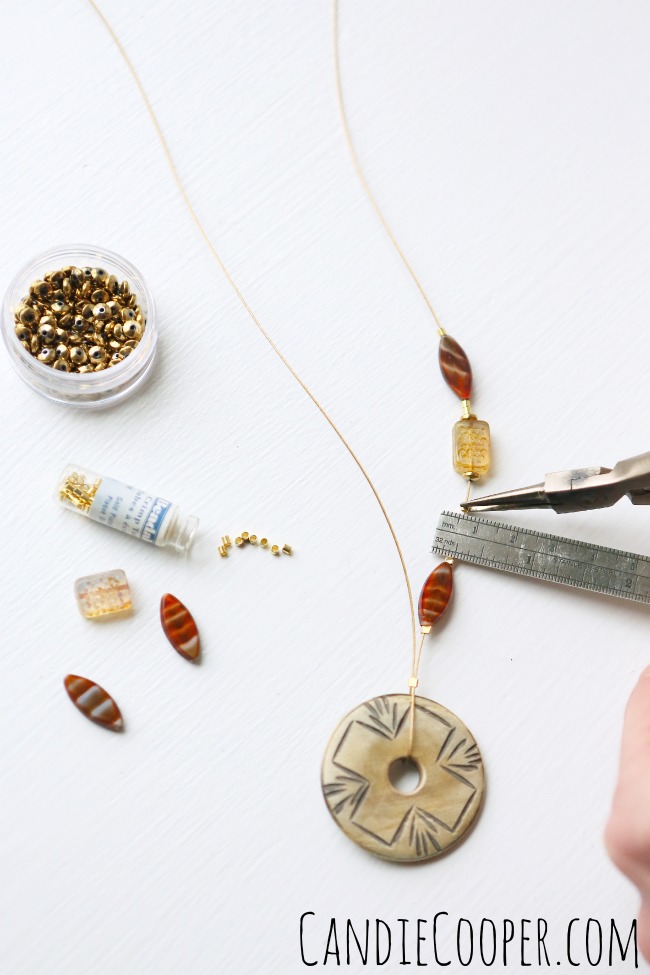
Smoosh it.  Smoosh it good.DIY Jewelry Making flat crimping illusion necklaceString the beads onto one side of the wire and separate each bead with two crimp beads.  Use a tool of some sort to help create equal distance between each crimp bead–I’m using a tiny ruler.

Flat crimp again.DIY Jewelry Making Modern Illusion NecklaceThen slide your first bead against the crimp bead.  Crimp the next tube so it keeps the bead in place along the wire.DIY Jewelry Making Illusion style necklace Use your measuring tool again and flat crimp the next crimp tube.Easy Necklace Making Idea from Candie Cooper with Beadalon Wire

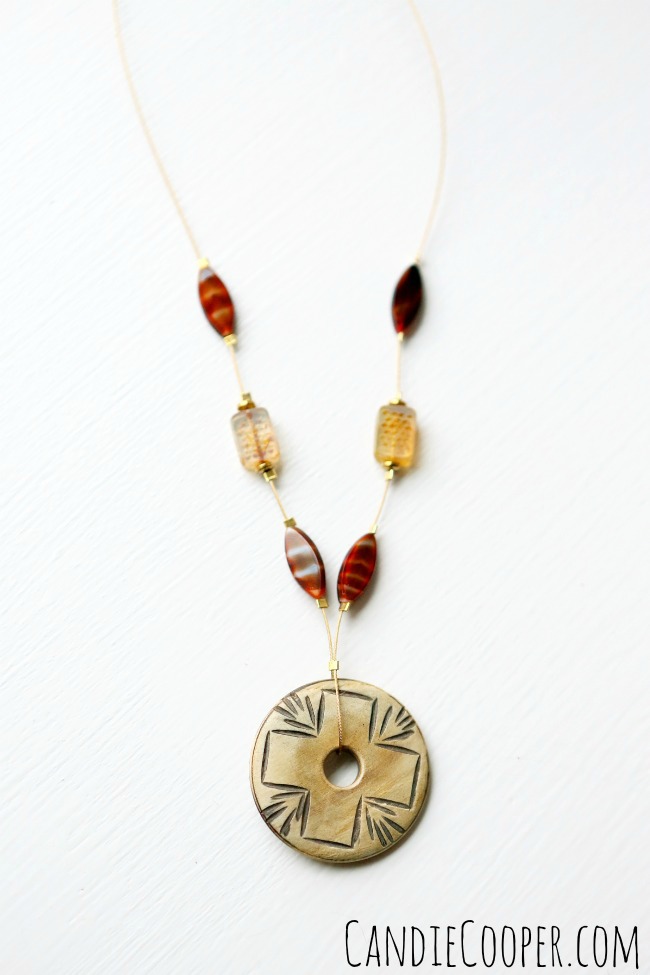
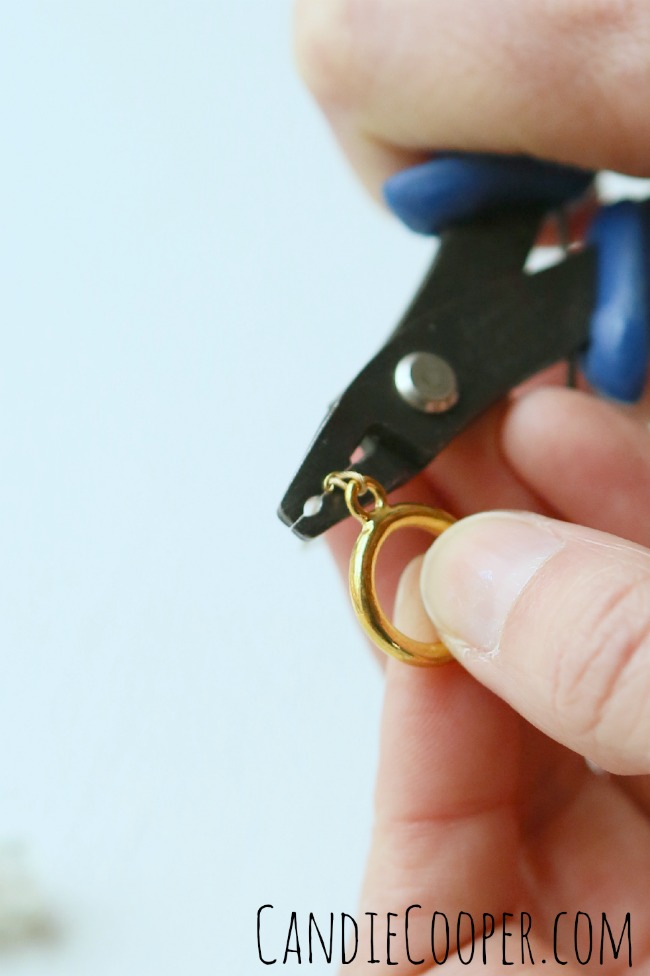
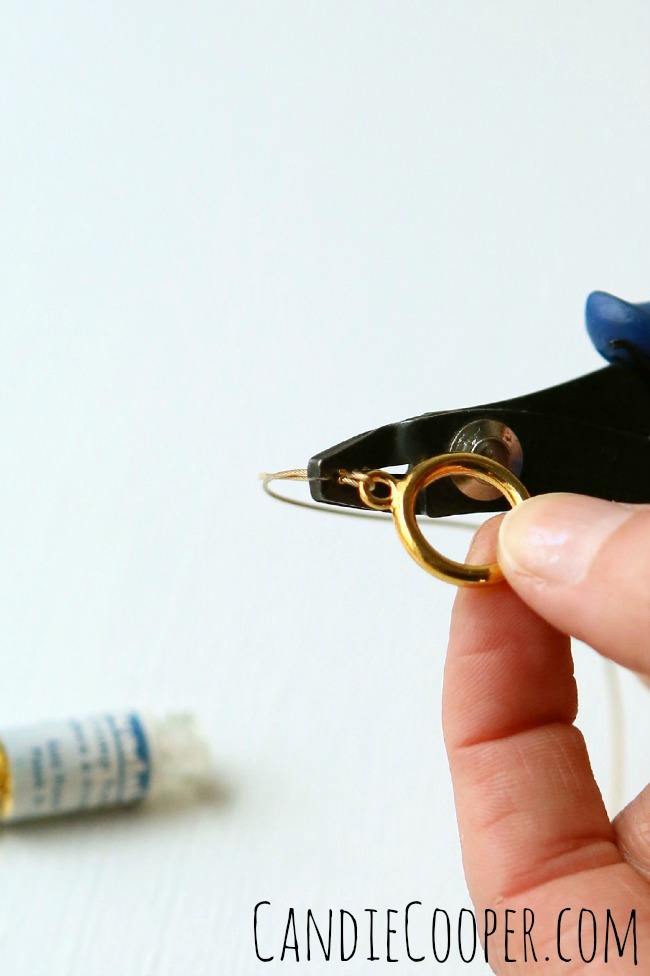
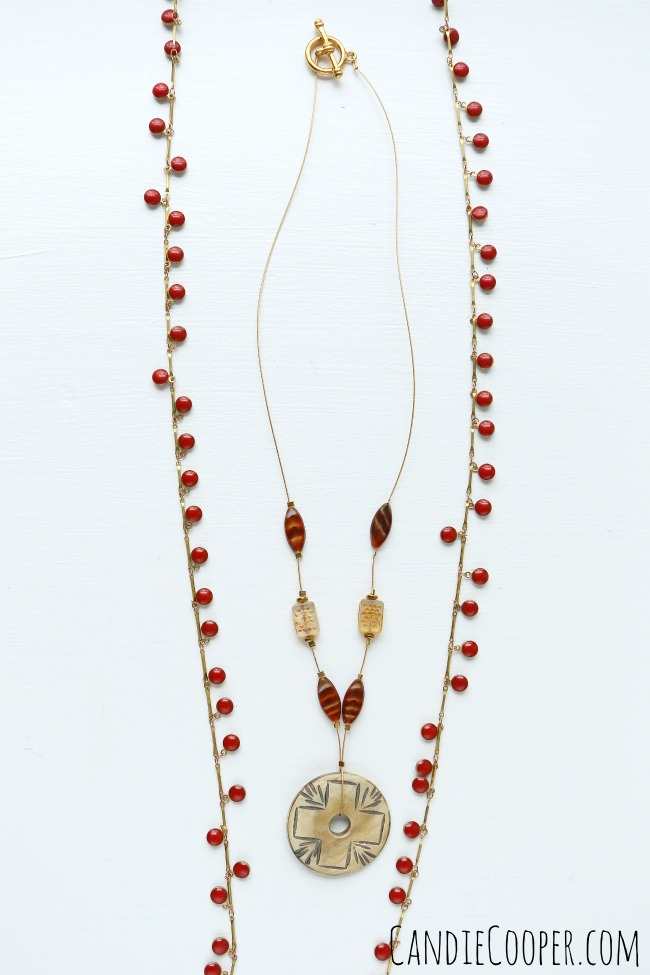
Repeat, completing  both sides of the wire.How to Crimp Part 1To finish the ends with a toggle clasp, we will use the traditional crimping method.  Slide a crimp tube onto the beading wire followed by one half of the clasp.  Thread the tail of the wire back through the crimp bead, snugging the tube up against the clasp, but not so much that your clasp cannot move freely.How to crimp Part 23Put the crimp tube in the “U” shape opening on the crimping pliers and crimp.How to crimp Part 33Turn the crimp tube 90 degrees and place in the outside opening to roll the crimp bead into a tight C or shut.DIY Jewelry Making with thick beading wire from BeadalonI created this necklace to match this unique chain.  49 strand .024 diameter gold Beadalon wireHere’s another version with a handmade glass donut bead.  With a focal piece like this, it’s nice to highlight the beauty of it with minimal stringing work around it. from Candie Cooper's DIY Jewelry Making Blog

How to Make Easy Ear Wires

This post brought to you by Beadalon!Beadalon Break 2015-a week full of DIY Jewelry Making  tutorialsAnd here we are on Day two of Spring Beadalon Break!

Let me cut to the chase:

My name is Candie Cooper….Candie Cooper, jewelry artist and authorand I am absolutely obsessed with fringe (and jean jackets, but that’s a story for another day).

Have been for awhile, but lately with the fashions it’s gotten extra bad.

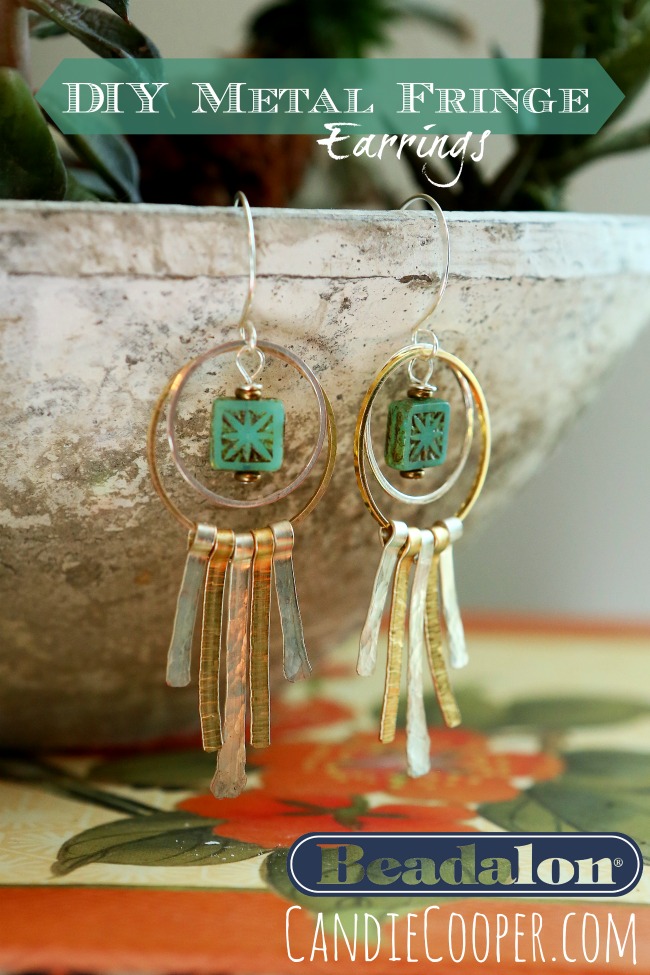
So, in this post I’m going to get you to come on over to the dark side and show you how to make fringed metal earrings with Beadalon Artistic Wire as well as how to make easy ear wires with their new Artistic Wire Findings Forms.

Shake it if you got it!

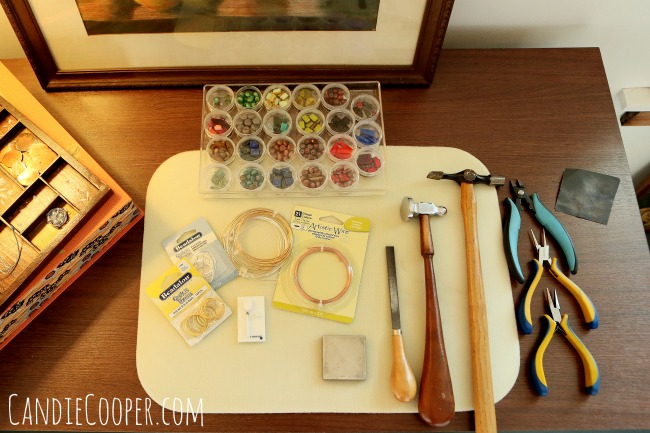
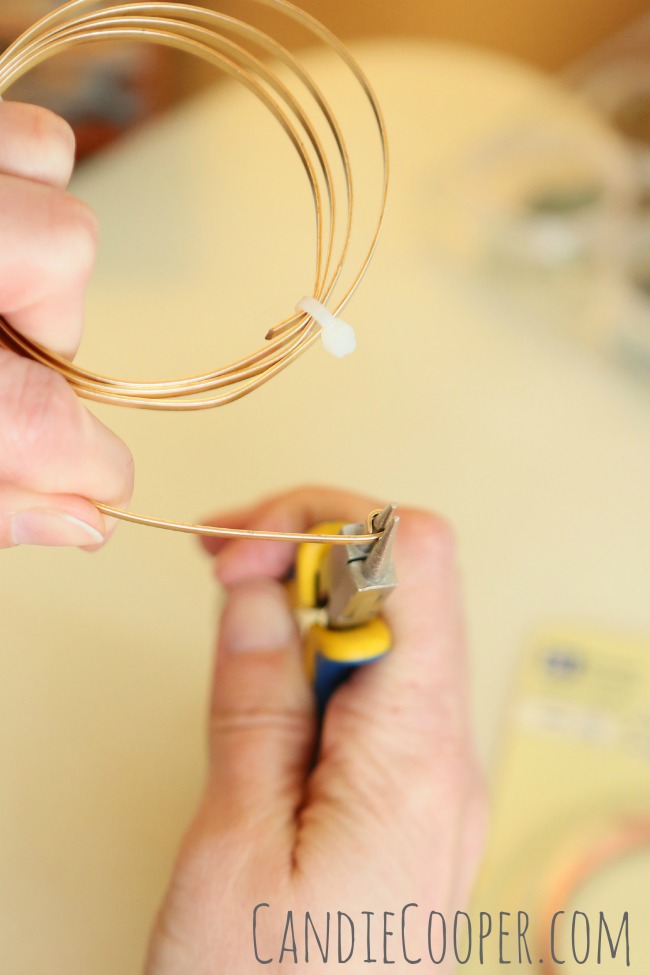
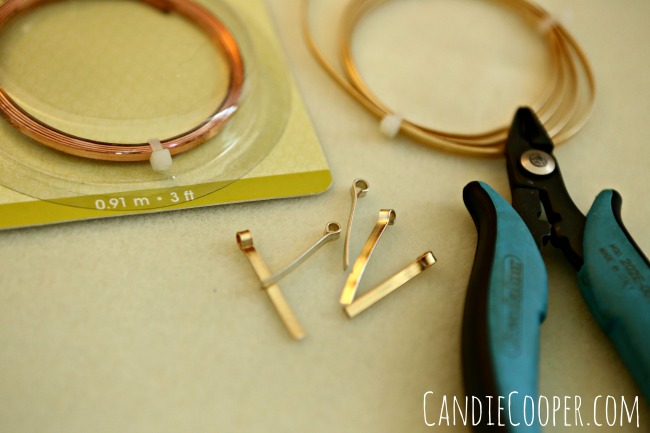
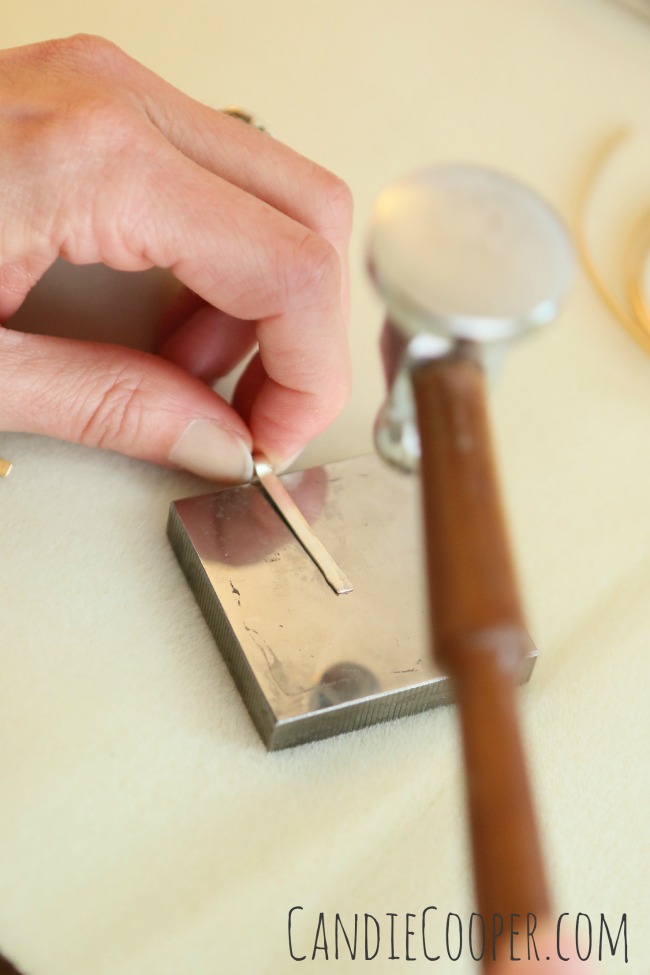
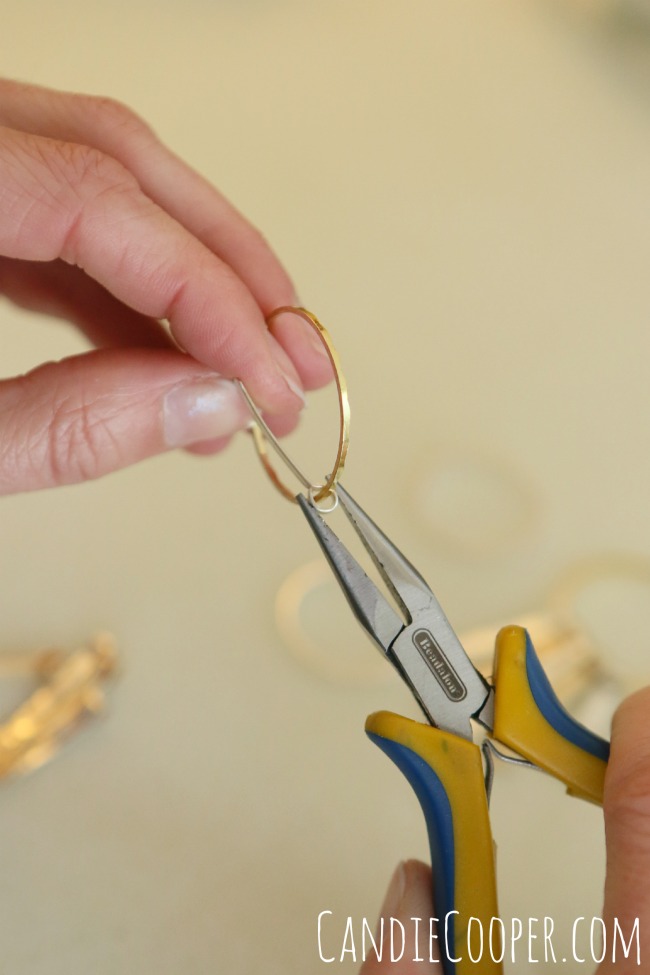
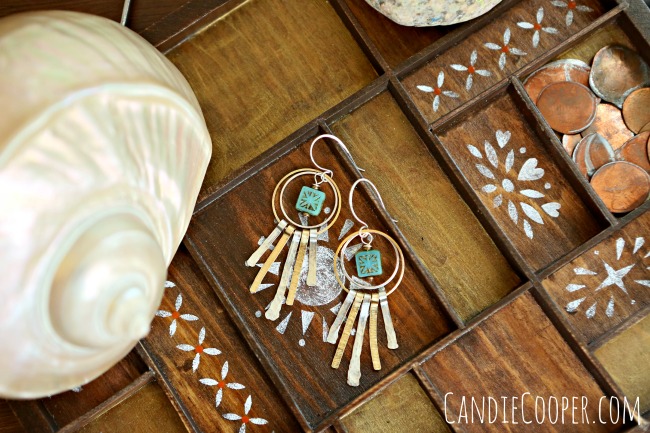
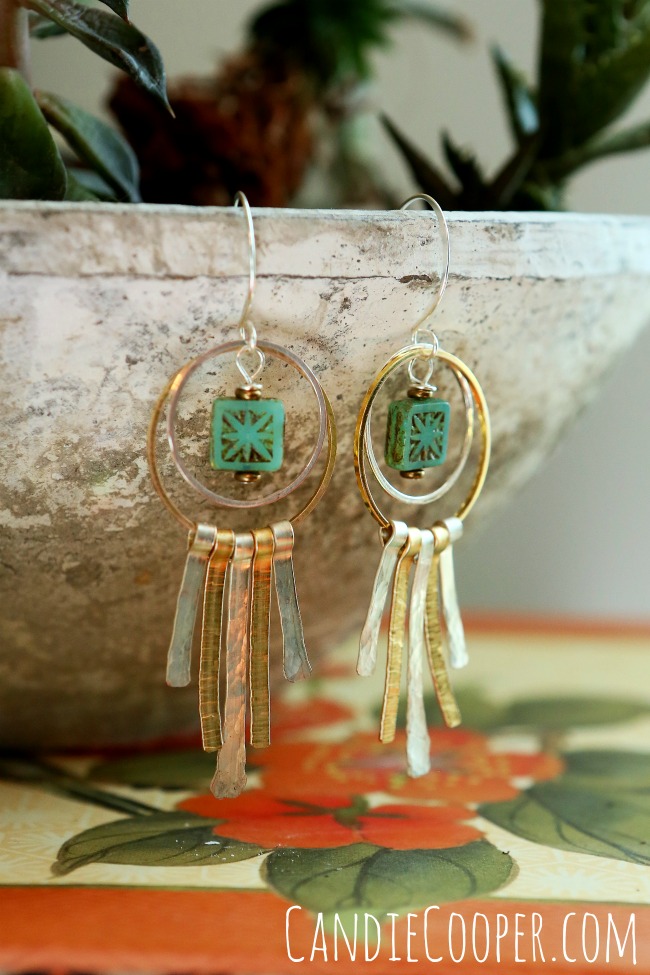
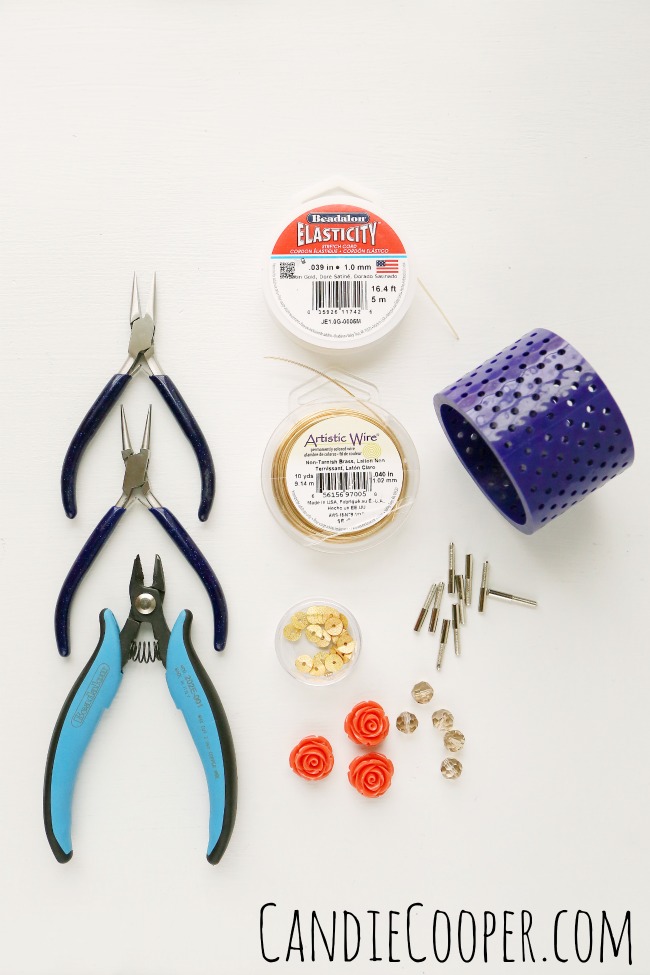
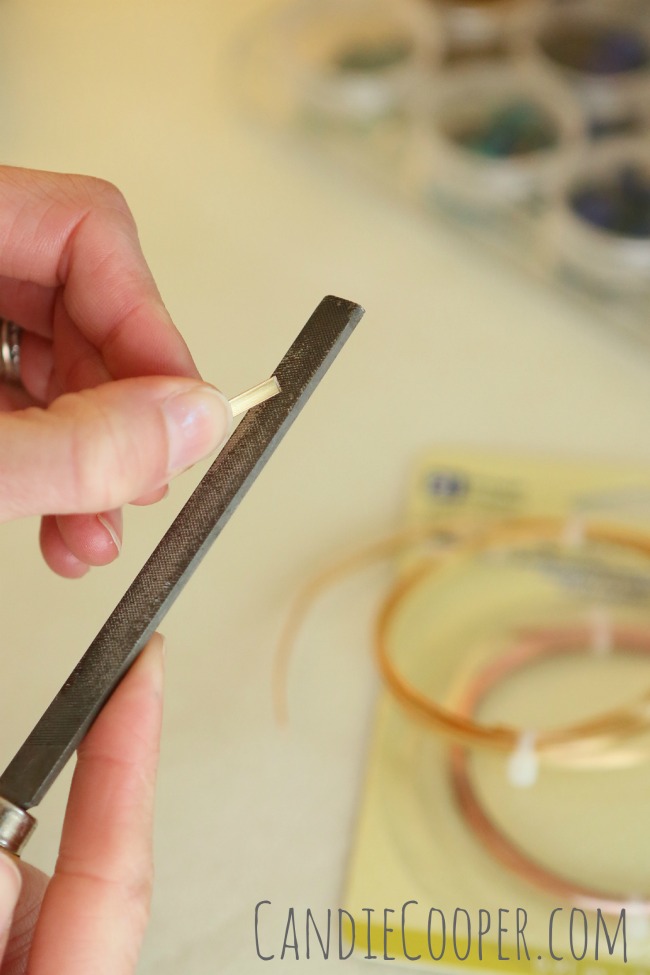
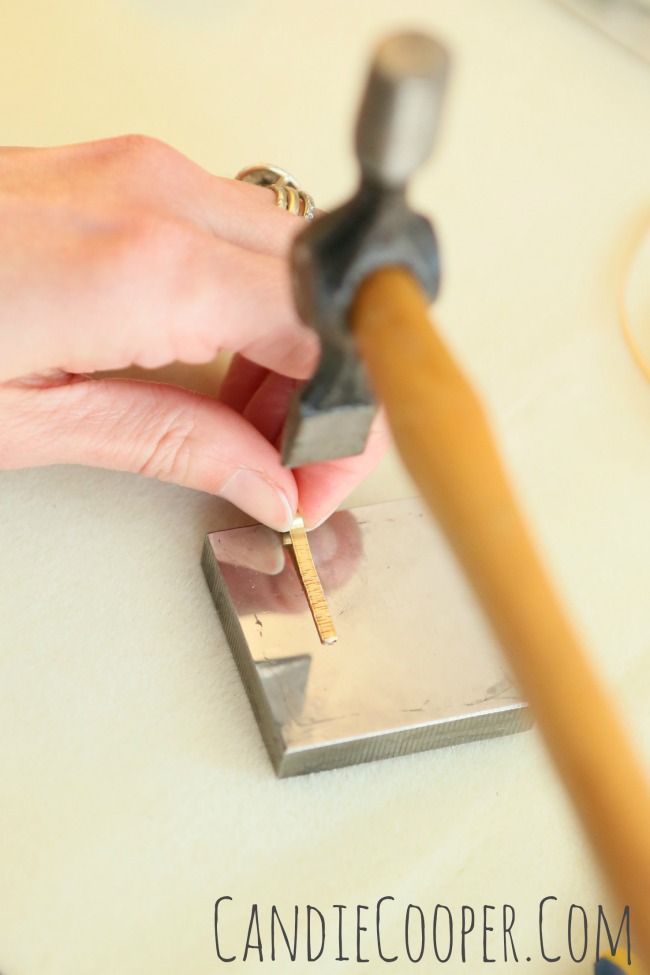
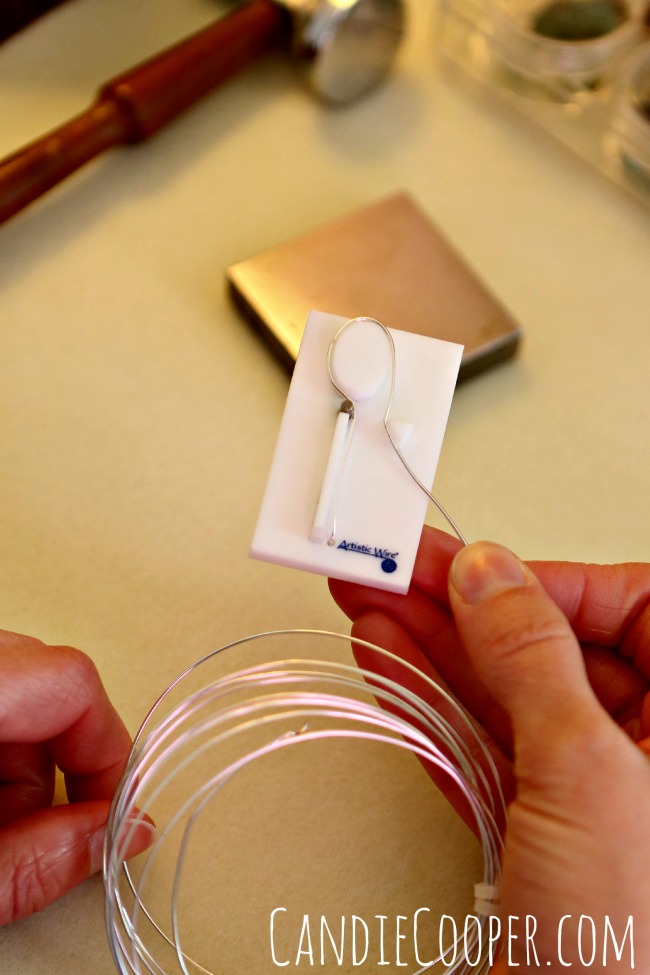
Let’s go!Metal Fringed Earrings from Candie Cooper with Beadalon productsThese earrings go together so fast and you can make the metal fringe as loooong as you like because we are actually using a coil of flat Artistic Wire.How to Make Ear Wires with Beadalon productsMaterials list from Left to Right:  Beadalon Quick Links in gold and silver colors (25mm and 20mm diameter),  20g. silver plated Artistic Wire, Artistic Wire Ear Wire jig, Flat Artistic wire in gold and silver, steel bench block, file, chasing hammer, riveting hammer, Ergo jewelry making plier set, sand paper and a few beads and head pins.Artistic Wire earringsLet’s jump into making the fringe.  Make a loop at the end of the flat wire with round nose pliers.  Trim to the desired length. Flat Artistic Wire You’ll need five pieces per earring so you can decide what colors and lengths you like.  The wire cuts easily with regular wire cutters.Making metal jewelry with Beadalon's Artistic WireFile the corners on the bottom for obvious reasons.Texturing metal with a chasing hammerHammer time!  Hammer the wire pieces on a steel block with the chasing hammer to create dimples on the surface of the metal.  I like to hit the ends extra so it flares them a bit.DIY Metalworking with Beadalon's Artistic WireThis is traditionally used as a riveting hammer.  They make special hammers shaped like this for texturing too if you really get into this.
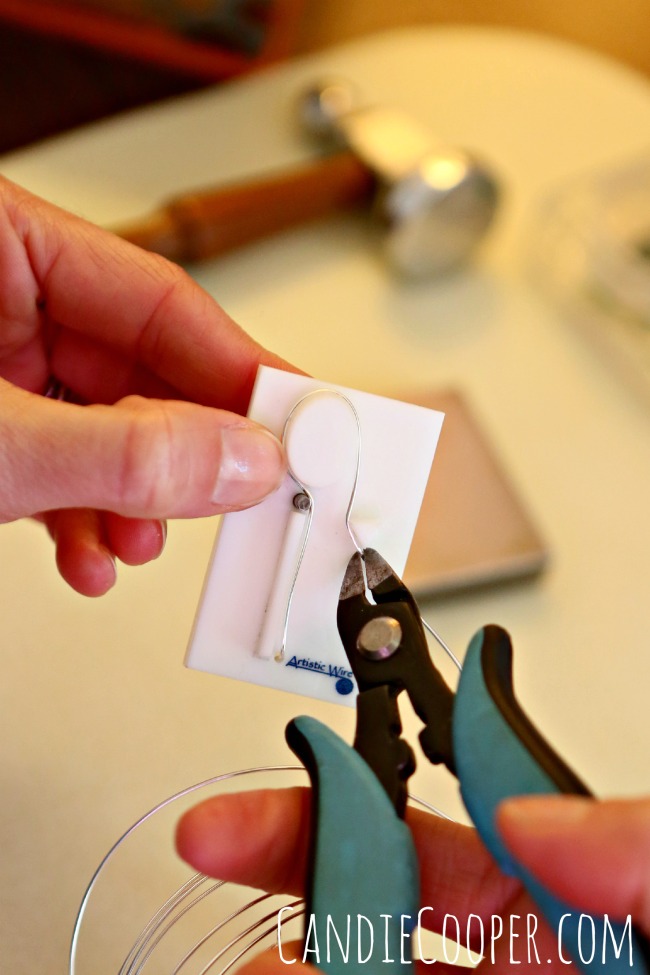
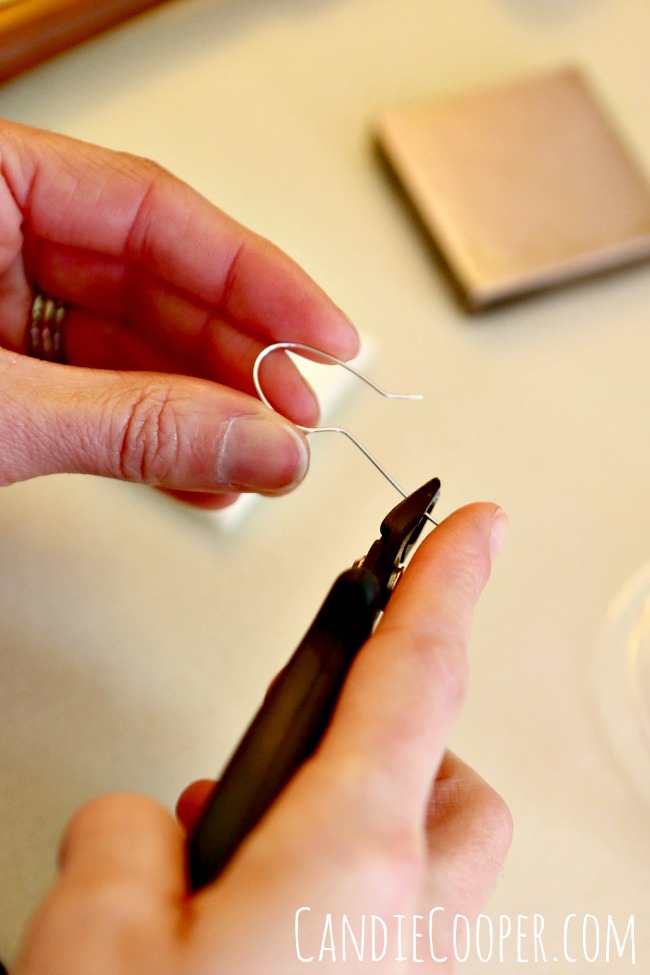
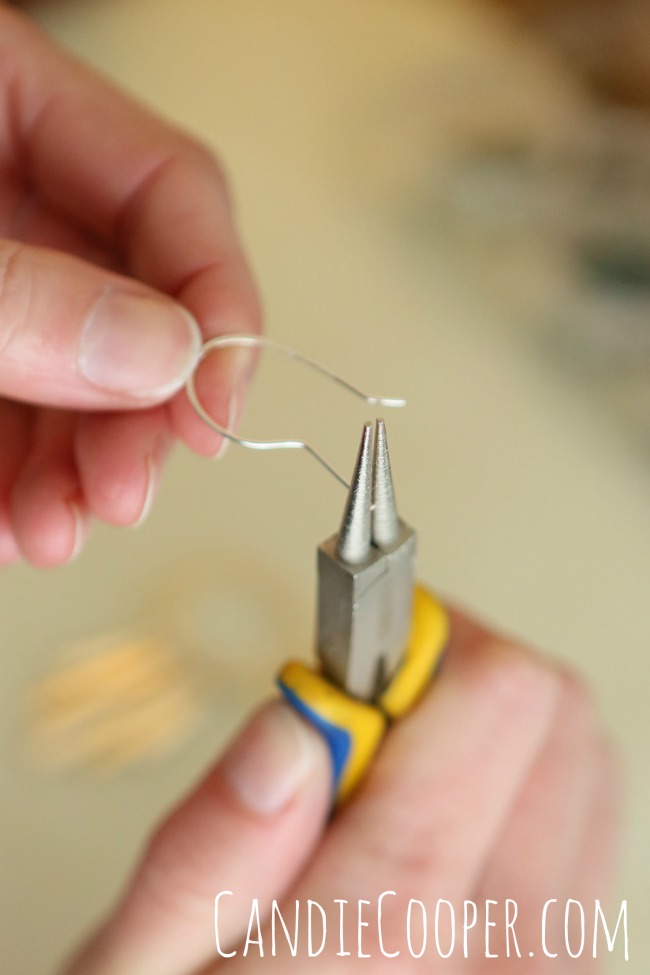
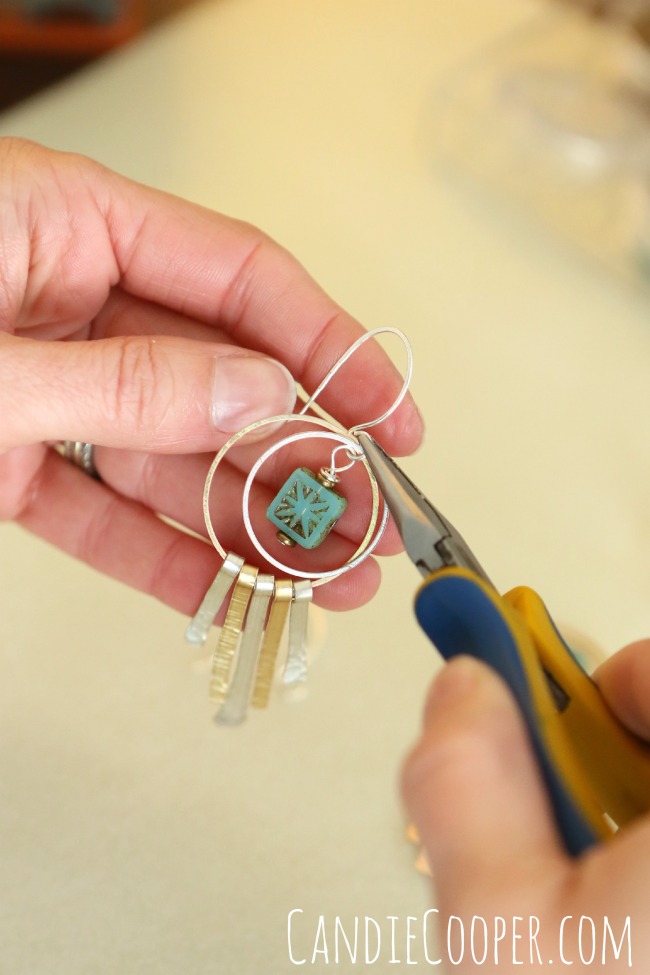
Now I want to show you how to make easy ear wires!How to Make Consistent Ear Wires with an Artistic Wire jig from BeadalonThis handy dandy Findings Forms jig from Beadalon makes DIY ear wires a breeze.  This one is especially cool because it makes long legged ear wires so you can change the ear wire to suit your design.  For this project, I just need some good ol’ fashioned French ear wires with a slightly larger loop than traditional ear wires have.DIY Jewelry Making How to make ear wiresOnce you’ve wrapped the 20g. wire around, trim the back and pull the ear wire from the jig.DIY Jewelry Making  Making Ear Wires with an Artistic Wire jigLike I mentioned earlier, because of this long leg, you could also add a bead or do an easy wrapped loop closure.  Trim the front…How to make ear wires with 20g. wireand roll it back to create a large loop.  To add some extra strength to the ear wire, hammer the top arched part on a steel block to harden the wire.Making Earrings with Metal Fringe and Quik Links from BeadalonNext open up all the fringe pieces and connect them to the large Quick Link.Making Coachella Inspired Fringed EarringsI created a little Czech bead dangle to hang with my layered hoops.  A little color never hurt anybody!
How to make earrings from Candie Cooper with Beadalon Artistic WireDone and done!

Candie Cooper JewelryTwo metal color jewelry makes me HAPPY!

DIY Coachella Inspired Earrings from Candie Cooper

CandieCooper.comNow go on with your bad self!

I’ll see you tomorrow with another tutorial!