$100 Jesse James Bead Stash Giveaway!

This post brought to you by Jesse James Beads–purveyors of the most unique beads ever!
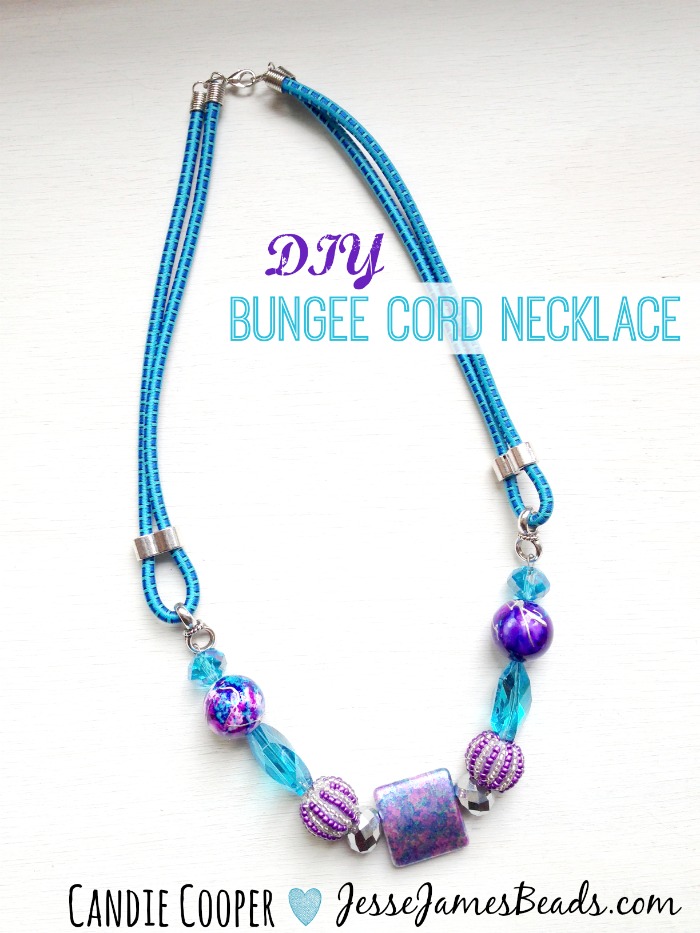
Bungee Cord Necklace5Yesterday, I guest posted on the Jesse James Beads blog with this bungee cord necklace tutorial.  Check out the full tutorial here.   My challenge was to make a piece using bungee cord and their fun beads.  This was my design solution.  I wanted to make something that teens and adults would have fun making.  What do you think?  If you make it, know that the cord and beads come in a million colors.  The hardest part is choosing a combo.  Isn’t life tough?
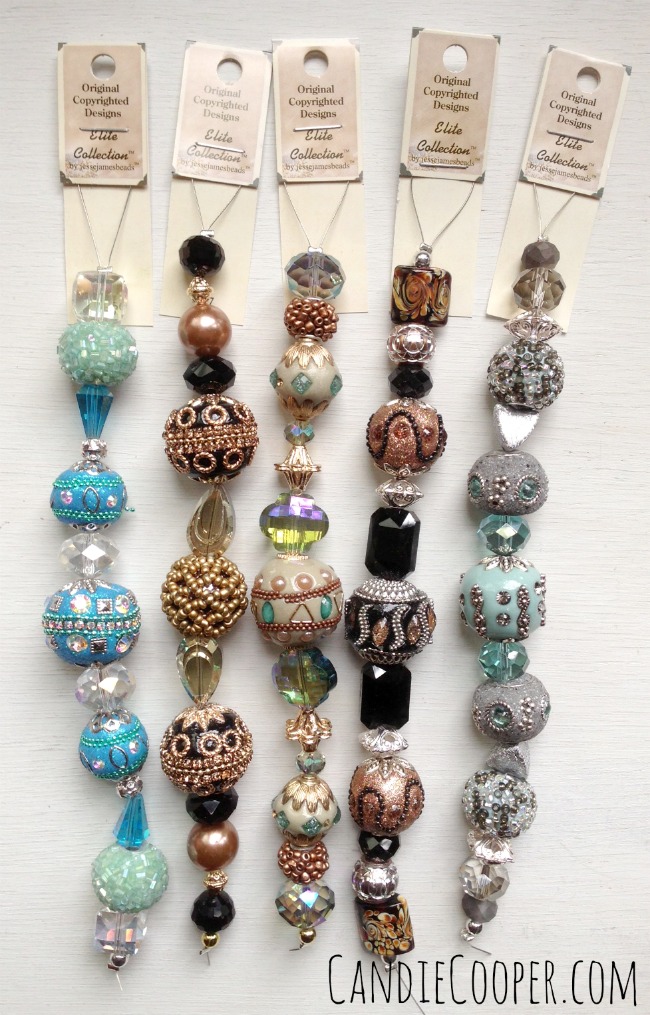
Jesse James Beads Elite StrandsJesse James Beads is celebrating the launch of their Elite Collection at JoAnn Fabric and Crafts stores!  The Elite Collection has beads that are uniquely designed for maximum design beauty.  Each strand is different, full of luxurious texture and sparkle!
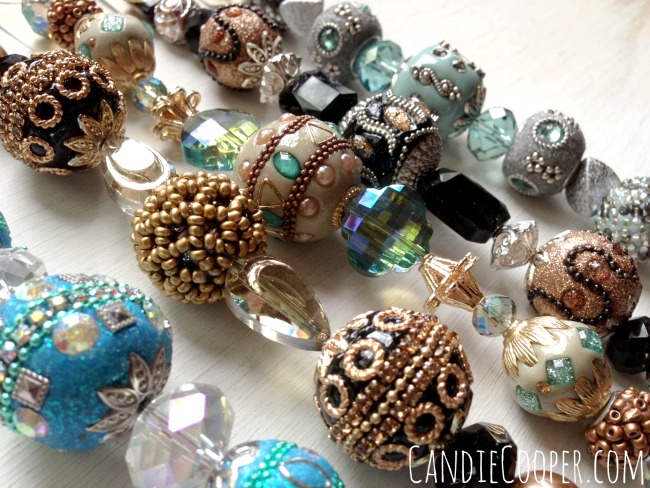
Elite Bead Strands from JoAnn Fabrics and CraftsI absolutely adore the seed bead net over the big bead on the second strand.  You know…in case you were wondering!  JJB bead strands are like Yankee Candles kind of.  Women absolutely cannot help but pick each one up, talk about them, smell them (ok they don’t smell the beads, but you know what I mean), and admire how each one is different and special.  I work at the trade shows with JJB where there are hundreds and hundreds of strands and that’s what we do.  We connect through the love of the beads.
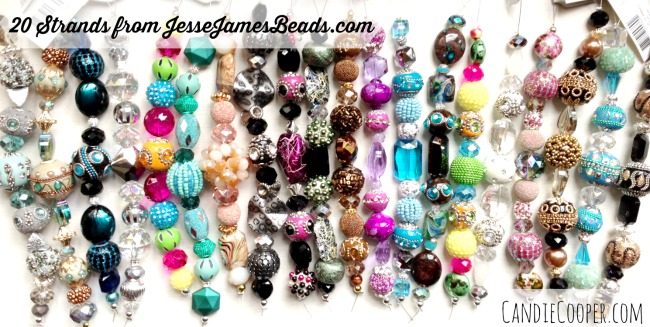
Jesse James Beads Giveaway with on Candie Cooper's BlogNow because I love you and to celebrate the release of the Elite Collection bead strands at JoAnn Fabrics, Jesse James Beads gave me 20 strands of fabulous beads to giveaway!  The above strands can be yours.  All yours!  You can make 20 bungee cord necklaces!  Or just sit them on your table and smile because they are yours.  All yours!
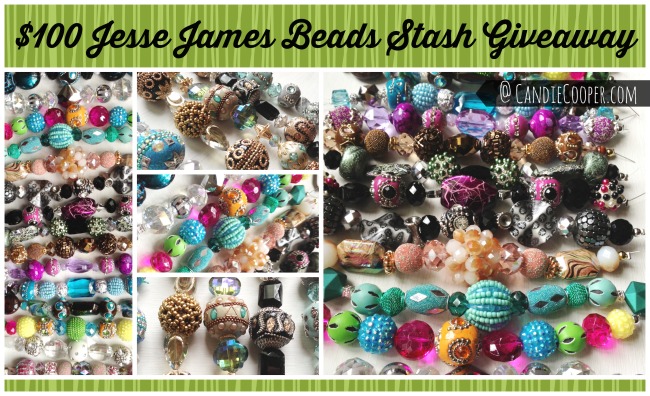
Candie's Bead Stash GiveawayThis is a $100 value of beads!  I’m excited for you!  Best of luck!

See the rafflecopter below for how to entering.
a Rafflecopter giveaway

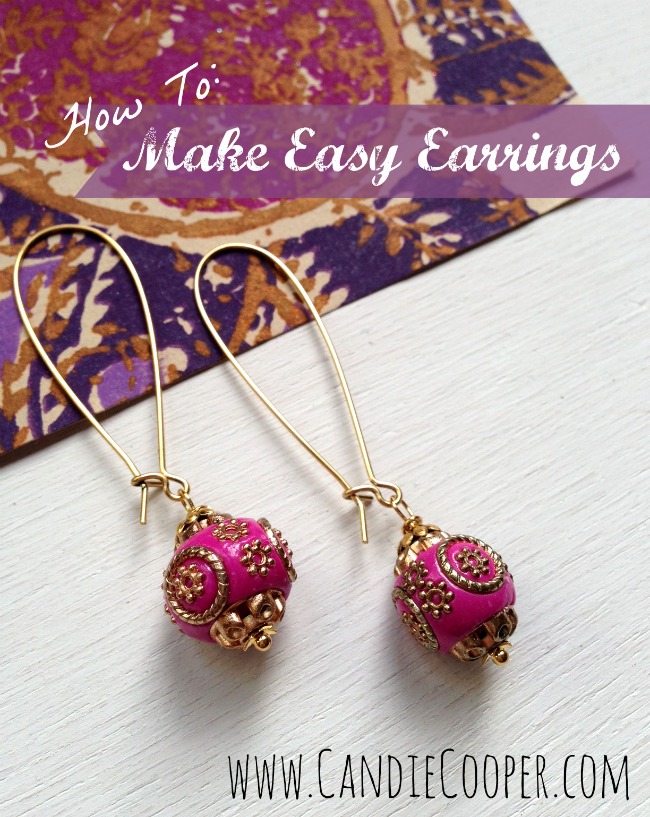
How to Make Easy Earrings with Wrapped Loops

How To Make Easy EarringsWant to instantly make yourself feel better?  Whip up a sassy pair of earrings just for you.  You deserve it.  I promise.  I don’t know about you, but sometimes when I make myself something, I feel guilty—I should give these as a gift, I should be adding these to my stash of things to sell, and so on.  This is also not a new song on this blog.  So….  I’m telling that little voice in my head I’ll do it next time.  You can too!  For now, it’s our turn!  Let’s do this!

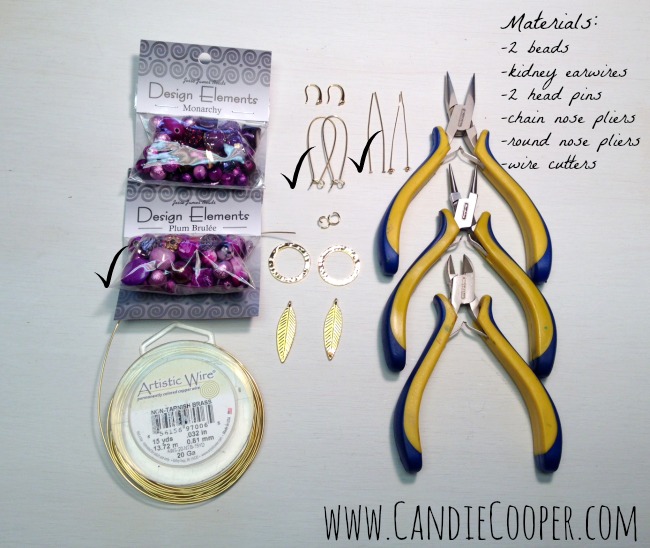
Earring Making MaterialsI actually made a trio of earrings with these supplies of which tutorials on will trickle out.  For now, you only need what’s checked and listed.  You might also want a couple bead caps (half domed beads that sit next to a focal bead).

P.S. Ergo plier sets are my fave.

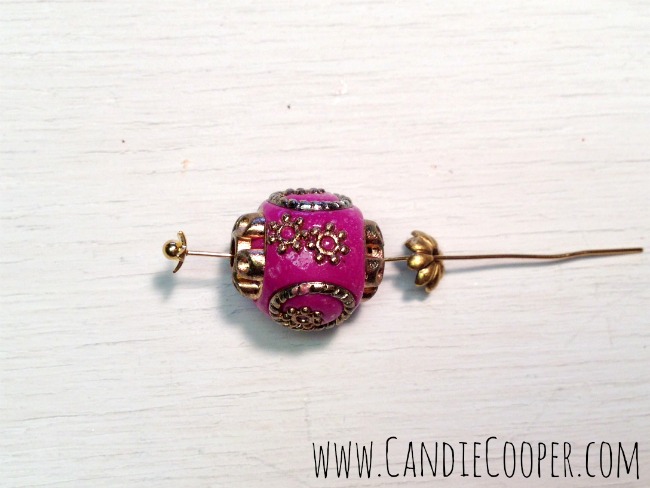
How to Make Easy Earrings 7String all the pieces onto a head pin.  I’m using Beadalon decorative balled/star head pins, Jesse James Boho style beads (see JoAnn Fabrics) and brass bead caps.  The bead is so decorative, I didn’t think I needed much else (note that for once in my life, I’m keeping it simple).

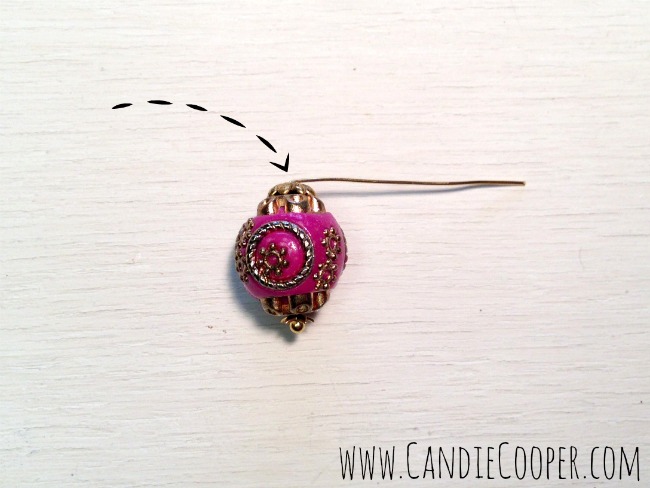
How to Make Easy Earrings 9.jpgMake a 90 degree bend in the head pin just above the last bead cap.

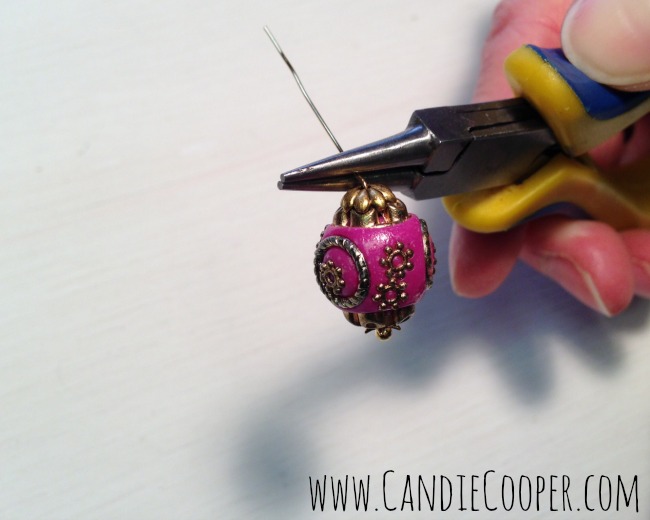
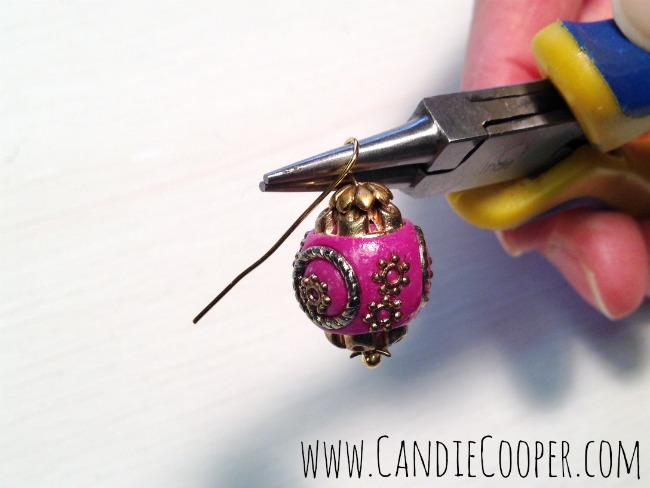
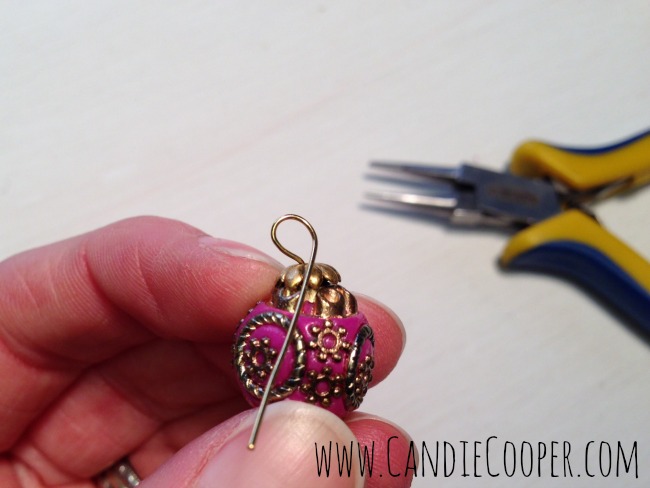
How to Make Easy Earrings 1Put the round nose pliers into the bend of the head pin and bring the end of the wire up and around the pliers and back under.

How to Make Easy Earrings 2If you’re new to making jewelry, pliers are simply for forming wire or small amounts of sheet metal.  We need a solid round loop at the top of the bead dangle so we have to use round tipped pliers to achieve that.

How to Make Easy Earrings 3At this point, your loop can look like this or close to it.  If this is your first time making jewelry, know that this wrapped loop technique is one of the hardest tricks in the book.  Making the loop consistently sized takes a bit of practice.

Now, we’re going to grab the chain nose pliers (angled tips).

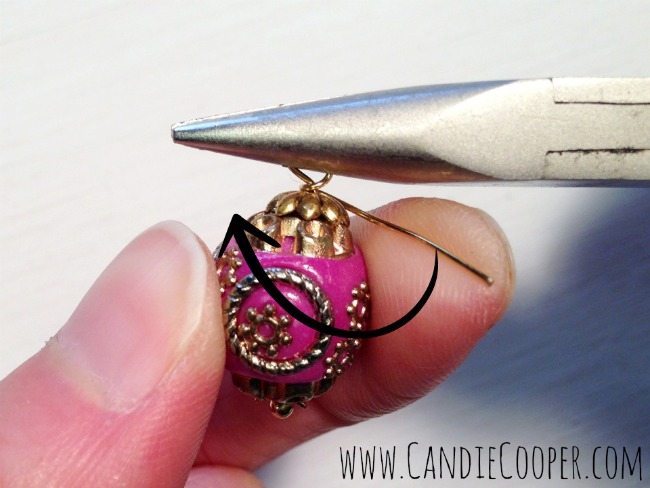
How to Make Easy Earrings 8.jpgPut the loop in the jaws of the pliers and now twist the end of the wire round and round just above the bead.  My wraps are always messy.  If you want perfect, you came to the wrong blog.  Trim any excess wire with wire cutters.

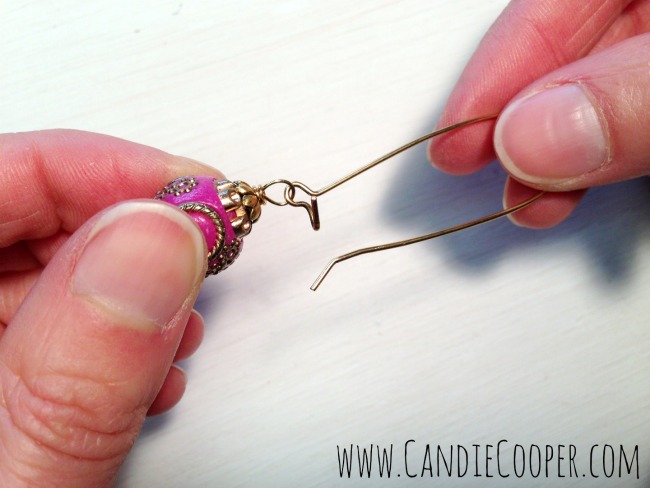
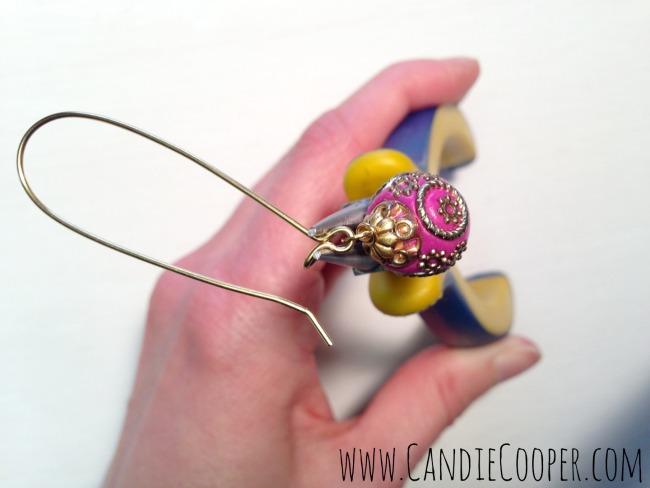
How to Make Easy Earrings 4.jpgOpen up the kidney ear wire and hang the beaded dangle in the front opening.

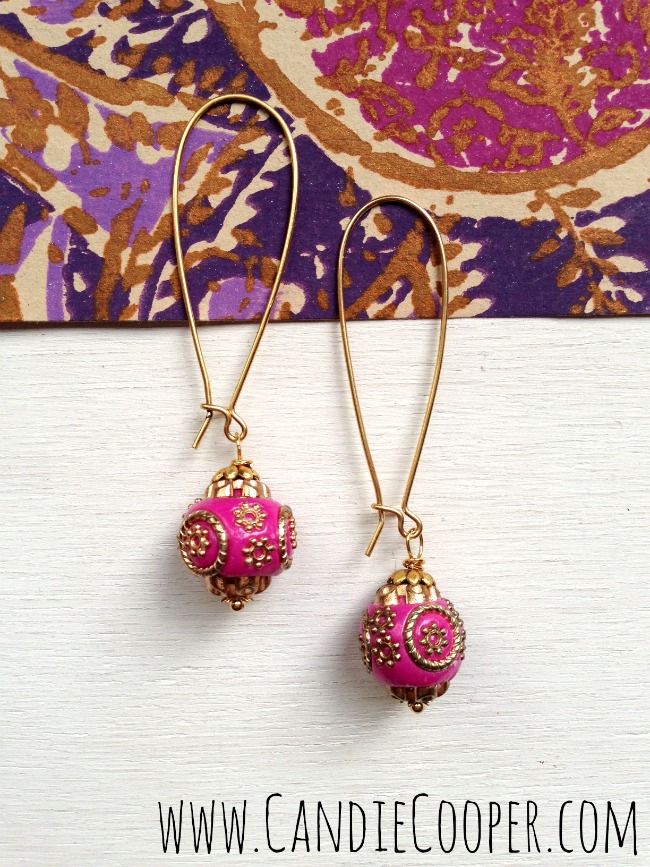
How to Make Easy Earrings 6Use the round nose pliers to pinch the opening shut.  You don’t have to do this if you want to make lots of beaded dangles and change them out.  If I’m selling earrings, I close the loop because inevitably those bead balls will make a run for it.  Probably start a new bead colony or something.  Plus your customers will be really happy if they aren’t messing with runaway bead dangles.  But, why am I talking about customers?  We’re keeping these for ourselves, right?  With that….

Boho Chic EarringsThey lived happily ever after….(“they” being us and the sassy new earrings).

THE.  END.

Make Jewelry to Match An Outfit

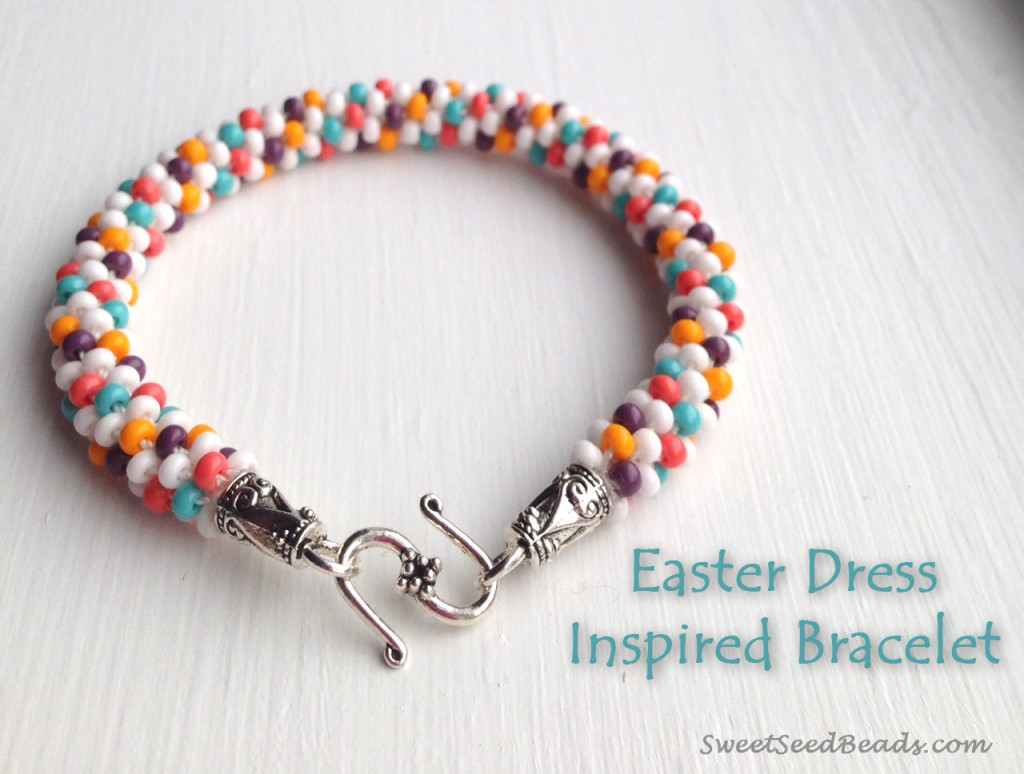
hero1Hey CC fans!  I’m Jamie and normally I can be found blogging over at SweetSeedBeads (check it out!).  Today I’m guest posting here for Candie (whom I absolutely LOVE) and I couldn’t be more excited to share a fun, last minute, Easter dress inspired bracelet with you : )

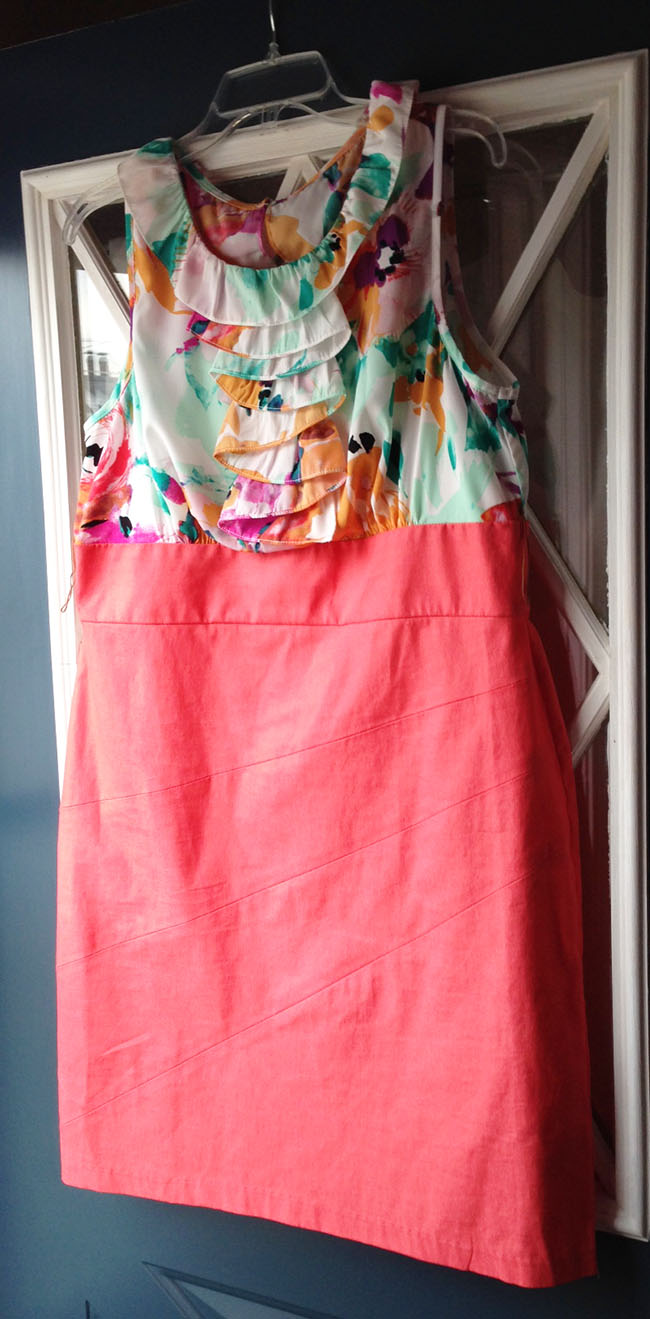
1 DressMy Easter dress is “so last year” but I snatched it up for like $14 at the end of the season and am still in love with it…and who doesn’t like a bargain, right?  Finding jewels to match all these fun, spring colors could be quite the challenge though…so, of course, I made my own.  This bracelet was made using a kumihimo braiding technique…here’s how you can make yours!

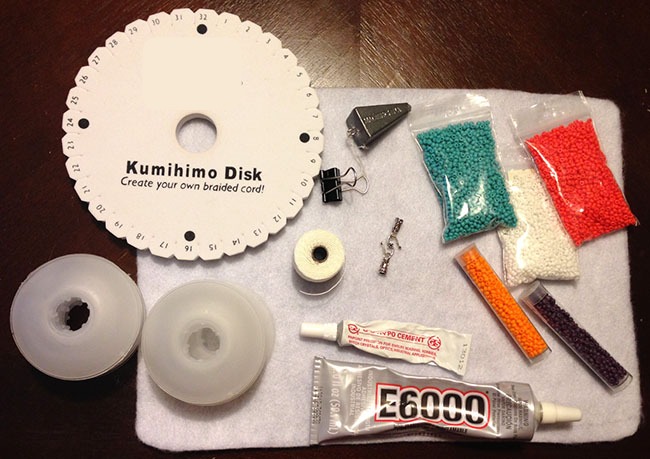
First, gather your supplies.  You will need:

Kumihimo Braiding Disc
8 Plastic Bobbins
White S-Lon Cord
Size 8/0 Seed Beads (in the color of your dress)
Glue-on Cord Ends and Clasp
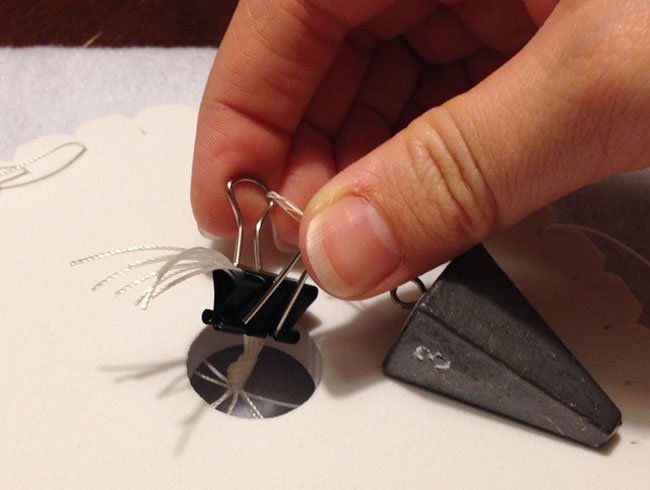
Kumihimo Weight (mine is my boyfriend’s fishing sinker tied to a binder clip…totally works)
G-S Hypo Cement
E6000 Adhesive
Scissors

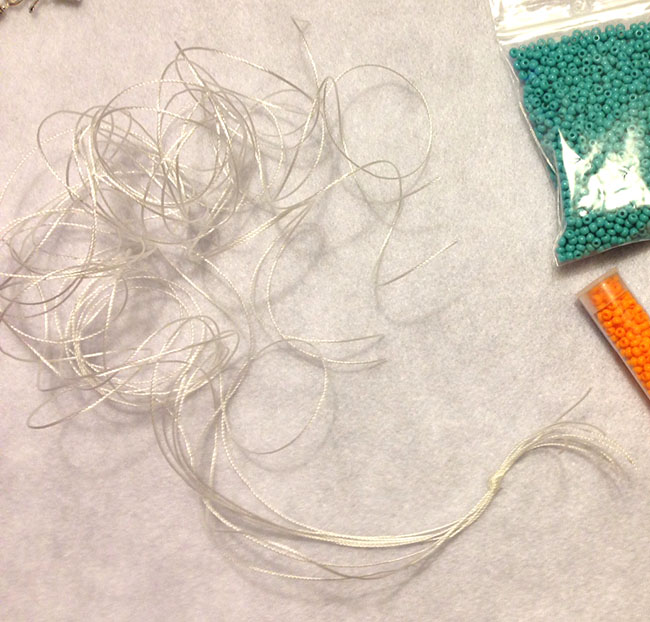
2-SuppliesStep 1. Measure and cut eight, 35″ lengths of S-Lon cord.  Tie all ends together in a knot.

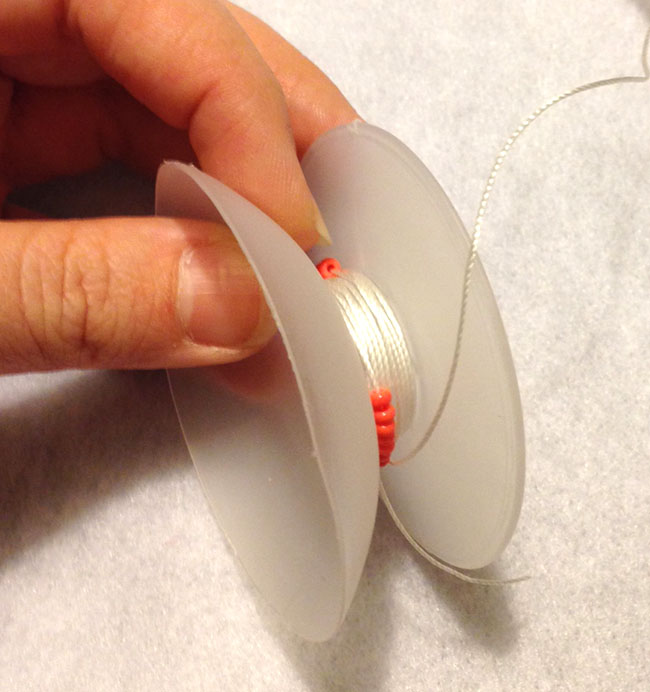
3 Tie offStep 2:  String 40 seed beads onto each strand.  For mine, I have four strands with white beads, one with coral, one with tangerine, one with aqua and one with plum beads.  Once all 40 beads are on the strand, wind the strand onto a plastic bobbin and close, leaving about 8-10 beads on the outside.  This will help your cords stay untangled when you begin your braiding.

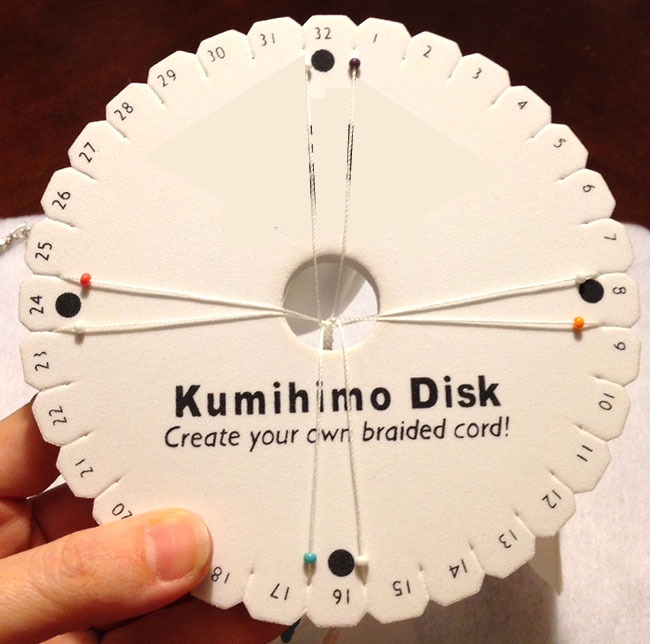
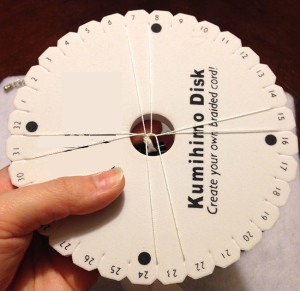
4 BobbinStep 3:  Set your strands up on the kumihimo disc.  You’ll want to start with a strand on the left and right side of the #8, #16, #24 and #32.  You can see in the photo below what colors of beads I placed in each slot to get the look of the bracelet above.  Looking for a different pattern?  Check out my Pinterest board for tons of ideas.

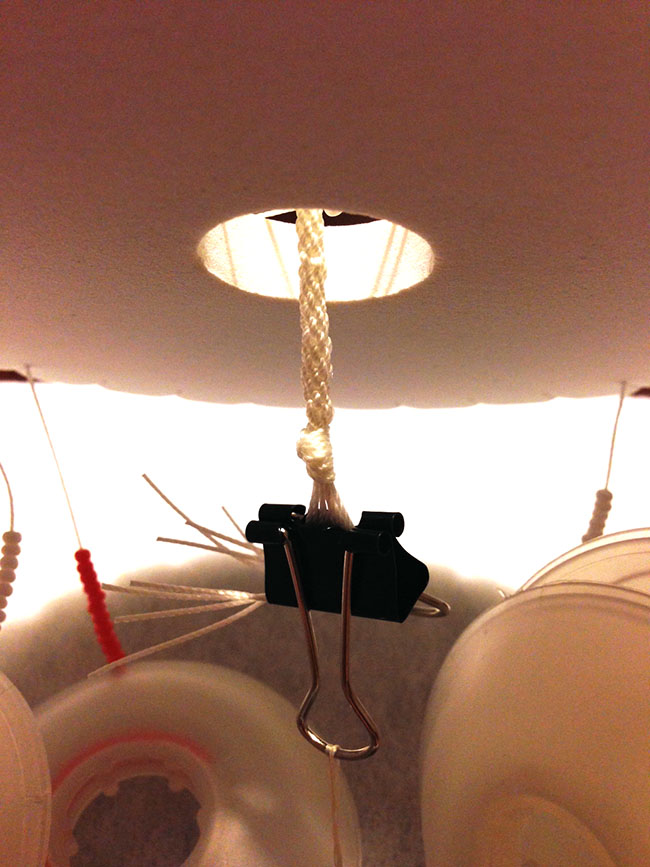
6-colorsOnce your strands are set, flip the disc over and attach your kumihimo weight to the knot that comes through the center hole.  This will keep the beading taut while you work.

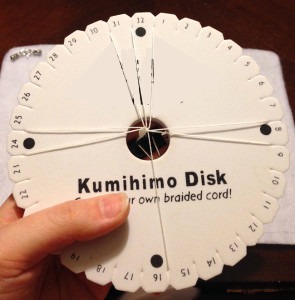
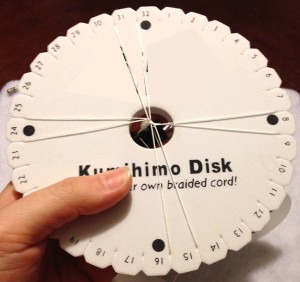
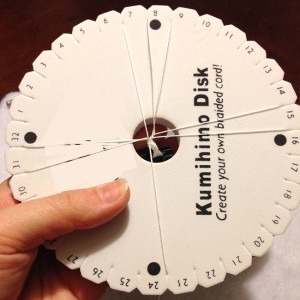
5 WeightStep 4: Begin your braid (without beads).  Start by moving the strand to the left of the #16 position up to the left of the #31 position.  Finish this set by moving the strand to the right of the #32 position down to the right of the #15 position.  Rotate the disc counterclockwise to the next set.  Begin this set by moving the strand to the left of the #24 position up to the left of the #7 position.  Finish this set by moving the strand to the right of the #8 position down to the right of the #23 position.

7-step-1-295x300

8-step-2-300x282

9-step-3-300x300

10-step-4-300x291Continue this step until you have about a 1/2″ braid coming out from the bottom.

11 step 6Step 5: Add beads to your braid.  Continue braiding the same way you did in step 4, however, now on each strand, slide a bead down and lock under the previous strand.  Be sure that you do not move on to the next strand until the bead is locked in place under the previous strand.  Continue this step until your beading is long enough for your wrist.  For my 7.5″ bracelet, my beading needed to be 6″ (my cord ends and clasp measure about 1.5″).
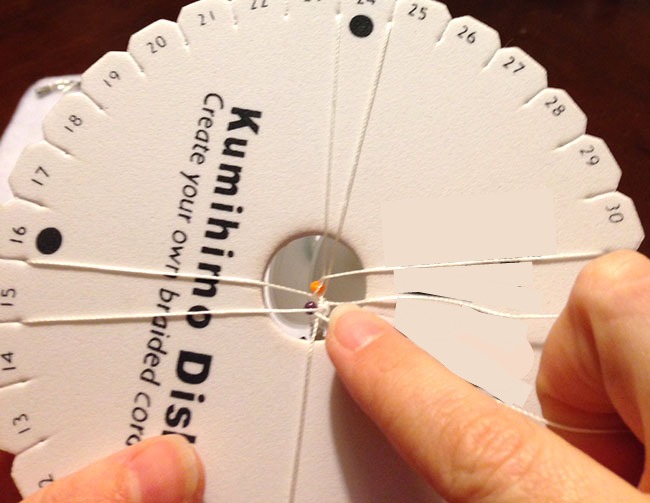
12-step-7Step 6:  Continue braiding without beads until you have about a 1/2″ tail on the end.  Remove the strands from the board and tie a knot in the end to keep your braid from unraveling.  Remove the weight, remove the bobbins and trim the excess cord.

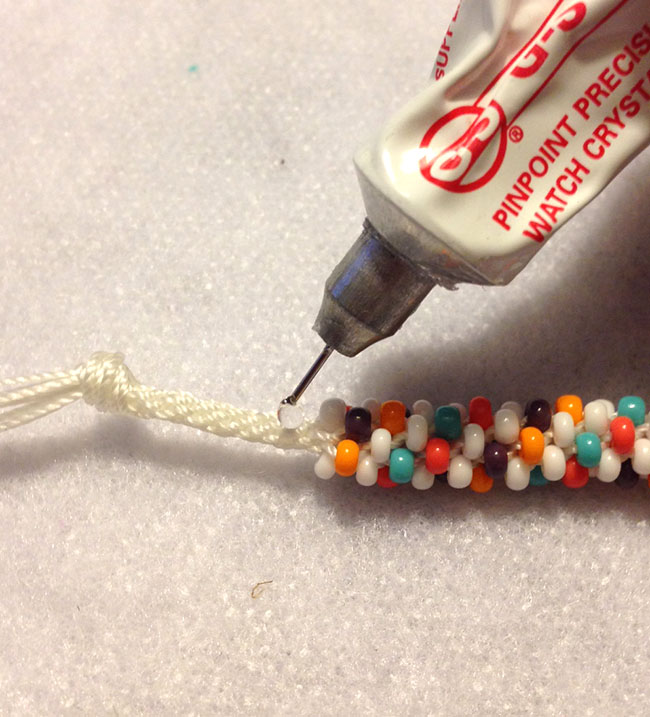
13Step 7:  Coat both braided ends with G-S Hypo Cement.  Let dry.

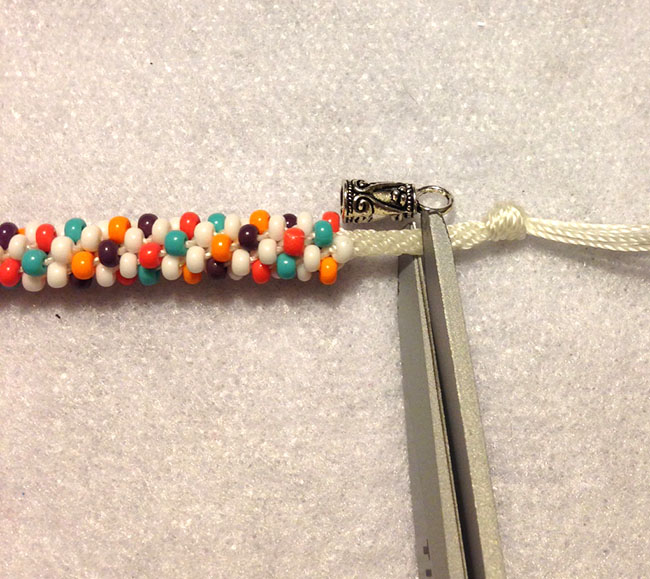
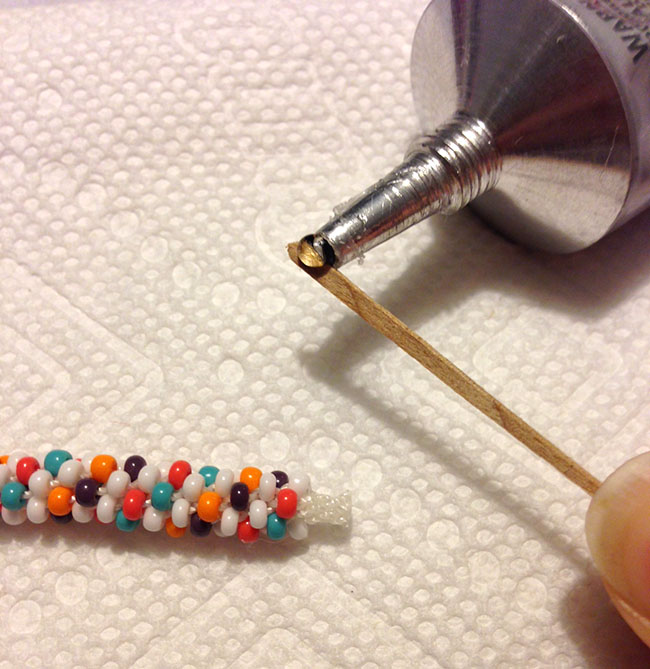
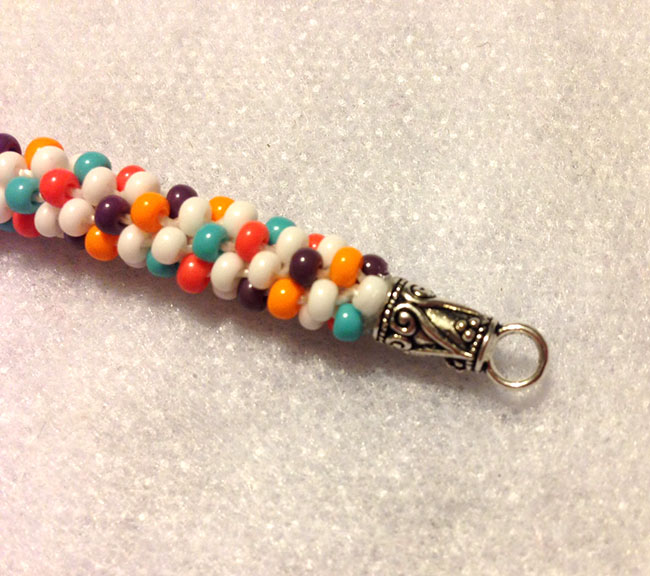
14 glueStep 8:  Once the cement is completely dry, line up your cord end and trim the braid to fit inside.  Using a toothpick, coat the braid with E6000 adhesive (this stuff is AWESOME!) and insert the end into the cord end.  Repeat for the other side.  Let the E6000 set up for about 24 hours.

15 Cut ends

16 e6000

17 end cap

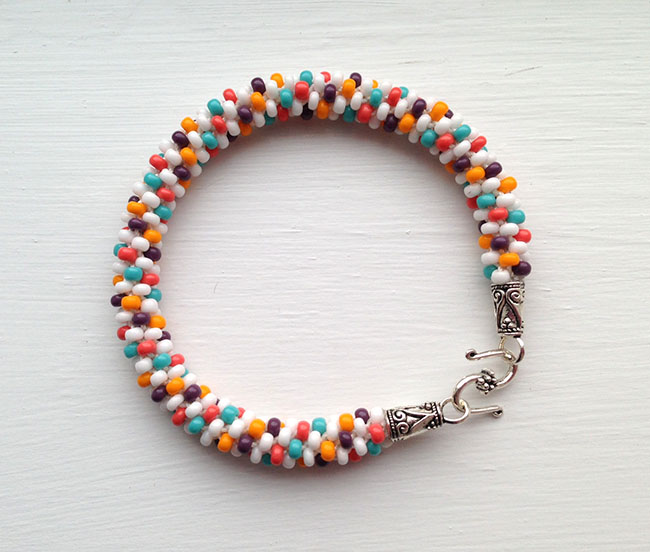
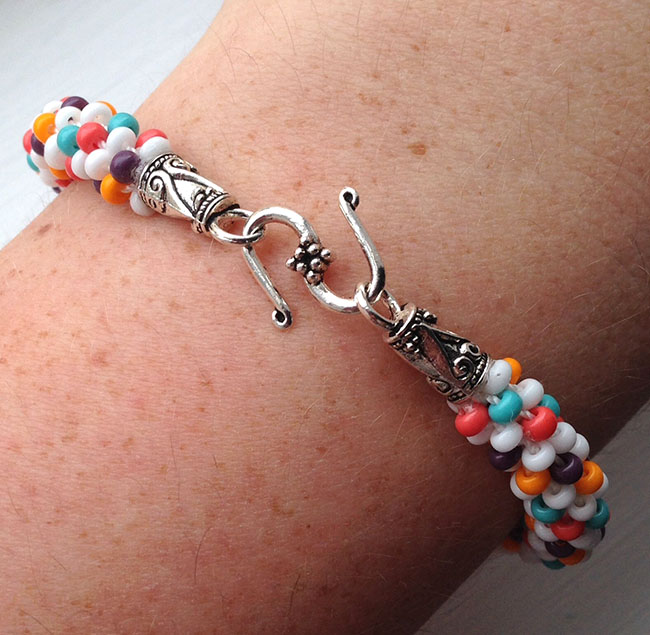
Step 9:  Finish the bracelet by attaching your clasp…mine, easy enough, is just an S-hook.

18 final

19 wrist

And that’s it…pretty easy right?  This whole project from start to finish only takes about three hours and can easily be done the day before Easter…so if you’re stressing about finding the perfect accessory to compliment your perfect dress…stress no more…create your own!

Hope you had as much fun as I did…thanks again, Candie!!

Happy Beading!

signature

$500 Giveaway

$500 Cash Spring Giveaway GraphicWoot woot!!  Let’s celebrate Spring with a big money giveaway!!  You need a few more beads, a new outfit, or just to stash away some cash for a rainy day.  Check out the Rafflecopter below to enter!  Fingers crossed for you!

Thanks to these fun blogs  for being major sponsors of this giveaway–

The major sponsors for this great giveaway are the following blogs: Domestic SuperheroJust Us FourSwish PrintablesCondo BluesOur Southern HomePersia LouDial M for MomsDIY Candy

Sponsor Graphic

a Rafflecopter giveaway


How to Make A Statement Necklace with Resin Chain and Beads

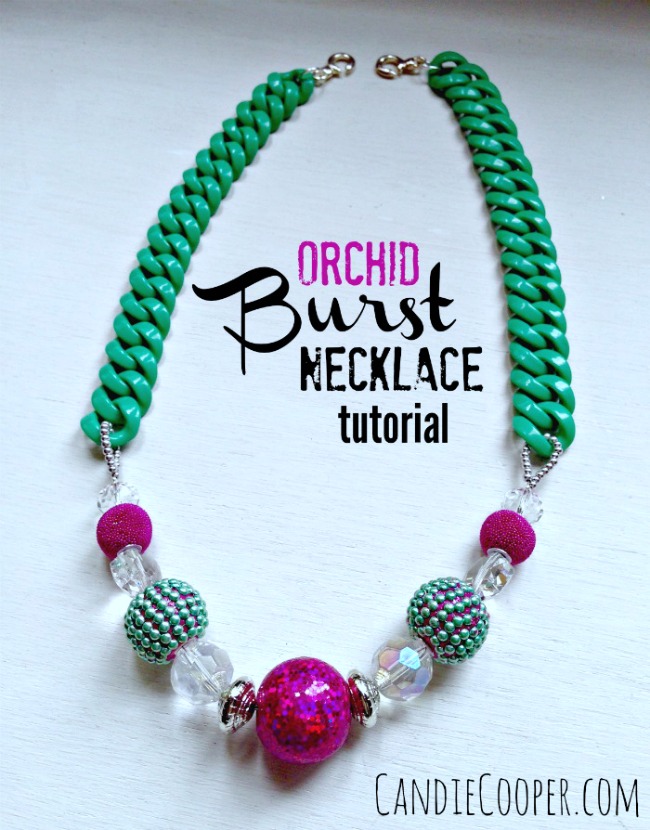
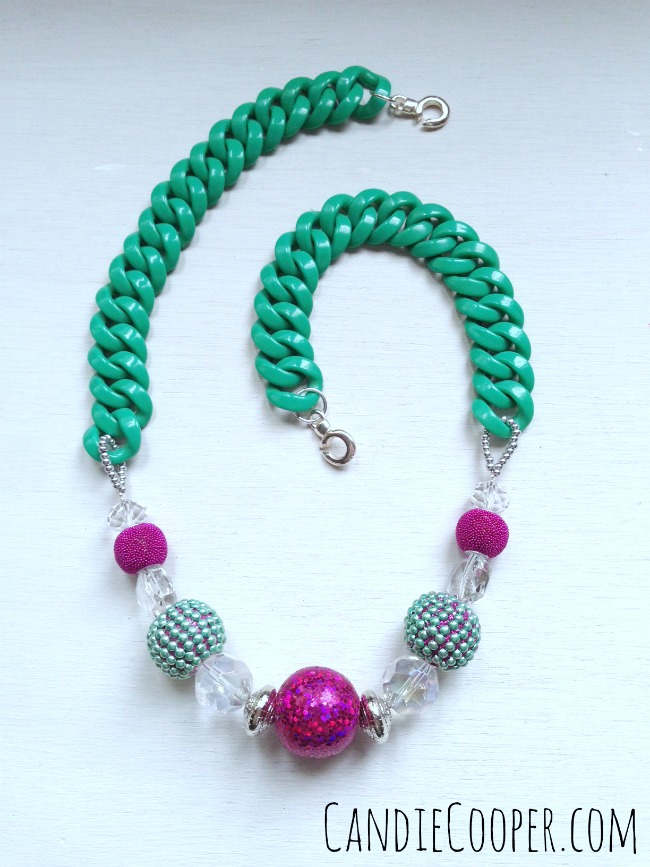
Jewelry Making Orchid Burst Necklace Tutorial2Have you seen the resin chains at Hobby Lobby?  I like them so much because they are reminiscent of Bakelite.  They are bold and bright, fun for spring fashion, but how do you transform them into jewelry pieces?  Here is one easy idea from me to you with love.

P.S.  Sorry in advance for my color tint issues.  I’m just not that savvy with my photo edits (YET!), but I’ll get there.  Thanks for hanging in with me.

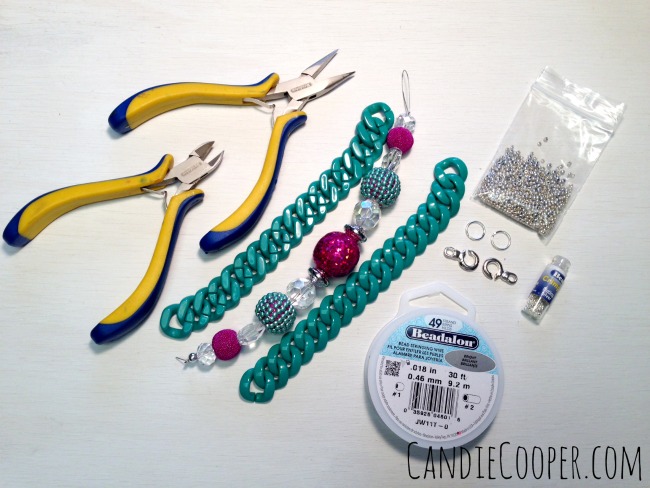
Jewelry Making Materials 1Basic supplies for this necklace are:  chain nose pliers, wire cutters, 2, 7″ chain pieces, 7″ strand of Jesse James Beads,  silver seed beads, 2 12mm jump rings, Beadalon duet clasp, 49 strand .018 nylon coated beading wire and #2 crimp tubes.

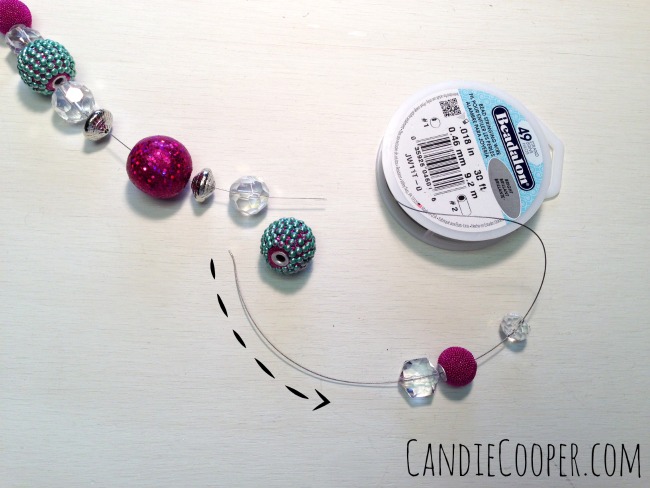
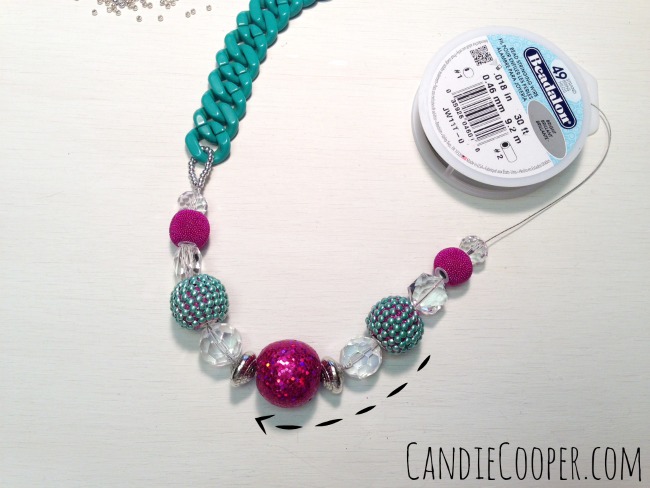
String the Jesse James Beads onto wireString the beads onto the beading wire.

String the crimp beadsFollowed by 2, #2 crimp beads.

It’s so important that the crimp beads match the beading wire.  Too big of crimp beads equals potentially-embarrassing-beads-crashing-to-the-floor scene.  Never good.

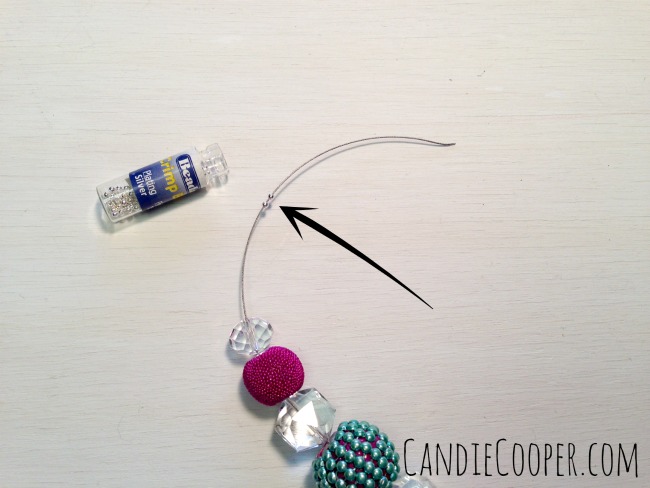
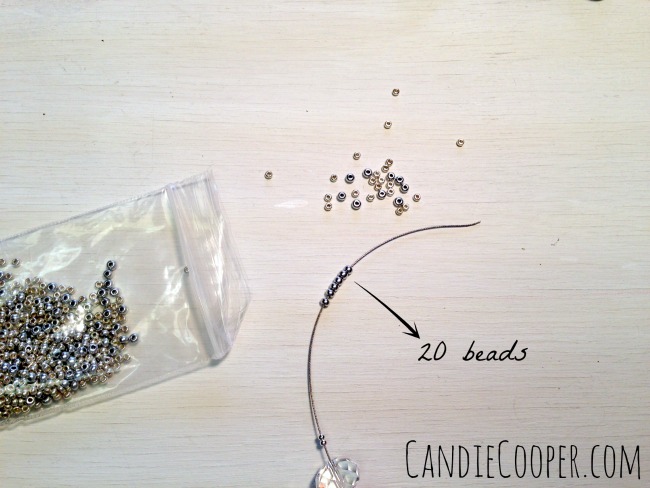
String a row of seed beadsNow string 20 silver seed beads onto the wire.  Don’t be like me and mix and match your silver seed beads (see in the bag), thinking, I won’t care if I have to pick out the same colored ones.  I do care, past self.  That was a bad idea.

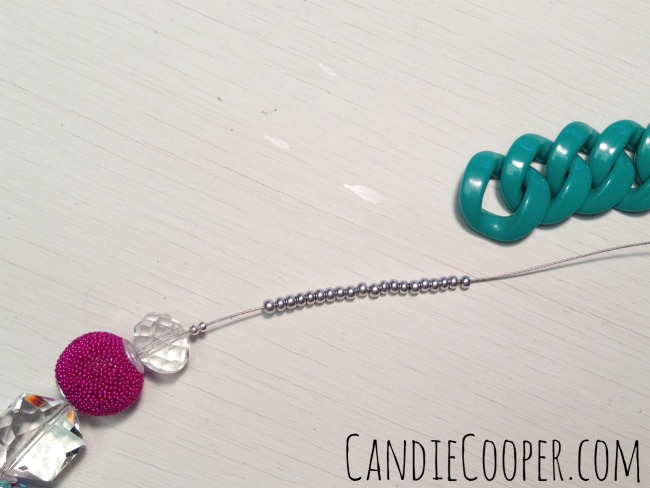
Row of seed beadsOk, so now we have 2 crimps and 20 seed beads.

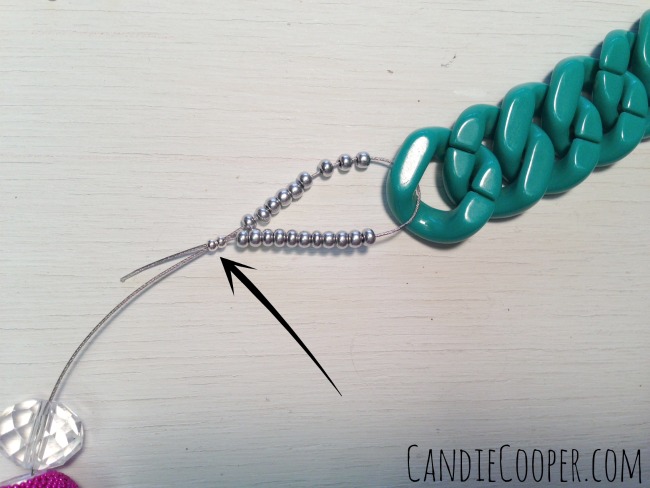
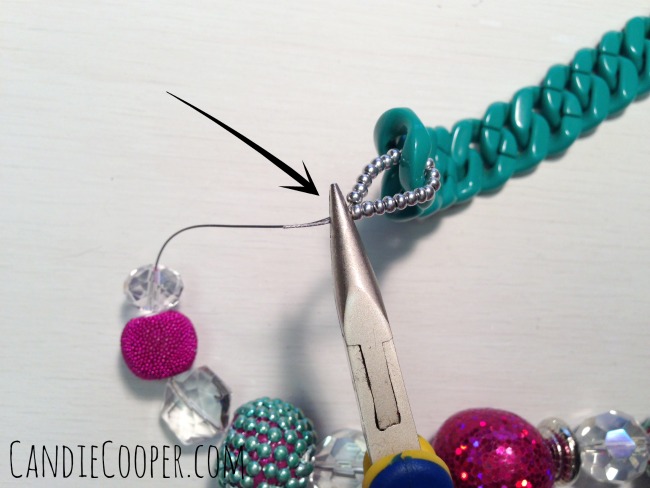
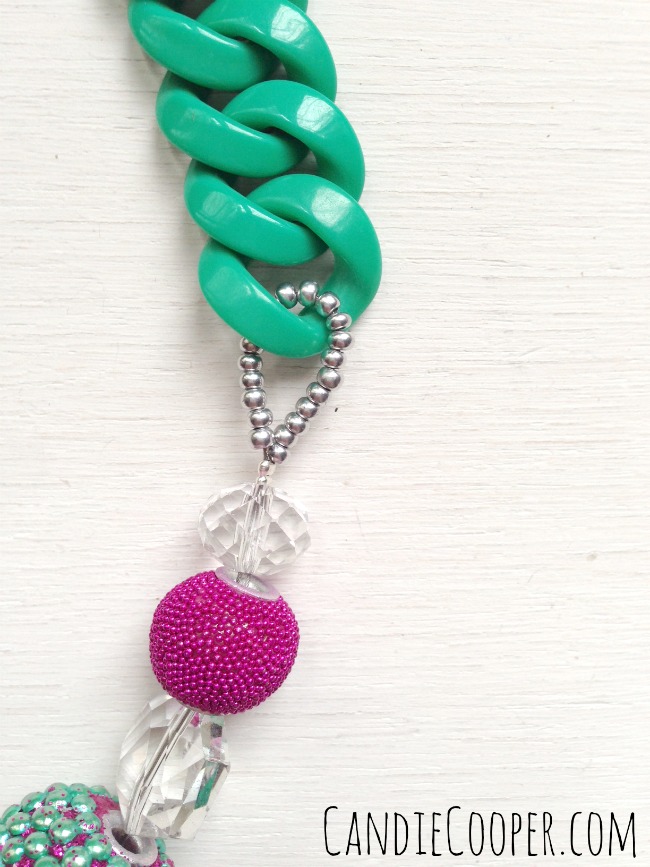
Thread the tail of wire through 2 crimp beadsLoop the tail of wire through the end of the chain and back through the crimp beads, creating a seed bead loop.  Now, you might have a couple questions….

1)  Why are you using 2 crimp beads?

A)  Because of the flat crimping technique and the large beads, I want to add double the security.

2)  Why the seed bead loop?

A)  See the splits in the chain?  The seed beads add a bit of thickness (and design aesthetic is a bonus) so the wire can’t sneak out of the split.  This gets us out of another potentially embarrassing moment.  I’ve had jewelry break on me in front of people and it’s SO humiliating.  I always say, “who made this anyway!?!?” with a big smile and a wink.

Slide crimps up next to seed beadsSlide the two crimp beads up next to the seed beads to cinch up the loop.

Jewelry Making How to flat crimpUse your chain nose pliers to smash the crimp beads down.  That’s right, I said smash.

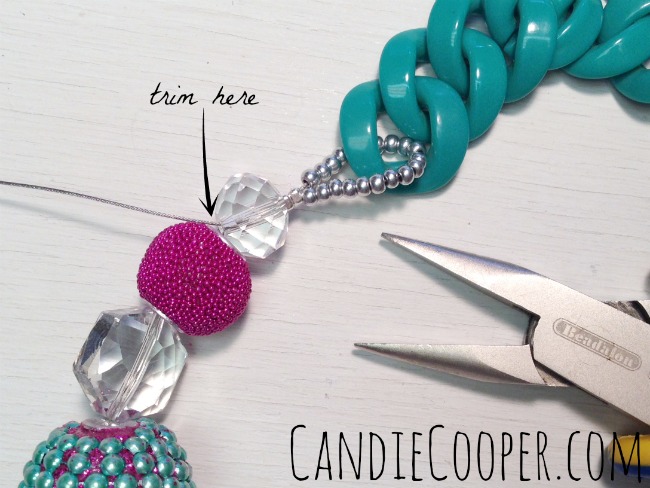
Trim the wireSlide the big colorful beads up, threading the tail through the first bead and trim away the excess.

Slide the beads towards the finished endNow, scoot all the beads over towards our crimped end.  Trim the wire so you have 4″ approximately.

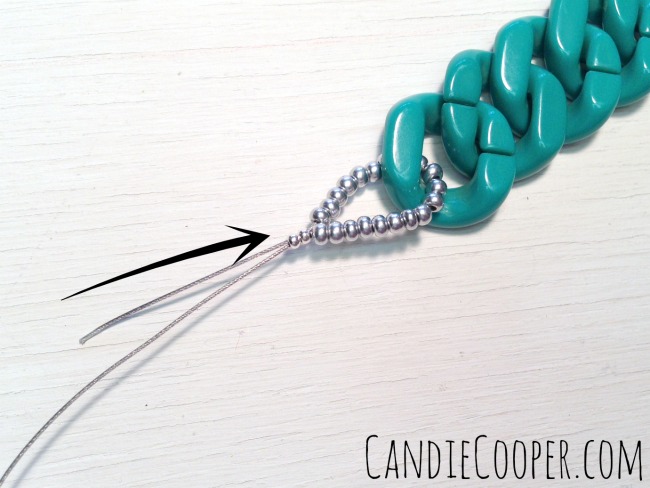
Row of seed beadsString 2 crimp beads and 20 seed beads.  Run the tail of wire through the chain, down through the crimps and first bead, pull out all the slack in the beaded section.  This can take some finagling.  Use your chain nose pliers to tug on the end of the wire to help remove the slack.

Finished with crimpingLooks good!  I use the seed bead loop for so many designs.  It is my beady lasso of sorts.

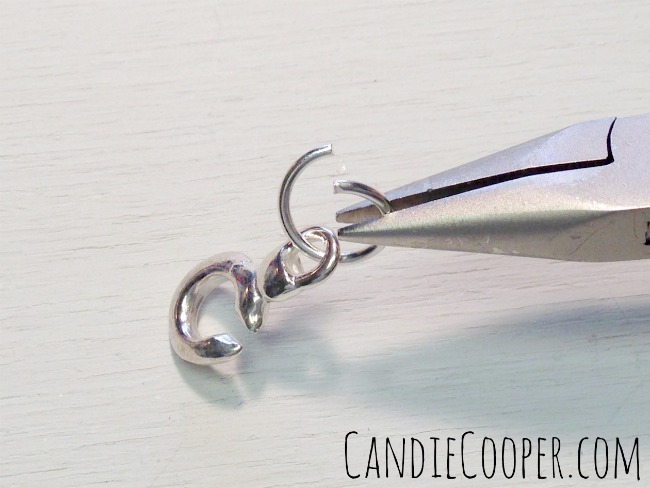
How to open a jump ringLet’s finish’er up!  Open a jump ring with chain nose pliers–from side to side.

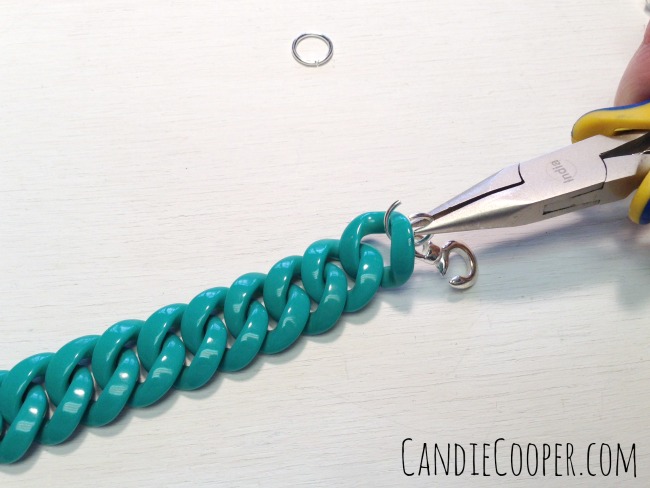
Connect the claspConnect one end of the duet clasp to the end of the chain.

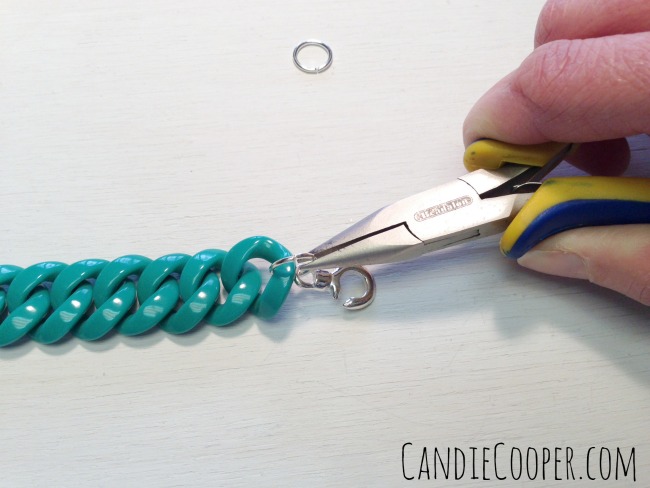
Close the Jump ringClose the ring so it’s nice and snug.

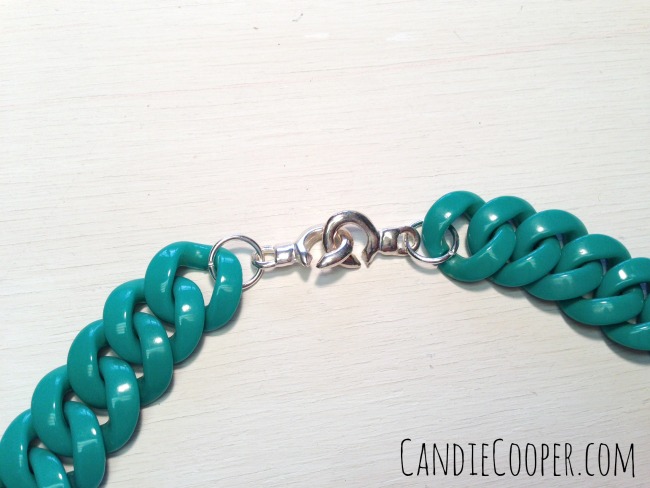
Connected duet claspRepeat for the opposite side.  It’s a cute little clasp pair, don’t you think?

Jewelry Making DIY Necklace 2Praise the Lord, we made it!  A burst of color for you!  I’m so excited!

Orchid Burst NecklaceAnd here I am wearing it so you can see the full look and how it hangs.

Expect more resin chain projects here.  I only bought every color they had.  Have you made anything with them?  I wanna see!

Happy day!

XO.

Candie

Easy Decorated Easter Eggs

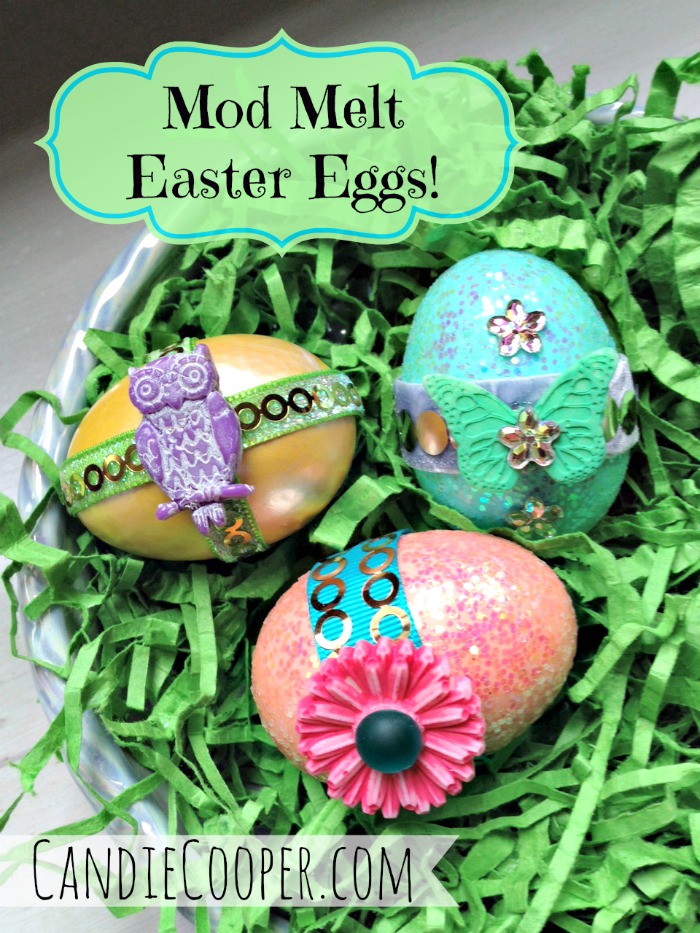
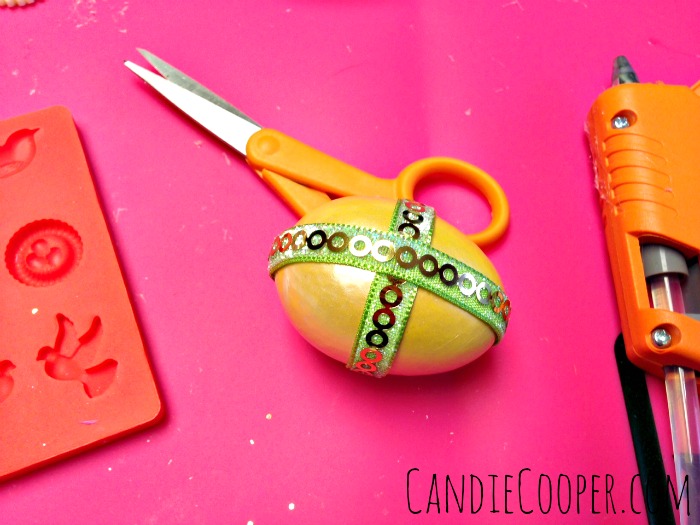
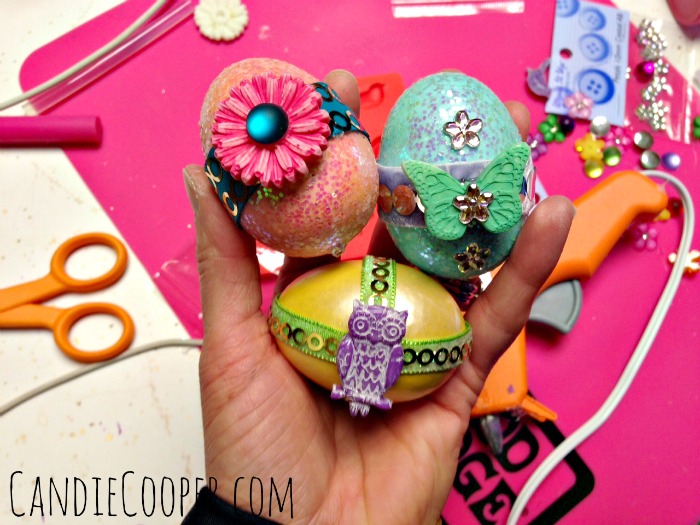
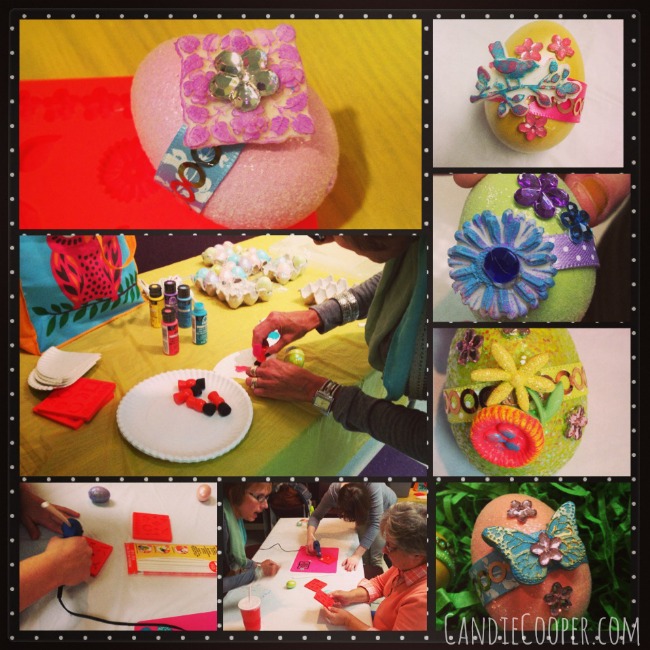
Mod Melt Easter Eggs from Candie CooperMy mom always decorated for Easter so it’s a family tradition to craft up eggs and have Easter grass coming out our ears around this time.    This is an easy project that uses Cathie Filian and Steve Piacenza’s, Mod Melts (made by Plaid).  Mod Melts are DIY embellishments along with some ready to go Easter eggs from JoAnn Fabrics.  They have the glittery and satin finish eggs there in pretty pastels.  You can find the Mod Melt sticks and molds at Michaels Craft store.  You’ll also need a skinny stick, high temp glue gun (has to be high temp or else the sticks don’t get hot enough to flow into the molds).
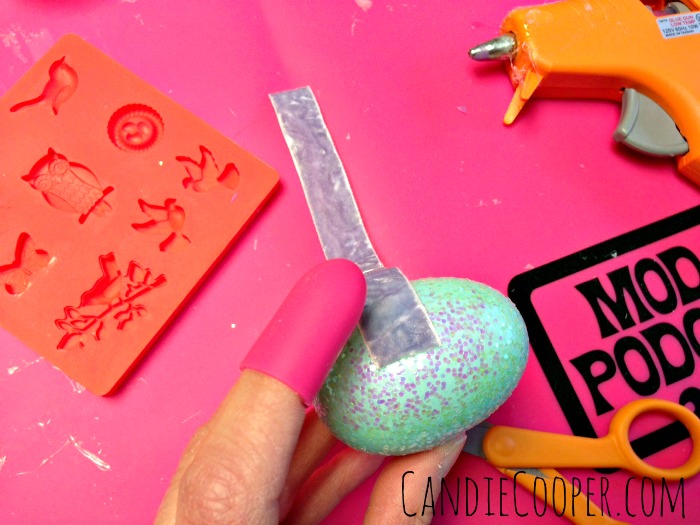
Glue the ribbon to the eggWrap a bit of ribbon around the egg (I knew there was a reason I was saving this pile of pretty ribbon scraps.  Craft supply hoarders unite!).

Secure the ribbon to the egg with hot glue and push it down with your finger protected by a Hot Glue Gun Helper finger cap.

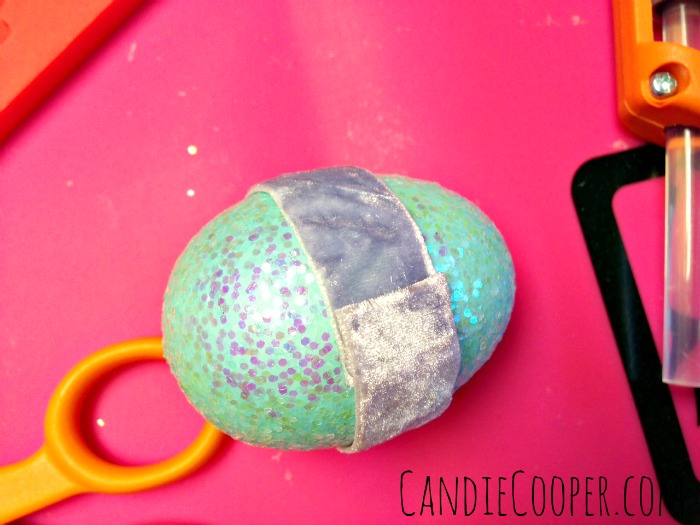
Glue end of ribbon downThen trim the ribbon to fit and glue the end of ribbon down.

Ribbon Wrapped EggAdd some metallic buzz with Martha Stewart metal ribbon–found in the decoupage/stencil section of the craft store at Michaels.  It comes in gold, gunmetal and rose gold.  I really like it.

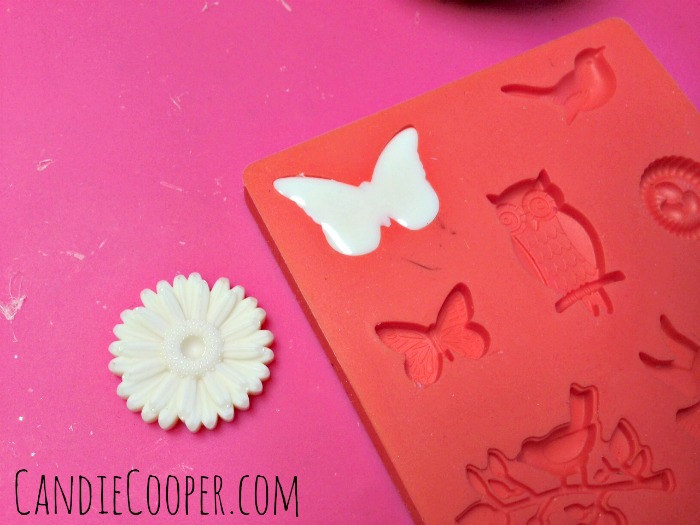
Mod MeltsBy now your hot glue gun and Mod Melt stick should be ready to fire!  Fill the mold and let set for 5 or ten minutes.  The hardest part in this project is waiting for these suckers to cool so you can see how awesome they are.  Tic toc… tic toc…


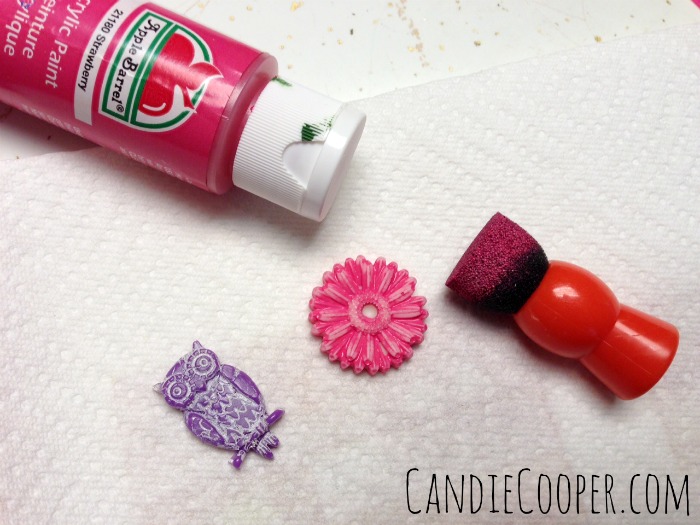
Paint the Mod MeltsSponge on some color by applying paint to a dobber and blotting it over the mod melt piece.

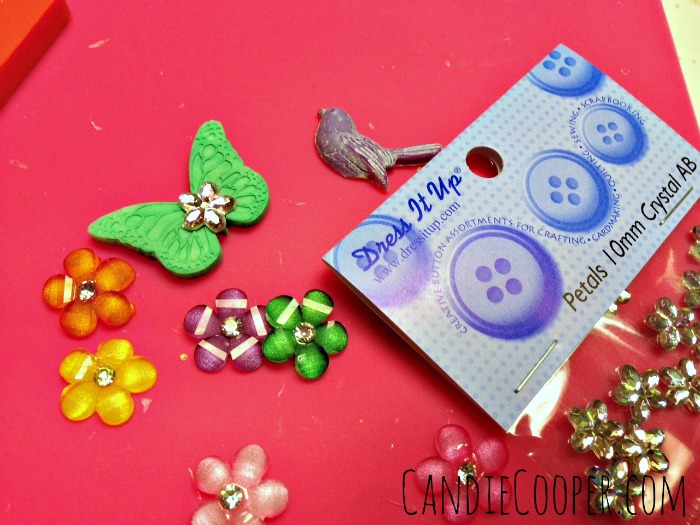
Dress It Up ButtonsYou can add further sparkle and layers with Dress It Up craft embellishments–usually found in the scrapbooking section of the craft store.  These things are like craft candy!  You can’t use just one.  Use a glue gun to glue the embellishments to the eggs.

Eggs with Mod MeltsTa da!  Never mind that craft explosion in the background!  That’s one of my other magic tricks.  I can take a clean table and trash it in 3.4 minutes flat.

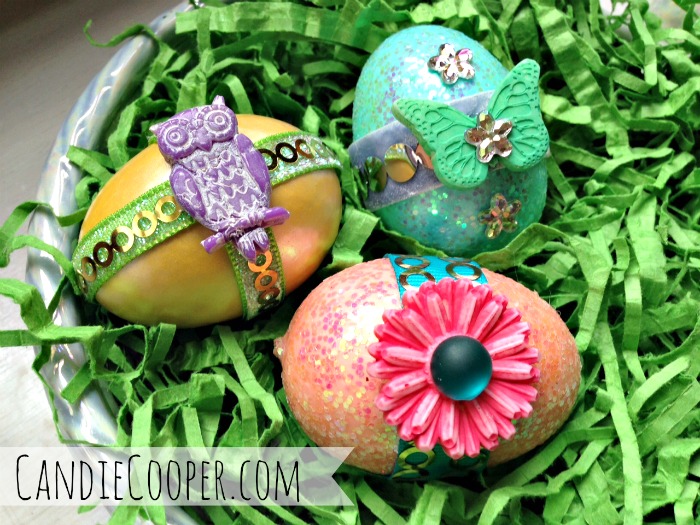
Candie Cooper's Easter Eggs with Mod MeltsHere they are!  Such cuties!  I’m really loving paper Easter grass this year too.  It’s so soft and natural looking.  I don’t over think these things or anything.  Can you tell?

Mod Melt Class collageLast week, our local Crafty Book Club met and I taught them how to use the Mod Melts with Hot Glue Gun Helpers.  The ladies liked them a lot and had fun experimenting.  This is our 4th year for making Easter eggs together.  It’s another great tradition!

XOXO.

Candie

Make a Statement Necklace Class in Philly

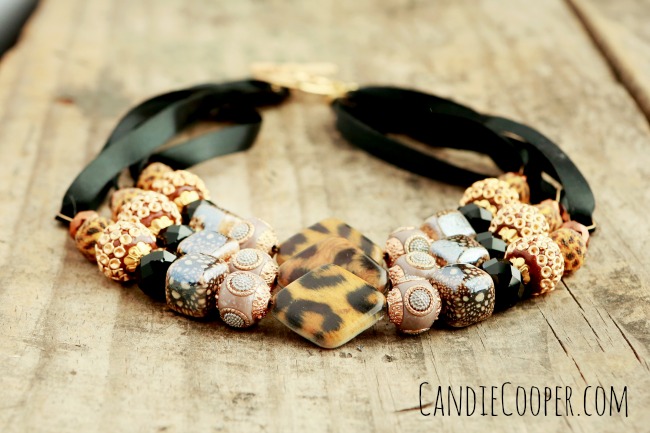
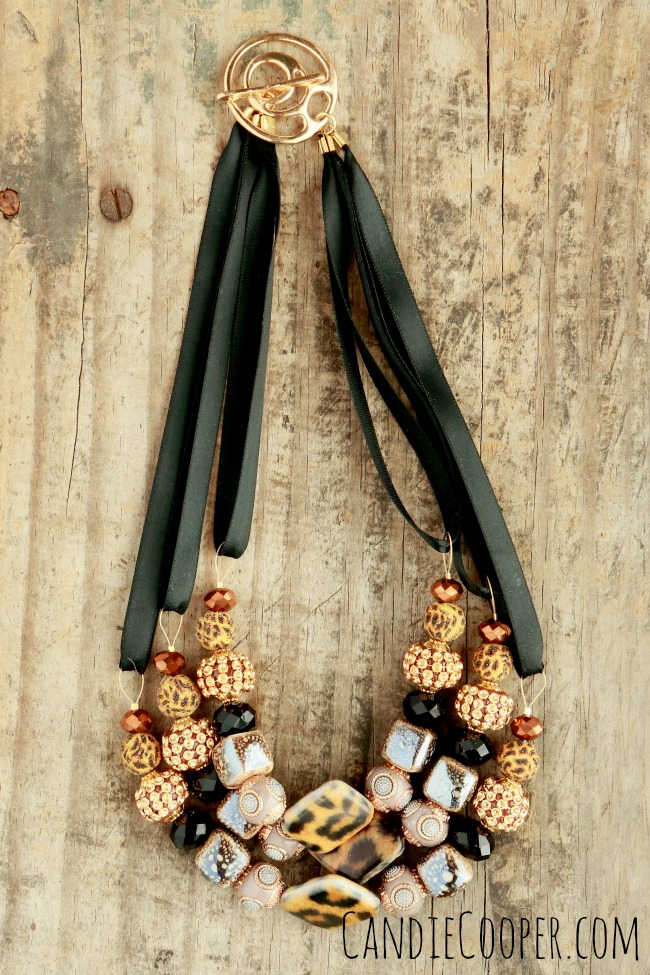
Candie Cooper Leopard Statement Necklace.jpgGood day to you!  I wanted to show you some detail shots of a class I’m teaching in Philly next month at Beadfest Spring.  It’s the statement of all statement necklaces.  Big and bold, sassy and classy!  I’m teaming up with Jesse James Beads—they have such exciting and unique beads like the ones above.  All the supplies are kicked in from the awesome people at Beadalon.

Candie Cooper Leopard Print Necklace 2.jpgJust look at that!  Stalk and pounce!  That doesn’t sound right, but you get my reference right?  Like a big cat! Rawr!

Do you live in the Philadelphia area?  You can come make this necklace with me and experience the CC freak show first hand!  Lucky!  And guess what?  It’s only $26!  That includes all the supplies too.  Literally, just bring yourself.  It makes me want to hop around just thinking about it.  We will have fun!

Before I forget, we will actually have several bead choices.  So if leopard isn’t your thing, we will find something for your unique style!  Jesse James Beads and I want you to be happy!

Here is a link to the class page and sign up info.

Fingers crossed I get to meet you!

Smiling,

Candie