 Hola beautiful people! How have you been? I’m doing better now that my blog is working again (thanks for asking). Sheesh. I went to upload pictures to this post and got errors. Then I updated to the new WordPress followed by a couple plugins only to find those actions were actually dominos of destruction that would lead to broken links, not being able to login etc…. I stayed up working late on Friday night in an attempt to fix it. At midnight, I surrendered and admitted to myself that I was in over my head. I thought, “why am I fighting this? Go to bed, Candice.” That brings us to this morning when I found even more quarks that happened and so I called my hosts hotline number. Thirty seconds later it was fixed. Dear Betsy! And praise the Lord! I just had to get that out. Thanks for listening. Moving on.
Now, I’ve got Romancing the Stone on and I’m ready to write. Just like Joan Wilder. My friend mentioned it the other day and that got the itch to watch it started. I watch it purely for the beginning of the movie. I love the scenery, I love watching her finish her book in tears, I love when she has notes all over to buy tissue, but she’s still out of tissue. Makes me feel completely normal.
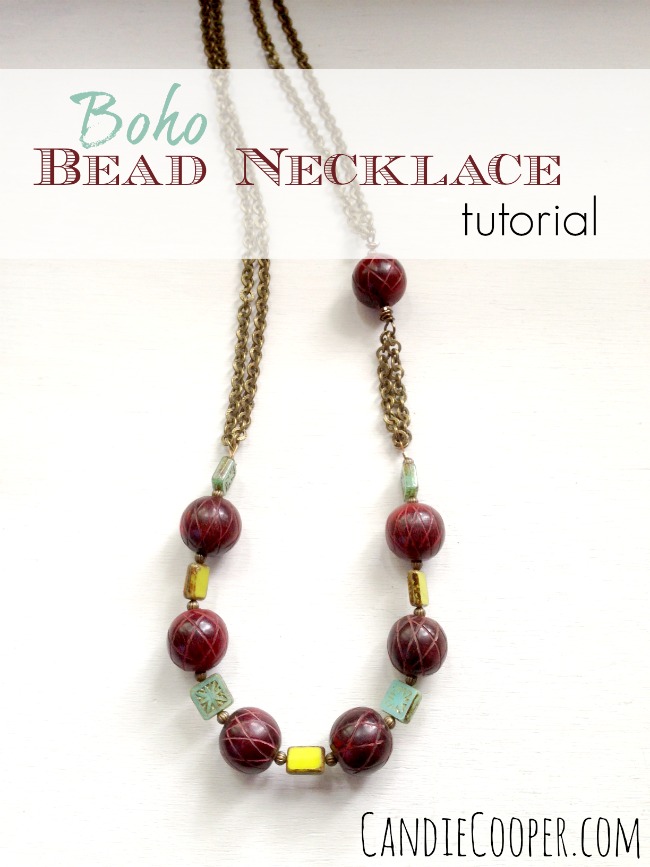
This boho bead and chain necklace tutorial started when Beadalon asked for pieces for their “Tropical” trend board on Pinterest. I got the wood beads on clearance somewhere…a really really long time ago. Bead hoarders unite! I blended them in with tropical color czech glass beads. I like the contrast of the metal, glass and wood surfaces together.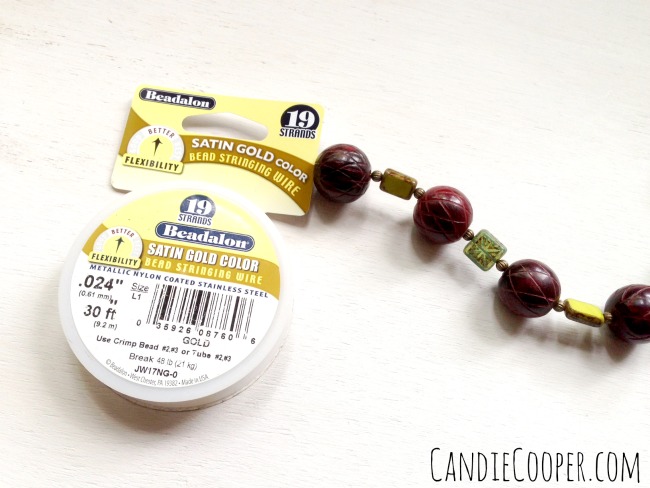 First, string your beads onto beading wire. I’m using Beadalon’s satin gold (19 strand, .024″) so it blends with the color of the chain.
 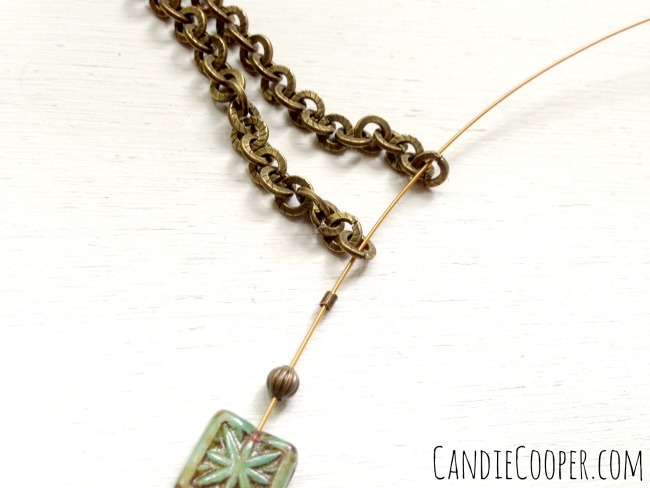 String a #2 crimp bead followed by the ends of the chain. For this necklace, I doubled over a piece of chain to make it thicker.
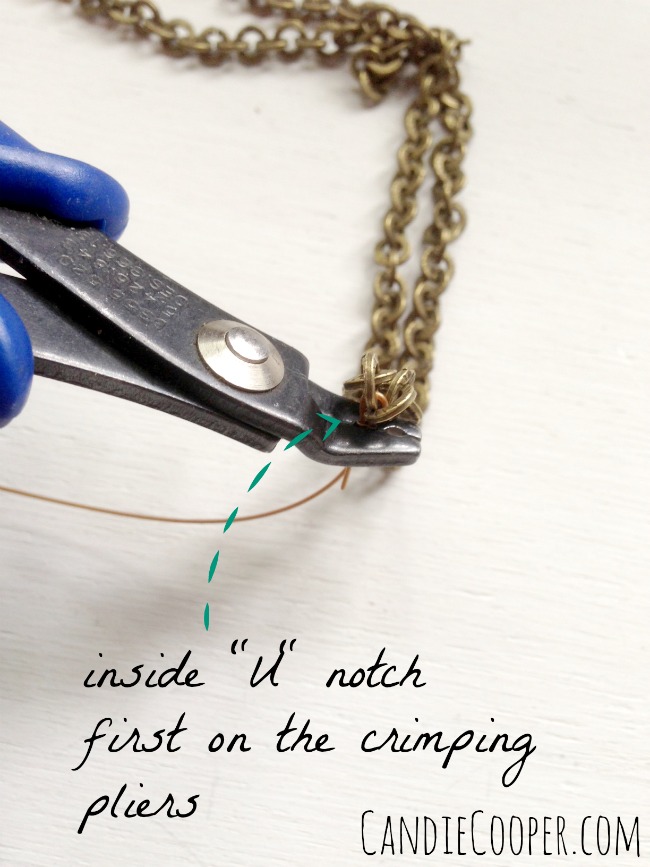 String the tail of wire through the crimp and slide the crimp bead up next to the chain. Now, put the crimp bead into the “U” shaped notch of your crimping pliers and clinch down.
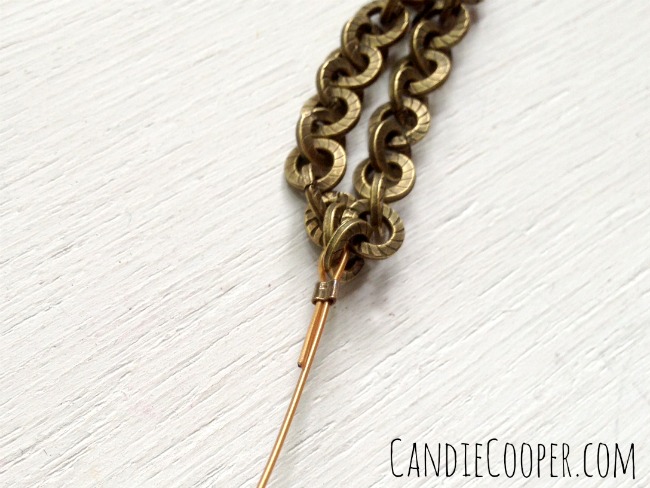 See the “U” shaped crimp bead?
 Now turn the “U” ninety degrees so it looks like a “C” and put it in the eye shaped slot of the crimp pliers and clinch down to fold the crimp bead over.
P.S. those are my husband’s hands. He walked by and saw me fumbling with my camera while trying to crimp and said, “I’ll be in the picture. I want to be in the picture.” If you know Aaron, this is completely normal. I love him.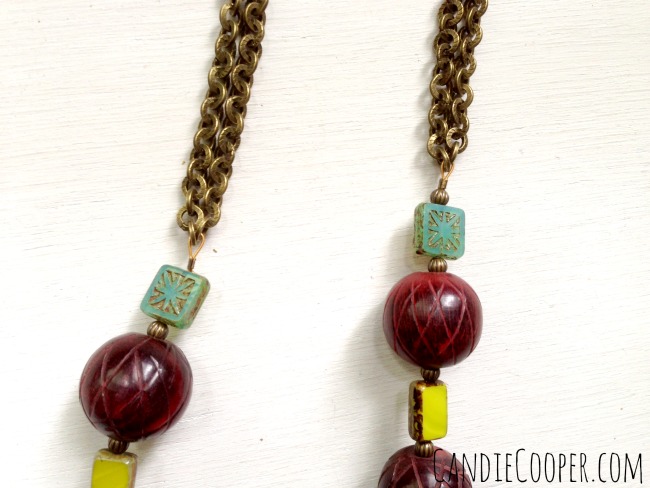 Now, slide the beads down to the finished end and repeat for the other side. Except do you see what I did? One side is not like the other one! Ai yi yi. I clearly got distracted by the cute man-hands crimping and forgot to add that one last tiny brass bead next to the crimp. I also didn’t realize this until I finished the entire necklace. I love it when that happens.
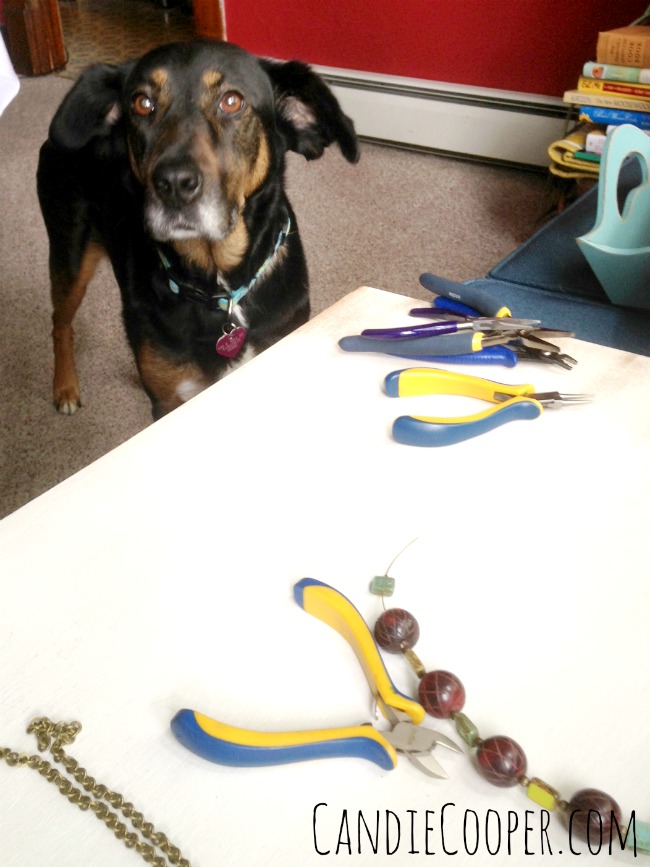 Let’s take a break so Bebe can say “hi.” She’s been coming over off and on through this process and resting her head on my knee, my shoulder, the white board, begging to be petted. She’s our big girl that showed up one day, skin and bones and scared to death. Aaron worked with her to earn her trust and the rest is history. She doesn’t know a stranger. Have I told you how much I love that man?
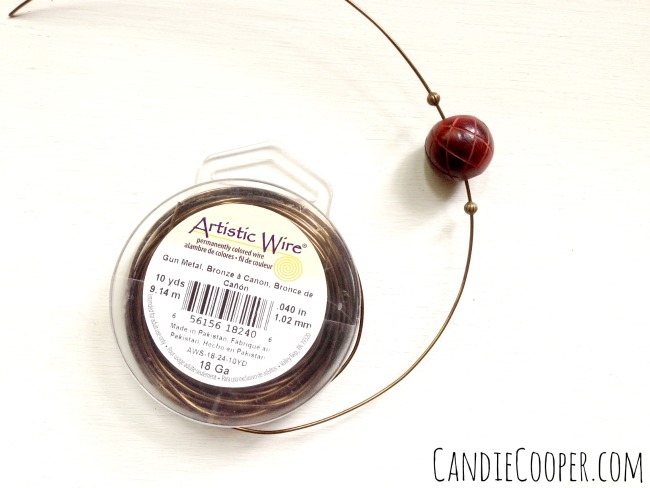 Let’s make a wrapped bead link. I’m using 18g Artistic Wire in gunmetal bronze so it matches the chain. String your beeads onto the wire.
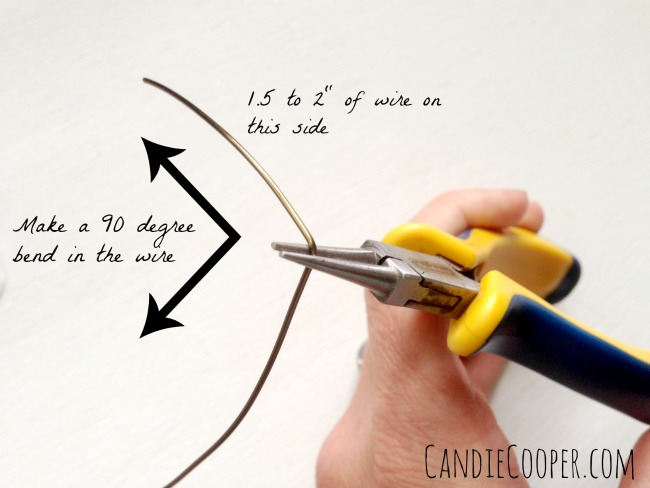 Grab your round nose pliers and make a ninety degree bend in the wire.
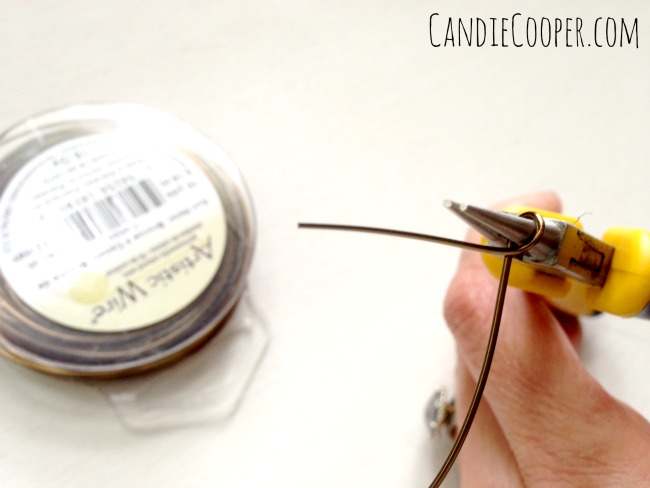 Bring the tail of the wire up and over the top of the pliers so it crosses in front of the other wire.
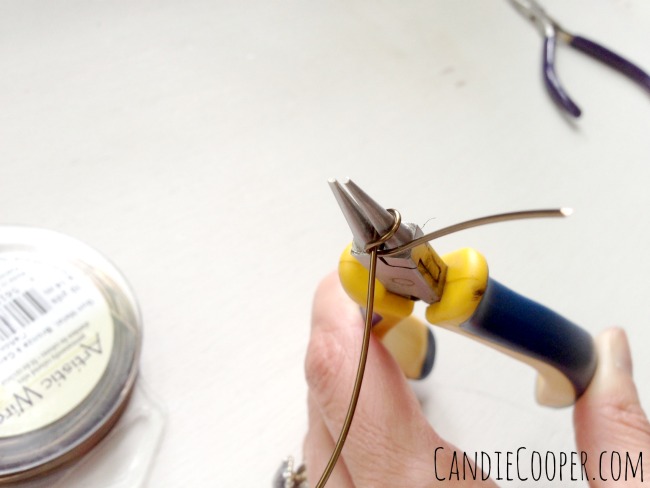 Start wrapping the tail of wire around the long wire–as many times as you like.
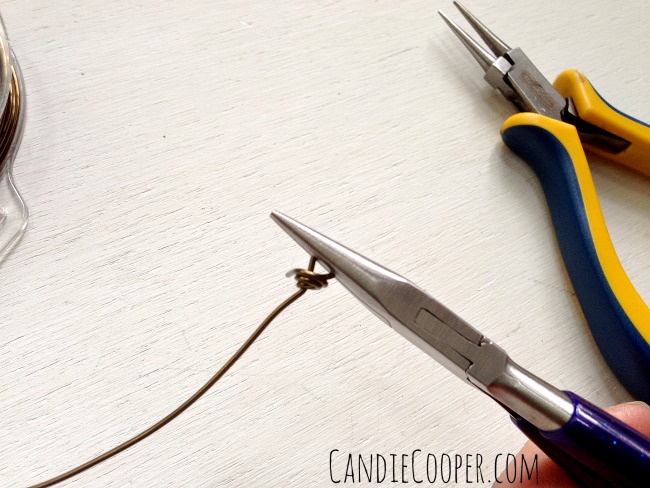 Sometimes it helps to hold the loop with chain nose pliers so it stays flat/in shape while wrapping. Trim the tiny, pokey/stabby part with wire cutters. Or tighten it inward with the chain nose pliers.
 Slide the bead against the finished wrapped loop and make another ninety degree bend in the opposite side of the wire.
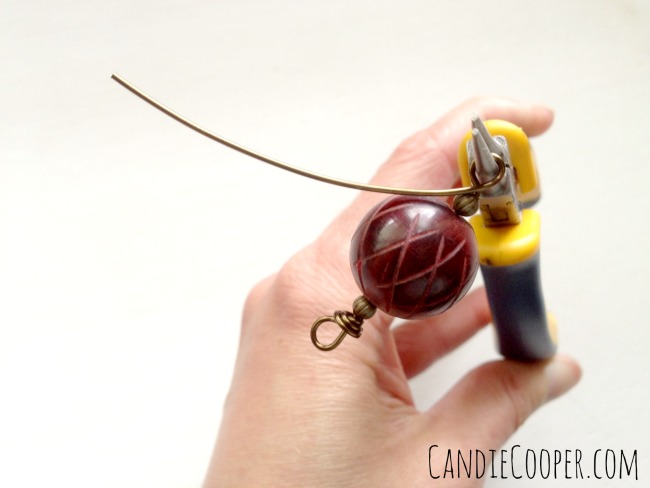 Trim the wire from the spool and start again with the wrapped loop technique.
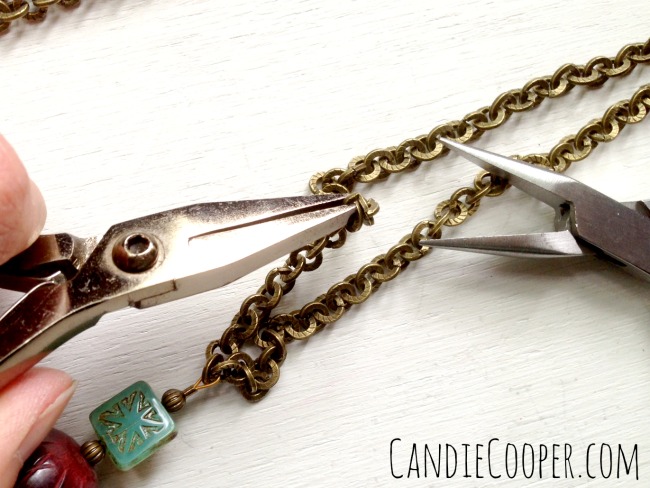 Split open the chain with two flat nose pliers. Open the link side to side on each piece of chain. Remove the sections so they are equal to the length of the beaded link.
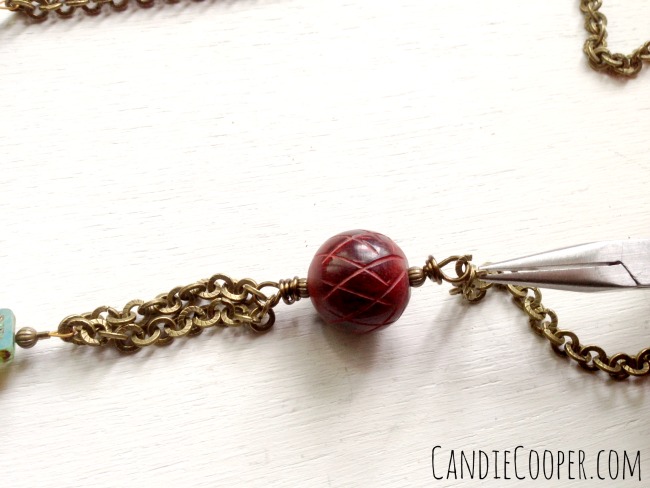 You can save those chain sections for a pair of earrings perhaps. I only did one beaded link as sort of a random surprise element to the necklace. Annnnnd possibly because I only had one bead left. Figured, I might as well use it!
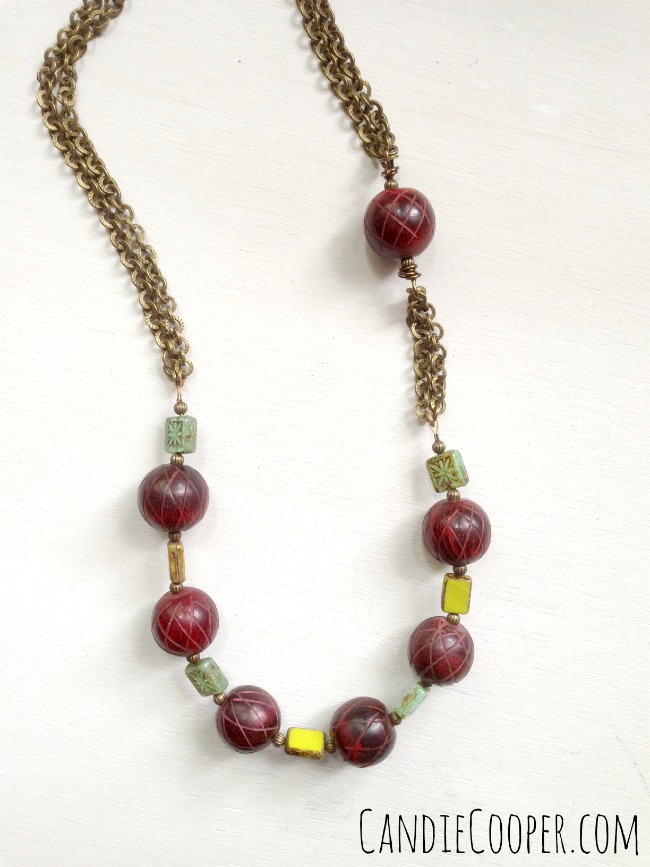 (insert big dramatic bead finale with tears and no tissue) I’m off to talk to my dogs and ask them if they want to celebrate.
Note: If you’ve not seen Romancing the Stone, that last bit will not make a lick of sense.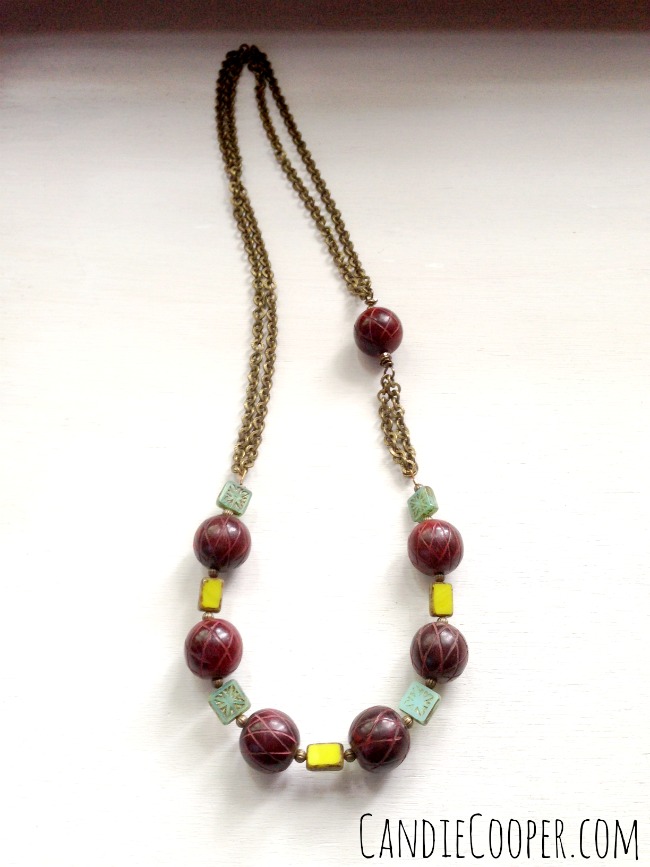 Love,
Love,
Candie
(your hopeless romantic bead and craft blogger)
 Hi, I’m Candie. I design jewelry and crafts, author books, teach classes and host television programs. I thrive on simple ideas that anyone can achieve. I also love projects made from unexpected materials that stand the test of time. Join me as I lead a creative life!


Beautiful! I have tool envy! Next month I get new tools!
Thank you Sheryl!! Excited you’re getting new tools! I love it!
That super cute- perfect for summer! I’d love to link to this if you didn’t mind!
Love the look, CC! Gorgeous photos and tutorial. Makes me want to get some fresh digs going once again, hmm… 😉